You can make marketplace administrators pay for your plug-in in 2 ways:
- Subscribe to your Plug-In
- Buy your Plug-In
This tool collects payment from your customers using Stripe only. Long story short, the Plug-In Billing Engine encapsulates your source code and makes it only available after payment has been done
- A Stripe Dashboard, you can get one here. Once you have your Stripe account, navigate to
Developers>API keysand take note of yourPublishableandSecretKeys - Decent knowledge of Stripe's APIs
- Thirst for money 💵
Back End
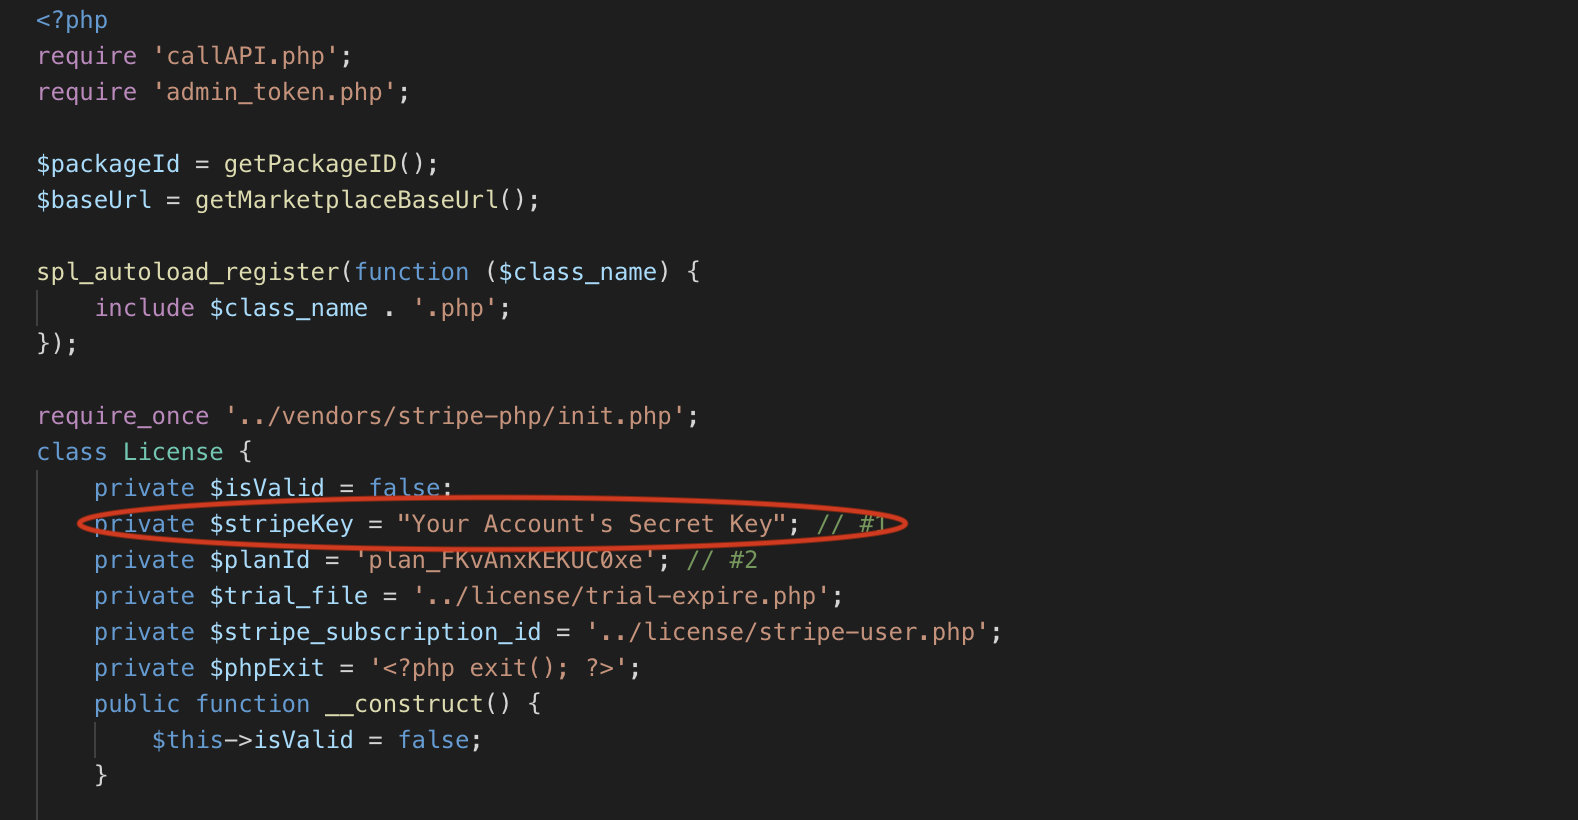
Start by downloading the Subscription Plan folder. To connect your Stripe account to the payments made by the user, navigate to license > license.php, and insert your Stripe Secret key into the line commented "#1".
You will also need a PlanID to be inserted at the line commented #2. To get this,
- Go to your Stripe Dashboard
- Navigate to
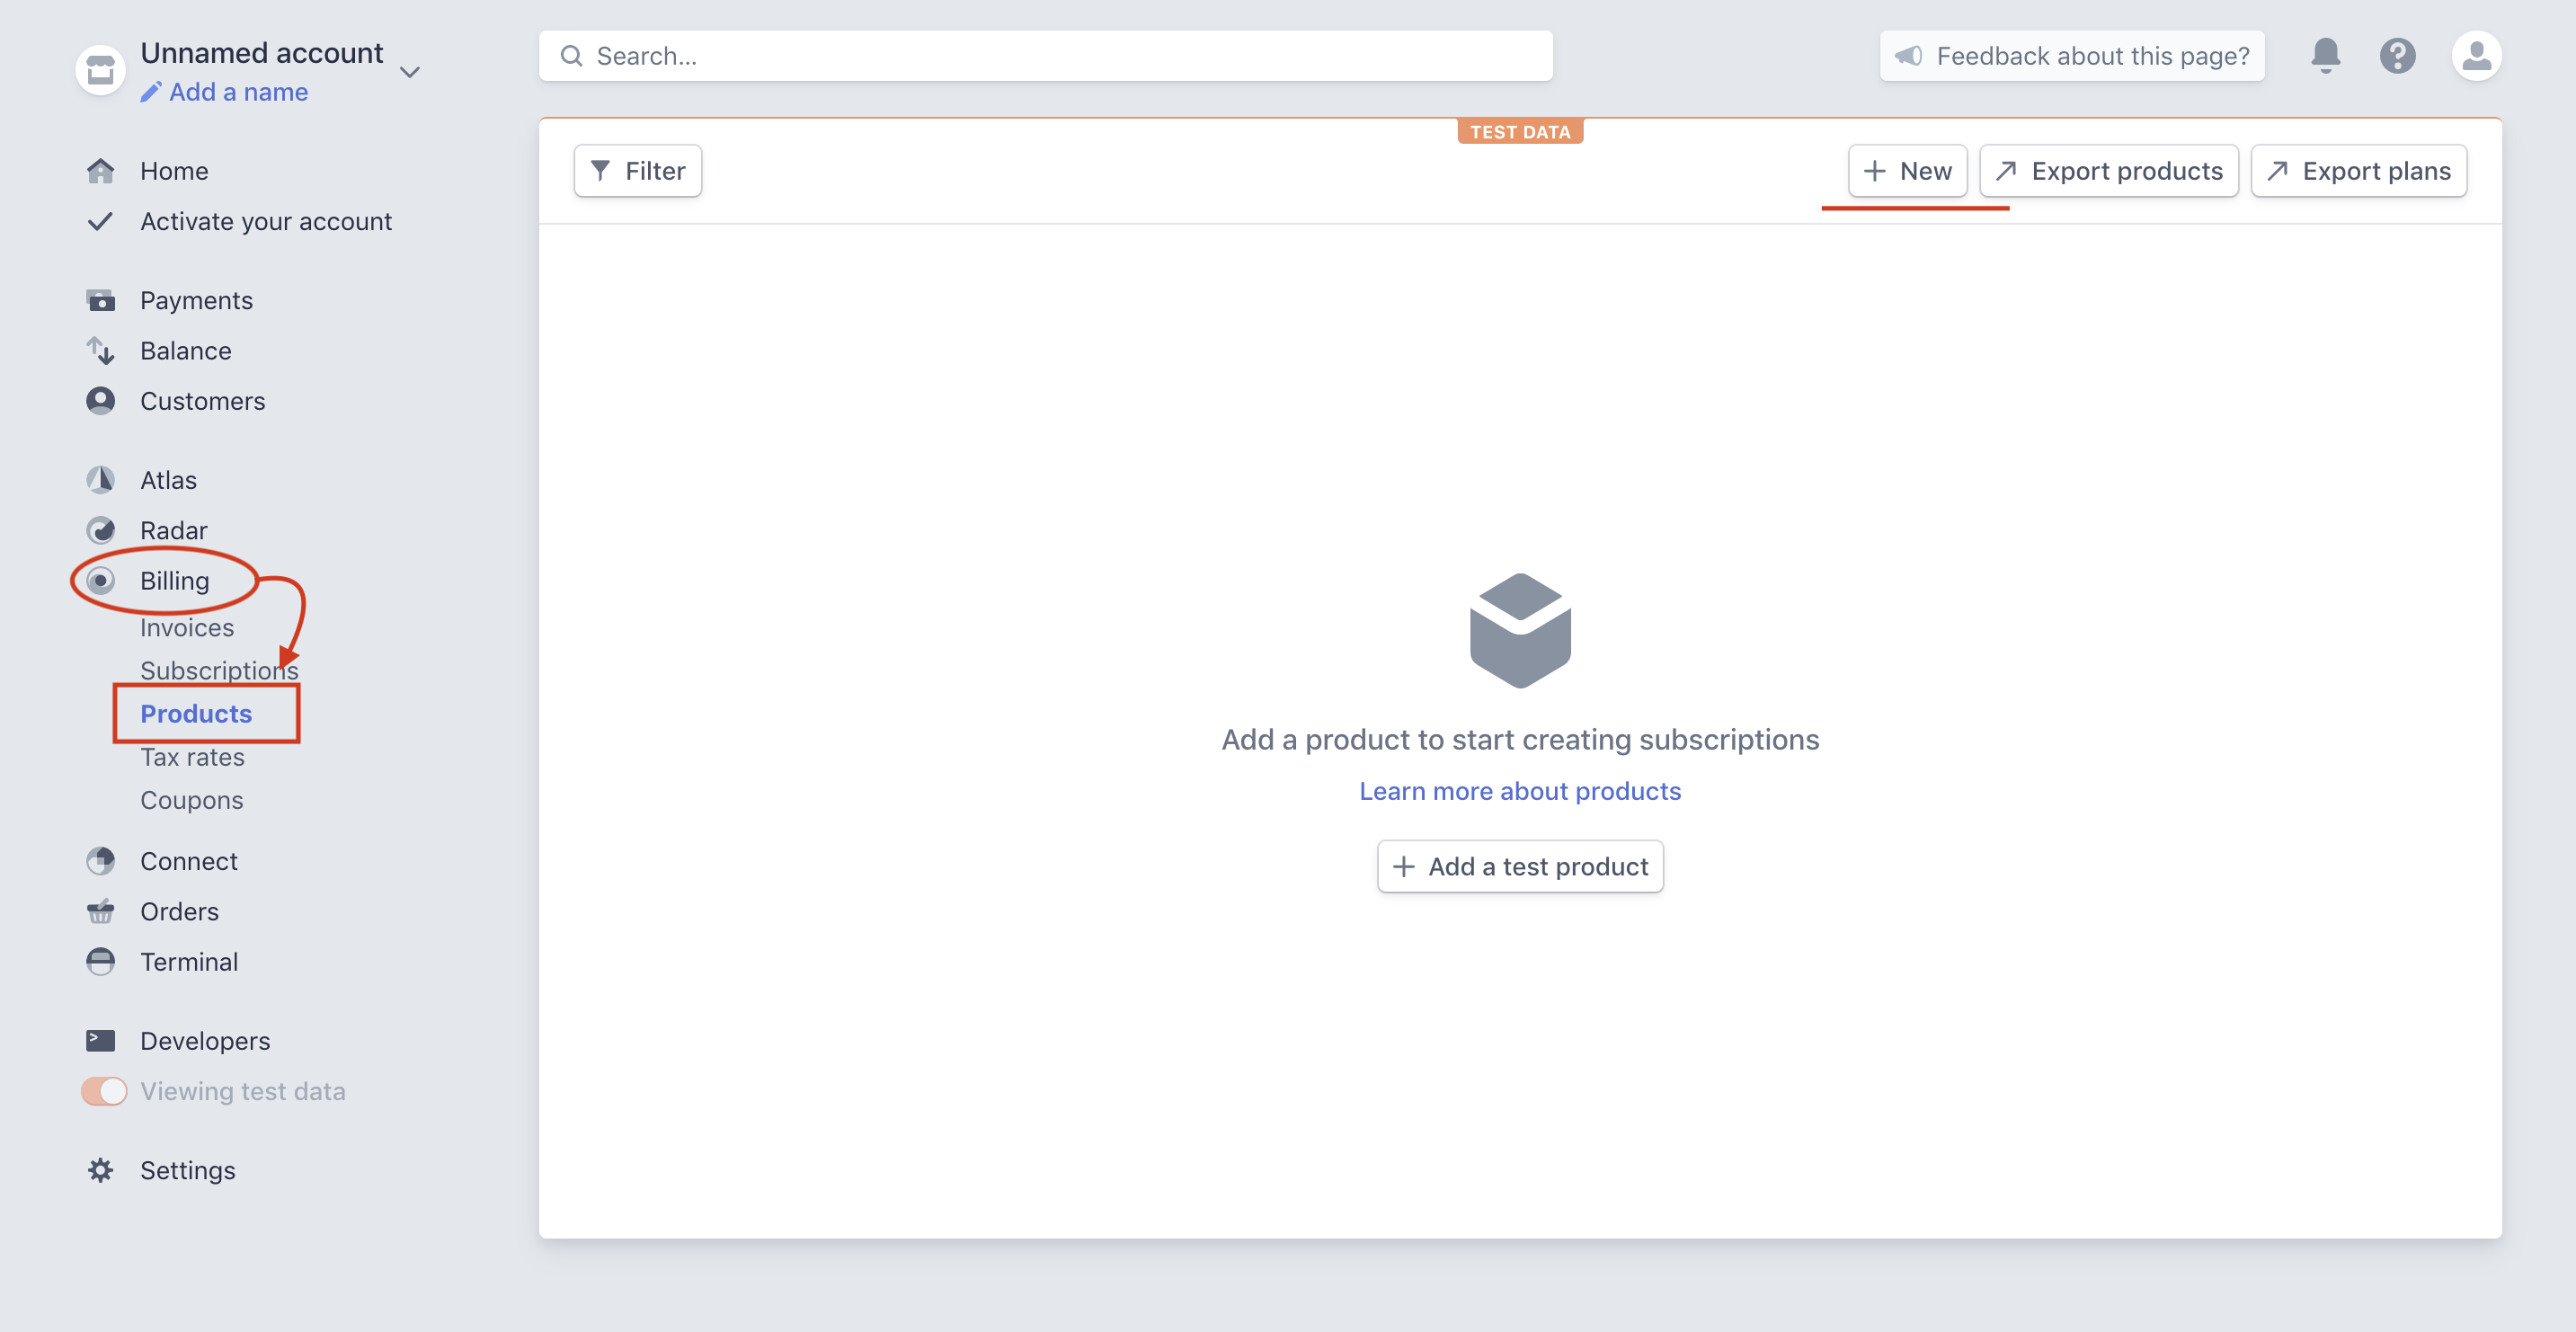
Billing>Productsand then click onNew. Give your product a name, and unit label or statement descriptor, if necessary, and create the product.
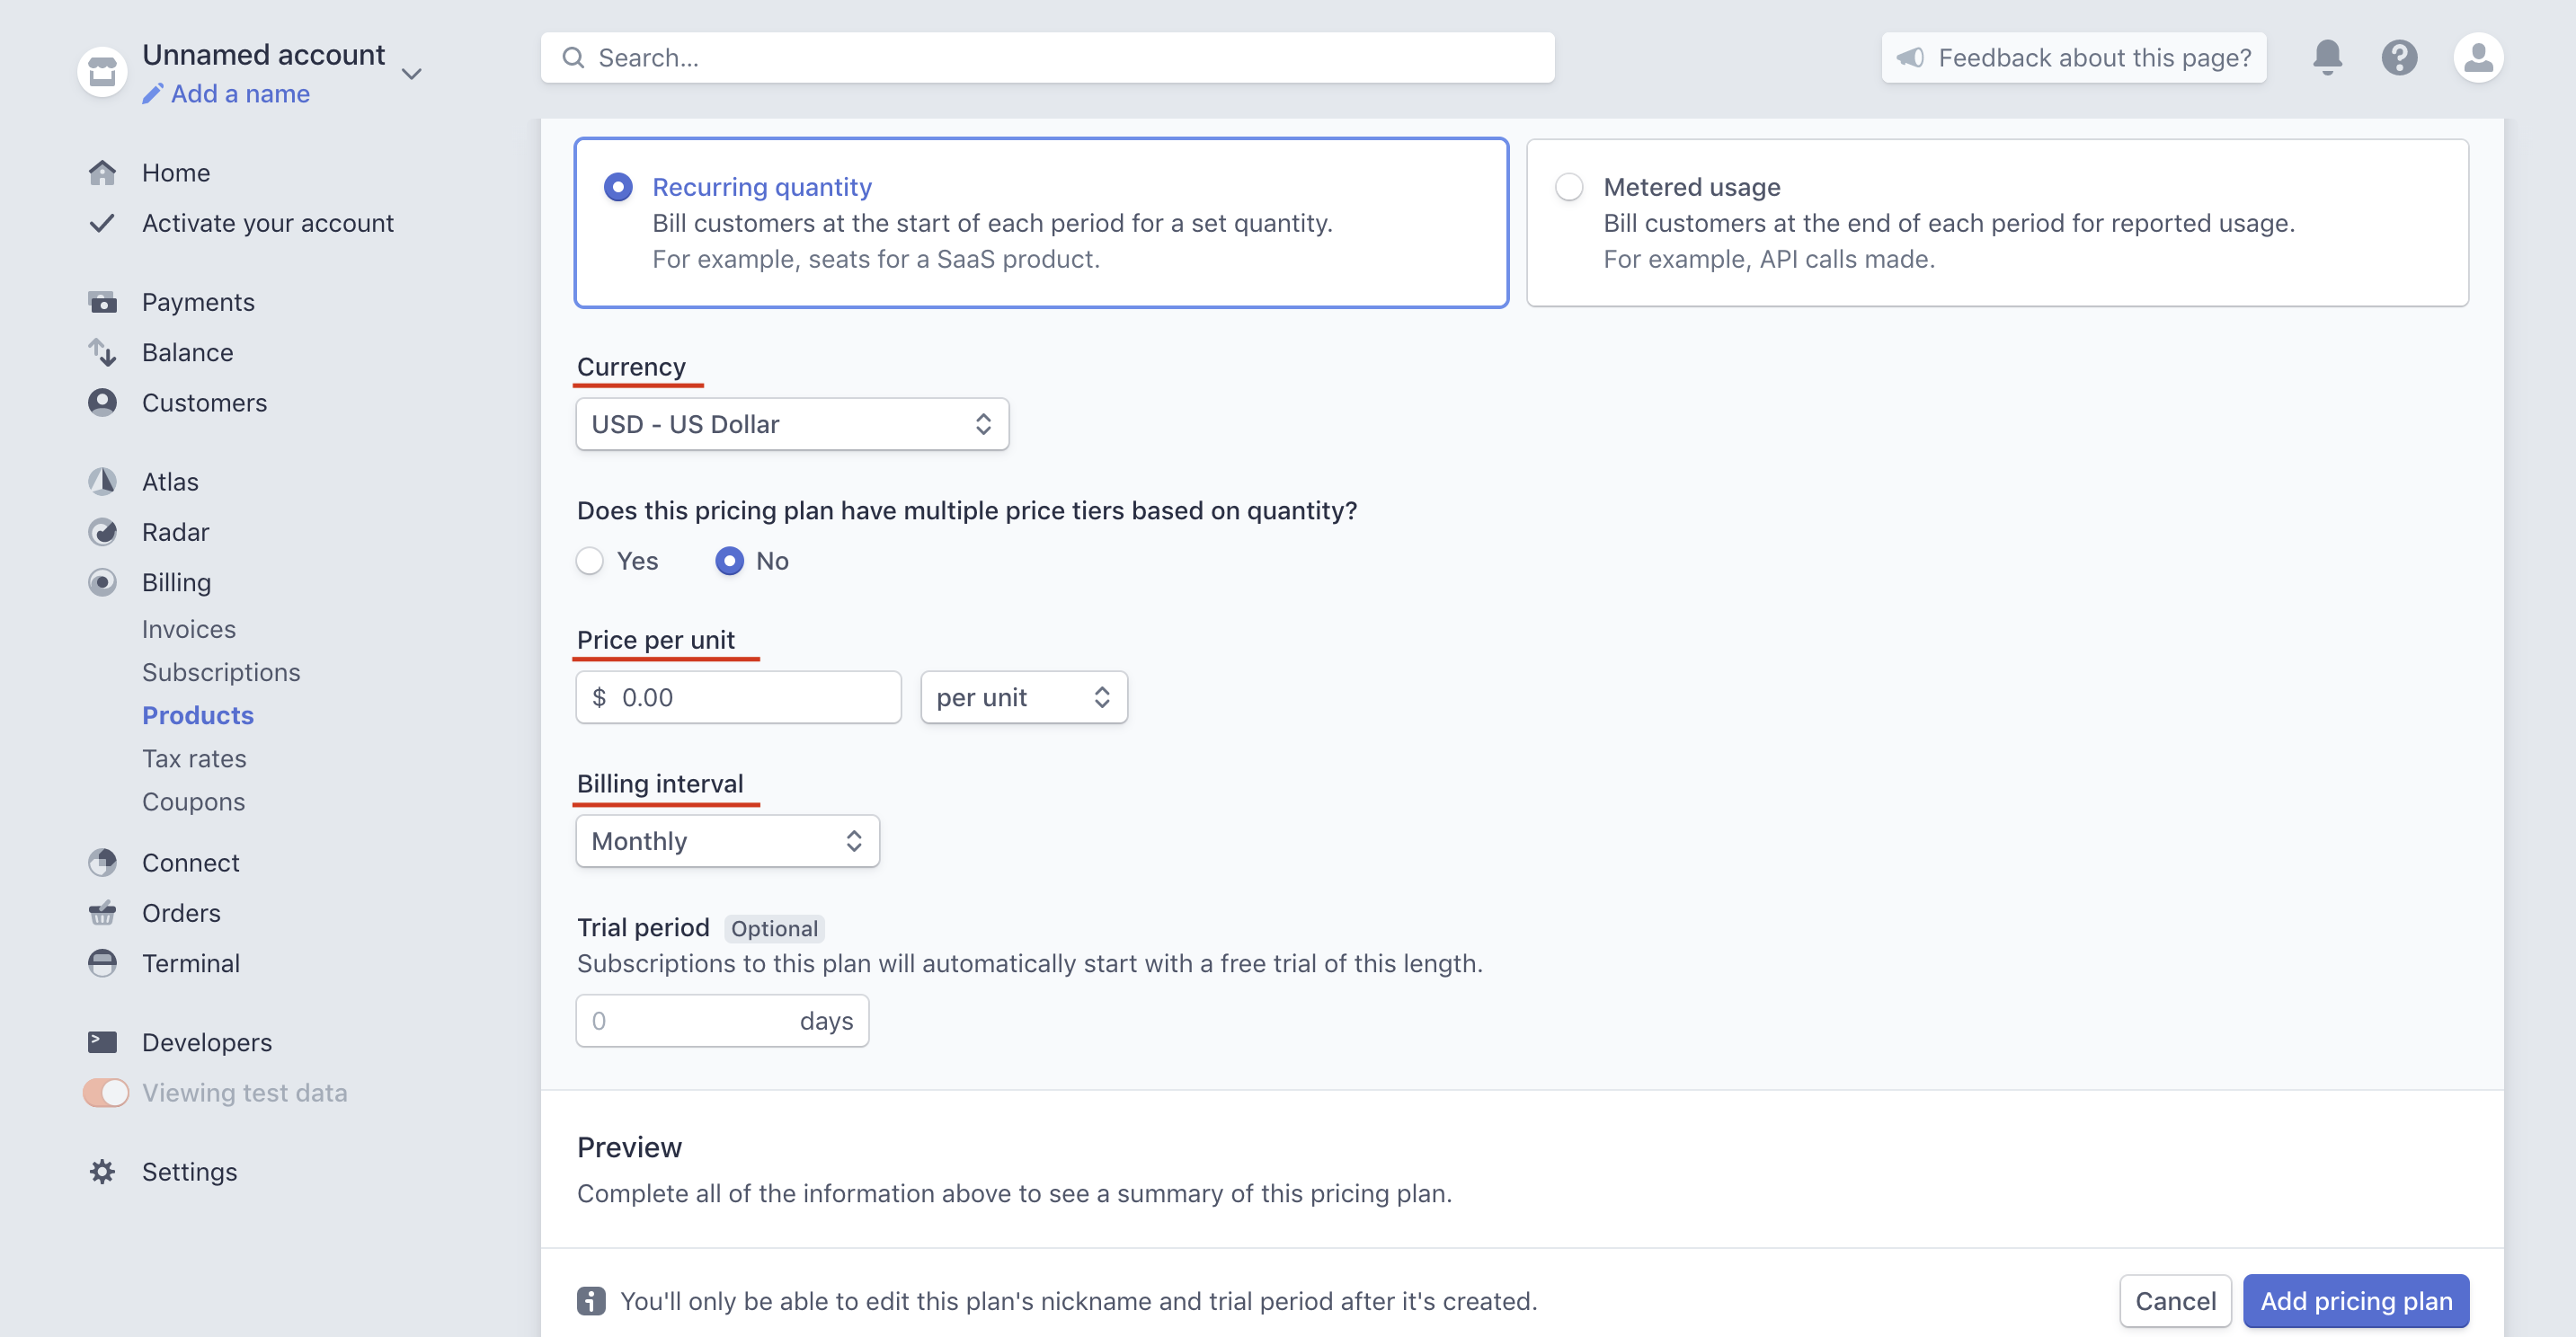
This will lead you to the Pricing Plan Page for your product. Fill in the necessary details such as its Name, Currency, Price per Unit, and Billing interval.
Once your Pricing Plan has been created, click on it and you will be able to retrieve the Plan ID that you need.
Copy and paste this plan ID back into license.php where it says #2.
Front End
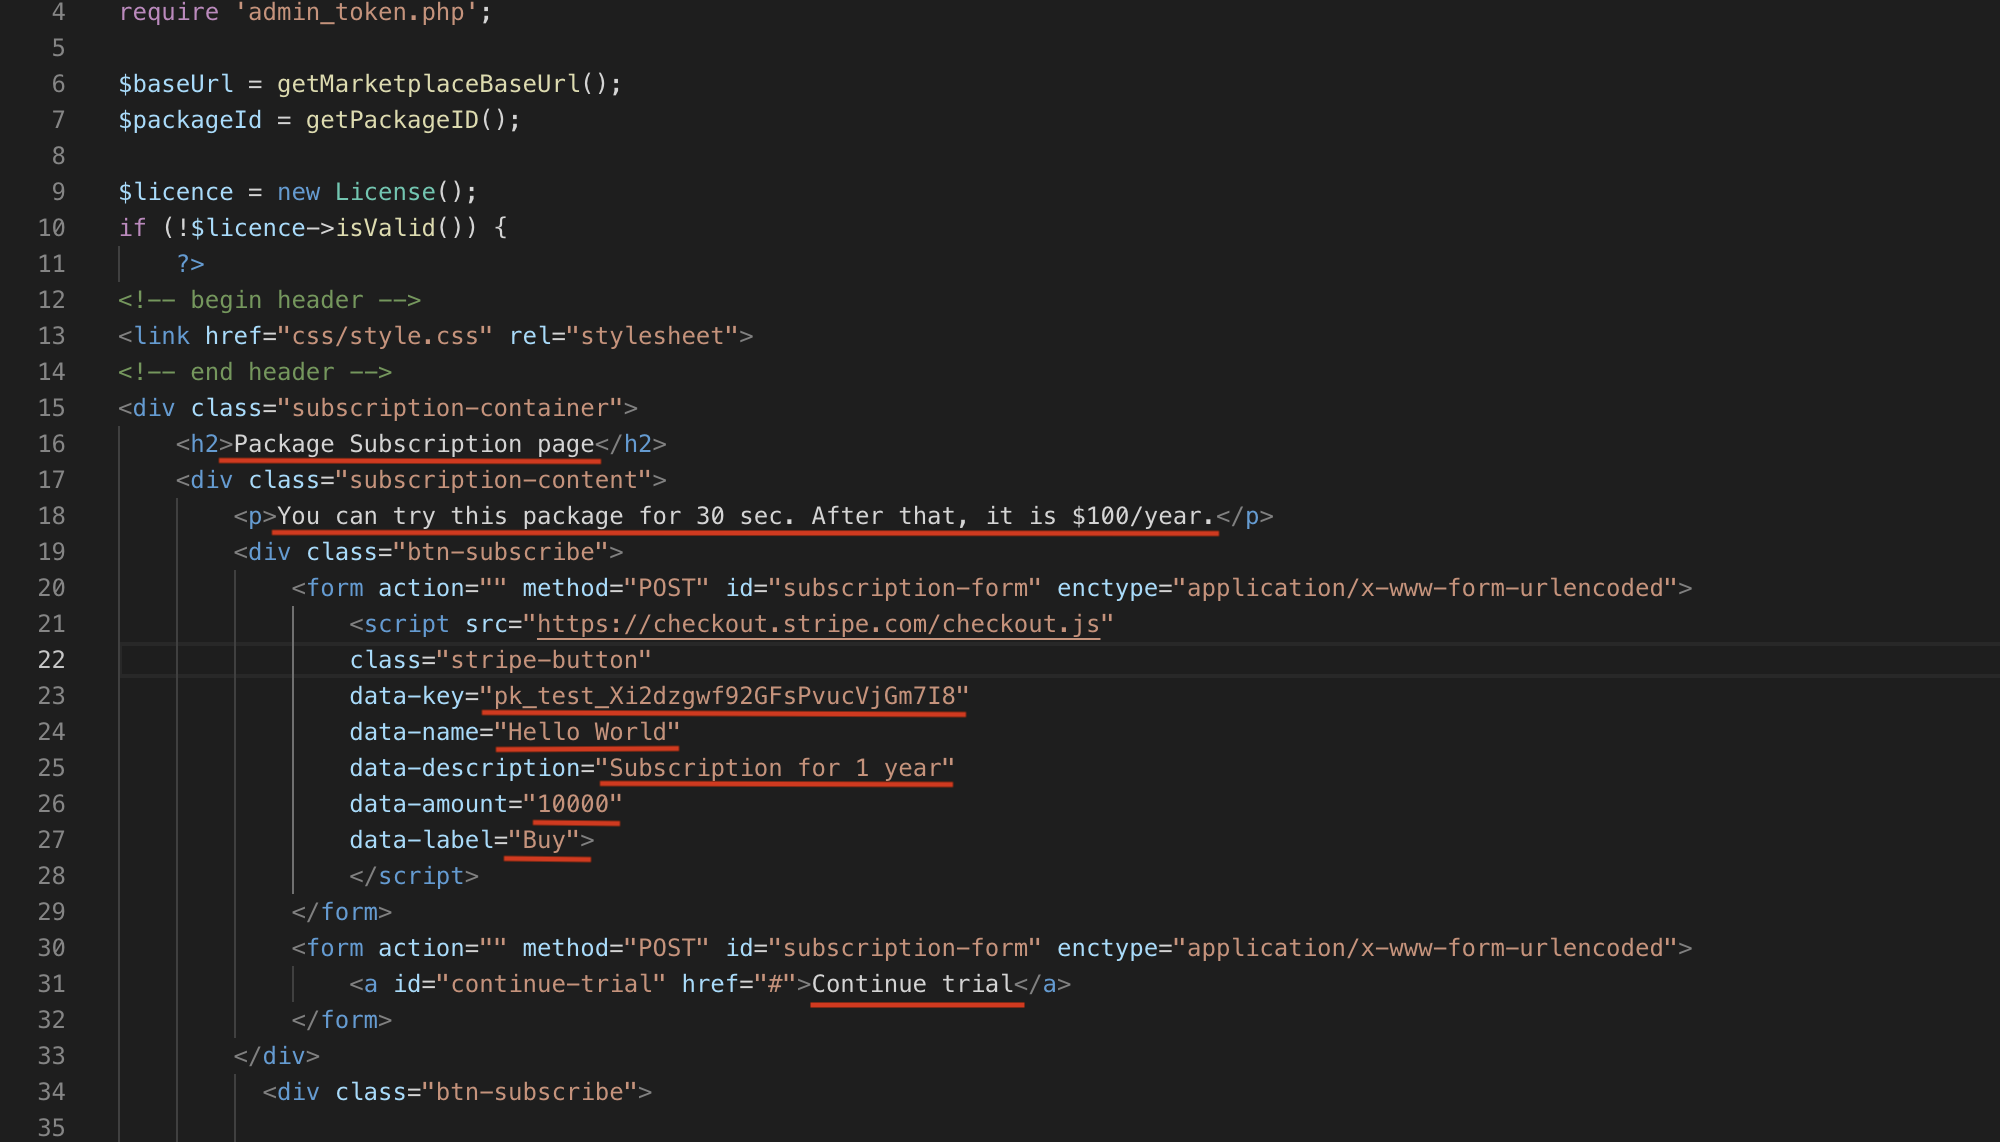
Back up the root folder, navigate to admin > subscribe.php and open it. Search for the form tag that is shown in the picture below and you can (and should) customizethe text and form parameters to match the plan you created on Stripe.
- Text on the main page before the Subscription button
data-key: Your Stripe Publishable keydata-name: Name of your Plug-Indata-description: Information for the customerdata-image: Absolute or relative URL of the image that you want to appear on the payment pop-updata-amount: The amount (in cents) that the customer is about to pay- This is only a front-end facing number. The amount that gets charged from the customer's card is decided in your Stripe Plan.
data-label: The text on the pay button. E.g:BuyorSubscribe
Adding a Free Trial to your Subscription Plan
If you want to add a free trial to your Subscription Plan, ensure specifying the duration of this trial on the Front End with the user.
Navigate to admin > trial.php and open it. The underlined code in the illustration below follows this logic: time = current time + number of seconds. Therefore, changing the number of seconds would change the duration of the trial. For example, if you want to have a 15-day trial, your line of code should look like:
$time = time() + 15 * 24 * 60 * 60; //(15days * 24 hours * 60 minutes * 60 seconds).In the screenshot below, the trial duration is 30 seconds:
After using up a trial, the customer will not be able to use it again, unless he/she pays for it. The trial cannot be exploited by uninstalling and re-installing the plug-in. It knows.
Uninstalling the Plug-In will unsubscribe the customer from the subscription plan.
Installing the plug-in again will make it ask for payment again.
Back End
Start by downloading Arcadier’s One Time Charge file. To connect your Stripe account to the payments made by the user, navigate to license > license.php, and paste your Stripe’s secret key into #1.
In order to create a One-Time fee that will be charged to your Stripe account, scroll down till you see the function buy() and make modifications there. Under the Stripe API call for creating a charge, change the following variables according to what you want to charge (underlined).
amount: The amount (in cents) of money you will be charging the user- This is the actual amount that will be charged to the user
currency: The currency of which the above amount will be charged in
Front End
Going back to the root folder (One Time Charge), navigate to admin > subscribe.php and open it. Search for the form tag that is shown in the picture below and make changes you want (underlined).
- Text on the main page before the Payment button
data-key: Your Stripe Publishable key data-name: Name of your Plug-Indata-description: Information for the customerdata-image: Absolute or relative URL of the image that you want to appear on the payment pop-updata-amount: The amount (in cents) that the customer is about to pay- This is only a front-end facing number. The amount that gets charged from the customer's card is the one that has been specified in
license.php.
- This is only a front-end facing number. The amount that gets charged from the customer's card is the one that has been specified in
data-label: The text on the pay button. E.g:BuyorSubscribe
The Plug-In Billing engine has the same file structure as all other plug-ins should have:
- root
- admin
- html
- css
- scripts
- user
- html
- css
- scripts
a.phpb.phpc.php
- admin
Let's say you want to create a Premium Marketplace Report Generator. 100% of its source code is found in the admin folder and subfolders. So the Marketplace Report Generator's
.jsfiles go in the Plug-In Billing Engine'sadmin > scriptsfolder..cssfiles go in the Plug-In Billing Engine'sadmin > cssfolderindex.htmlfile goes insideadmin > index.phpof the Plug-In Billing Engineif($licence->isValid()){ ?> <link rel="stylesheet" href="css/style.css"> <p>Plug-In Content</p> <script type="text/javascript" src="scripts/scripts.js"> <?php }
For Plug-Ins that have user side code as well, you should have your scripts and php files check for validity of the marketplace owner's license using the isValid() function found in license.php.


