-
Notifications
You must be signed in to change notification settings - Fork 51
Migrating to openHistorian 2.0 in other GPA Products
Using the openHistorian.Binaries.zip download that can downloaded with the latest openHistorian release, you can extract the needed openHistorian 2.0 assemblies needed to upgrade any openHistorian 1.0 instance running in a GPA product built using the GSF Time-Series Library, e.g., the common PPA openHistorian 1.0 instance running in an openPDC. You can also migrate existing openHistorian 1.0 .D data files into openHistorian 2.0 .D2 data files using the Archive Upgrade Utility that comes installed with the openHistorian.
To start using the openHistorian 2.0 within an existing GSF Time-Series Library based application, begin by following these steps:
A few libraries must be installed in the program directory. All needed files can be found in the openHistorian 2.0 program directory (or just extracted from openHistorian.Binaries.zip below).
Be sure to use releases from the same version of the Grid Solutions Framework (GSF) and build date.
- GSF.SortedTreeStore.dll
- openHistorian.Core.dll
- openHistorian.Adapters.dll
- crypto.dll
Other DLL's may be required in order for assembly to show in Manager...
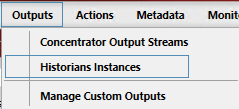
Open the Manager tool and navigate to Outputs\Historian Instances.

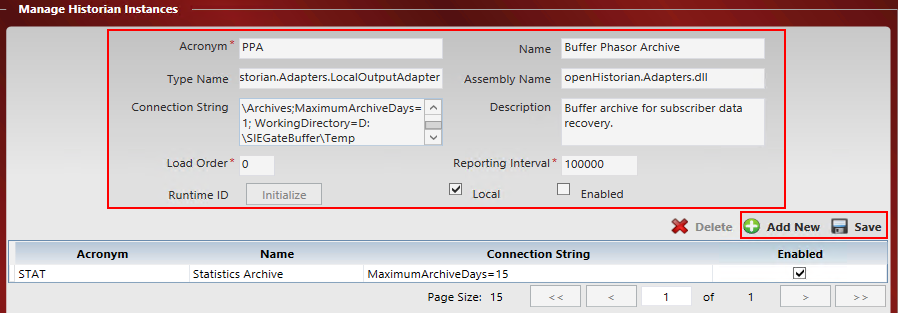
Select the existing historian instance to upgrade - or - click the (+)Add New button. In either case, enter the following settings in the form.
| Setting | Value |
|---|---|
| Acronym | PPA |
| Name | Buffer Phasor Archive |
| Type Name | openHistorian.Adapters.LocalOutputAdapter |
| Assembly Name | openHistorian.Adapters.dll |
| Connection String | ArchiveDirectories=C:\Program Files\openPDC\Archive; MaximumArchiveDays=100 |
| Description | Buffer archive for subscriber data recovery. |
| Load Order | 0 (default) |
| Reporting Interval | 100000 (default) |
| Local | Checked (default) |
| Enabled | Leave Unchecked for now (default) |

Click the Save button when done. There should be a new line in the list of historian
instances named 'PPA'.

Click the Initialize button, followed by checking the Enabled checkbox. Click Save.
If you are watching the host application console and see the following error, be sure you copied
the DLL files from step 1 and the GSF versions match.

Now that the buffer historian is set up, the PPAREADER must be
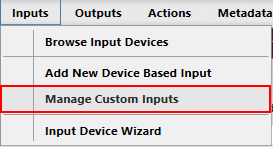
configured to use the openHistorian 2.0 libraries. In the Manager tool, navigate to
Inputs\Manage Custom Inputs.

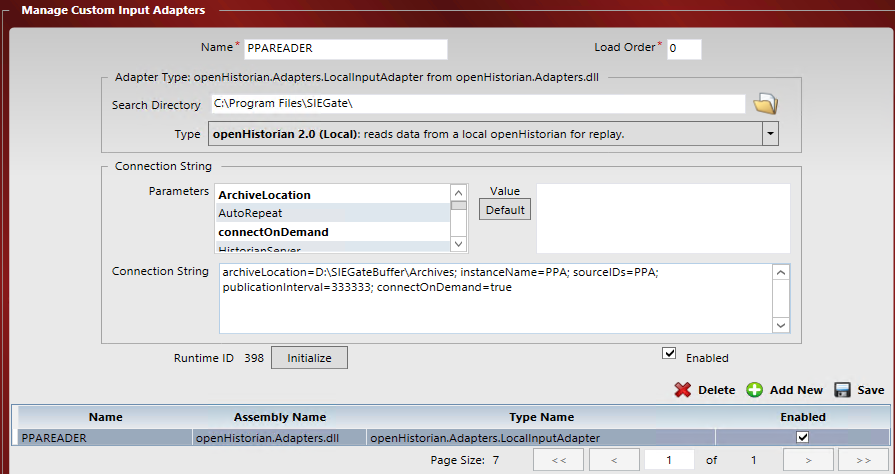
If, PPAREADER does not exist, create a new instance. Otherwise modify the existing instance to use the following settings:
| Setting | Value |
|---|---|
| Name | PPAREADER |
| Load Order | 0 (default) |
| Search Directory | C:\Program Files\openPDC\ (default) |
| Type | openHistorian 2.0 (Local) |
| Connection String | archiveLocation=C:\Program Files\openPDC\Archive; instanceName=PPA; sourceIDs=PPA; publicationInterval=333333; connectOnDemand=true |

Once the form is complete, check Enabled, click Save and Initialize.
You may also need to restart the service.
Note that the openHistorian 2.0 archive will use less CPU and will be much faster than the 1.0, but it will use more memory. To control the maximum amount of memory the historian will use, adjust the MemoryPoolSize setting in the host configuration file. For example, if you are loading an openHistorian 2.0 instance in the openPDC, open the openPDC.exe.config file while the service is not running and navigate to the <categorizedSettings>\<systemSettings>\<add name="MemoryPoolSize"> setting and set the desired value. The total size should be set in Gigabytes of RAM - the default is 0.0 for autosizing.