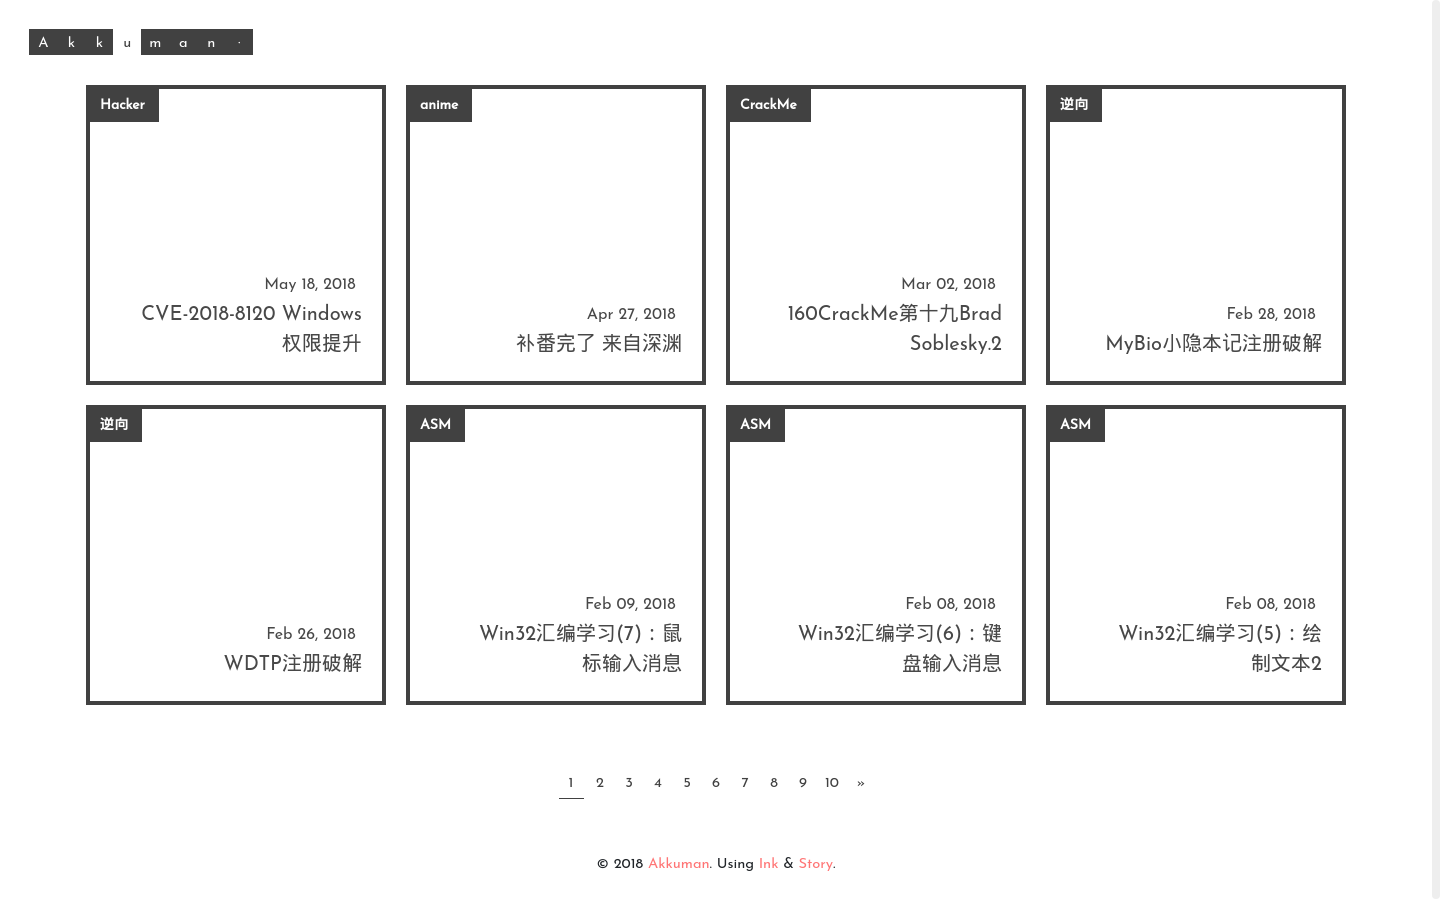
为纸小墨写的一款主题,该主题移植自Yumoe
标题旁边有一个 · 字符,点击后便可显示菜单。1,2,3 分别代表 独立页面菜单、导航树(仅在文章界面有用)以及搜索框。
具体介绍可见https://yumoe.com/archives/story.html
- 评论点击加载, 可以应对一些墙导致无法加载的场景
- 图片懒加载
- 评论系统支持来必力, Disqus, Gitment, 默认为Disqus
- ...
进入到纸小墨程序的目录下, 也就是ink主程序的目录, 然后进入该目录下的blog目录
然后执行
git clone https://github.com/akkuman/ink-theme-story.git或者下载git压缩包后解压到blog文件夹
现在你可以看到blog目录下的ink-theme-story目录
然后修改站点配置文件blog/config.yml
站点配置文件一般如下:
site:
    title: "Akkuman"
    subtitle: "Akkuman的技术博客"
    limit: 8
    theme: ink-theme-story
    lang: zh
    url: "ink-theme-story.pancakeapps.com"
    comment: Akkuman
    logo: "-/images/avatar.png"
    # link: "{category}/{year}/{month}/{day}/{title}.html"
    link: "{year}/{month}/{day}/{title}.html"
    # root: "/blog"

authors:
    me:
        name: "Akkuman"
        intro: "编程小白|技术菜鸟"
        avatar: "-/images/avatar.png"

build:
    # output: "public"
    port: 8000
    # Copied files to public folder when build
    copy:
        - "source/images"
    # Excuted command when use 'ink publish'
    publish: |
        git add . -A
        git commit -m "update"
git push origin我们需要修改的地方有:
title   #title字段是截图中的左上角Akkuman字段, 比如我设置为Akkuman那么就是和我截图中一样
subtitle    #网站子标题, 在标签页和归档能看到
limit: 8    #每页可显示的文章数目, 为了美观建议设置为8
theme: ink-theme-story    #网站主题目录, 设置为该主题ink-theme-story
其他地方根据自己需求更改, 纸小墨说明文档见简洁的静态博客构建工具 —— 纸小墨(InkPaper)
在纸小墨中,每篇文章是有作者的,我现在按上面我给出的例子配置为例进行说明
纸小墨中每一篇文章的头配置大致如下:
title: "简洁的静态博客构建工具 —— 纸小墨(InkPaper)"
date: 2015-03-01 18:00:00 +0800
update: 2016-07-11 17:00:00 +0800
author: me
cover: "-/images/example.png"
tags:
    - 设计
    - 写作
preview: 纸小墨(InkPaper)是一个GO语言编写的开源静态博客构建工具,可以快速搭建博客网站。它无依赖跨平台,配置简单构建快速,注重简洁易用与更优雅的排版。其中的preview是文章预览,也可在正文中使用<!--more-->分割, 是一个可选字段,我们不必管
对我们有影响的字段配置除了基础的title等等之外, 需要关注一下author这个字段
纸小墨每一篇文章的作者的关于页面是about.{{.Author.Id}}.html, 比如我上面的站点配置文件中authors有一个值是me, 那么这个作者的关于页面就是about.me.html, 也就是我们需要建立一个page, 纸小墨主程序打包中有一个文件about.me.md, 可以参见这个文件的格式, 我在这里给出来:
type: page
title: "关于作者"
author: me

---

## 纸小墨

构建只为纯粹书写的博客。

[http://www.chole.io/](http://www.chole.io/)
那么这个文件生成后就会在站点根目录下生成about.me.html文件.
重点来了
上面我说的关于页面是单个作者的关于页面, 在这个主题中, 我有定义一个站点的关于页面
<a href="{{.Site.Root}}/about.html"><li>{{i18n "about"}}</li></a>我们只需要按照上面about.me.md的格式新建一个about.md即可, 我在这里给出一个about.md例子:
type: page
title: "关于本站"

---

我是一个站点关于页面例子
author字段可省略,看自己的喜好
本主题的评论采用点击再动态加载的方式, 所以不用担心因为Disqus被墙的原因导致页面打不开, 只有当你点击show comments时才会开始加载评论
本主题的评论系统支持来必力, Disqus, Gitment
切换为来必力的话只需要修改站点配置文件blog/config.yml, 把comment字段的值修改成来必力的data-uid(可在来必力后台代码管理中看到), 然后打开blog/ink-theme-story/_comment.html文件, 把来必力评论的注释去掉, 然后把Disqus评论加上注释即可
切换为Gitment的话同上修改, comment字段的格式为
comment: "owner:repo:client_id:client_secret"其中各个的属性为
owner           #你的 GitHub ID
repo            #存储评论的 repo
client_id       #你的 client ID
client_secret #你的 client secret然后打开blog/ink-theme-story/_comment.html文件, 把Gitment评论的注释去掉, 然后把Disqus评论加上注释即可
特别感谢Yumoe提供了这么简洁大方的主题
