| npm (JS/TS) | PyPI (Python) | Maven (Java) | Go | NuGet |
|---|---|---|---|---|
| Link | Link | Link | Link | Link |
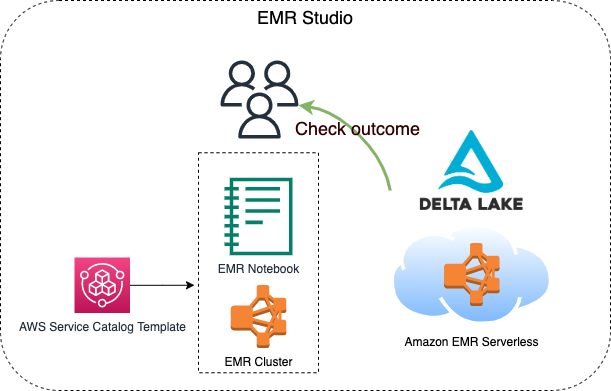
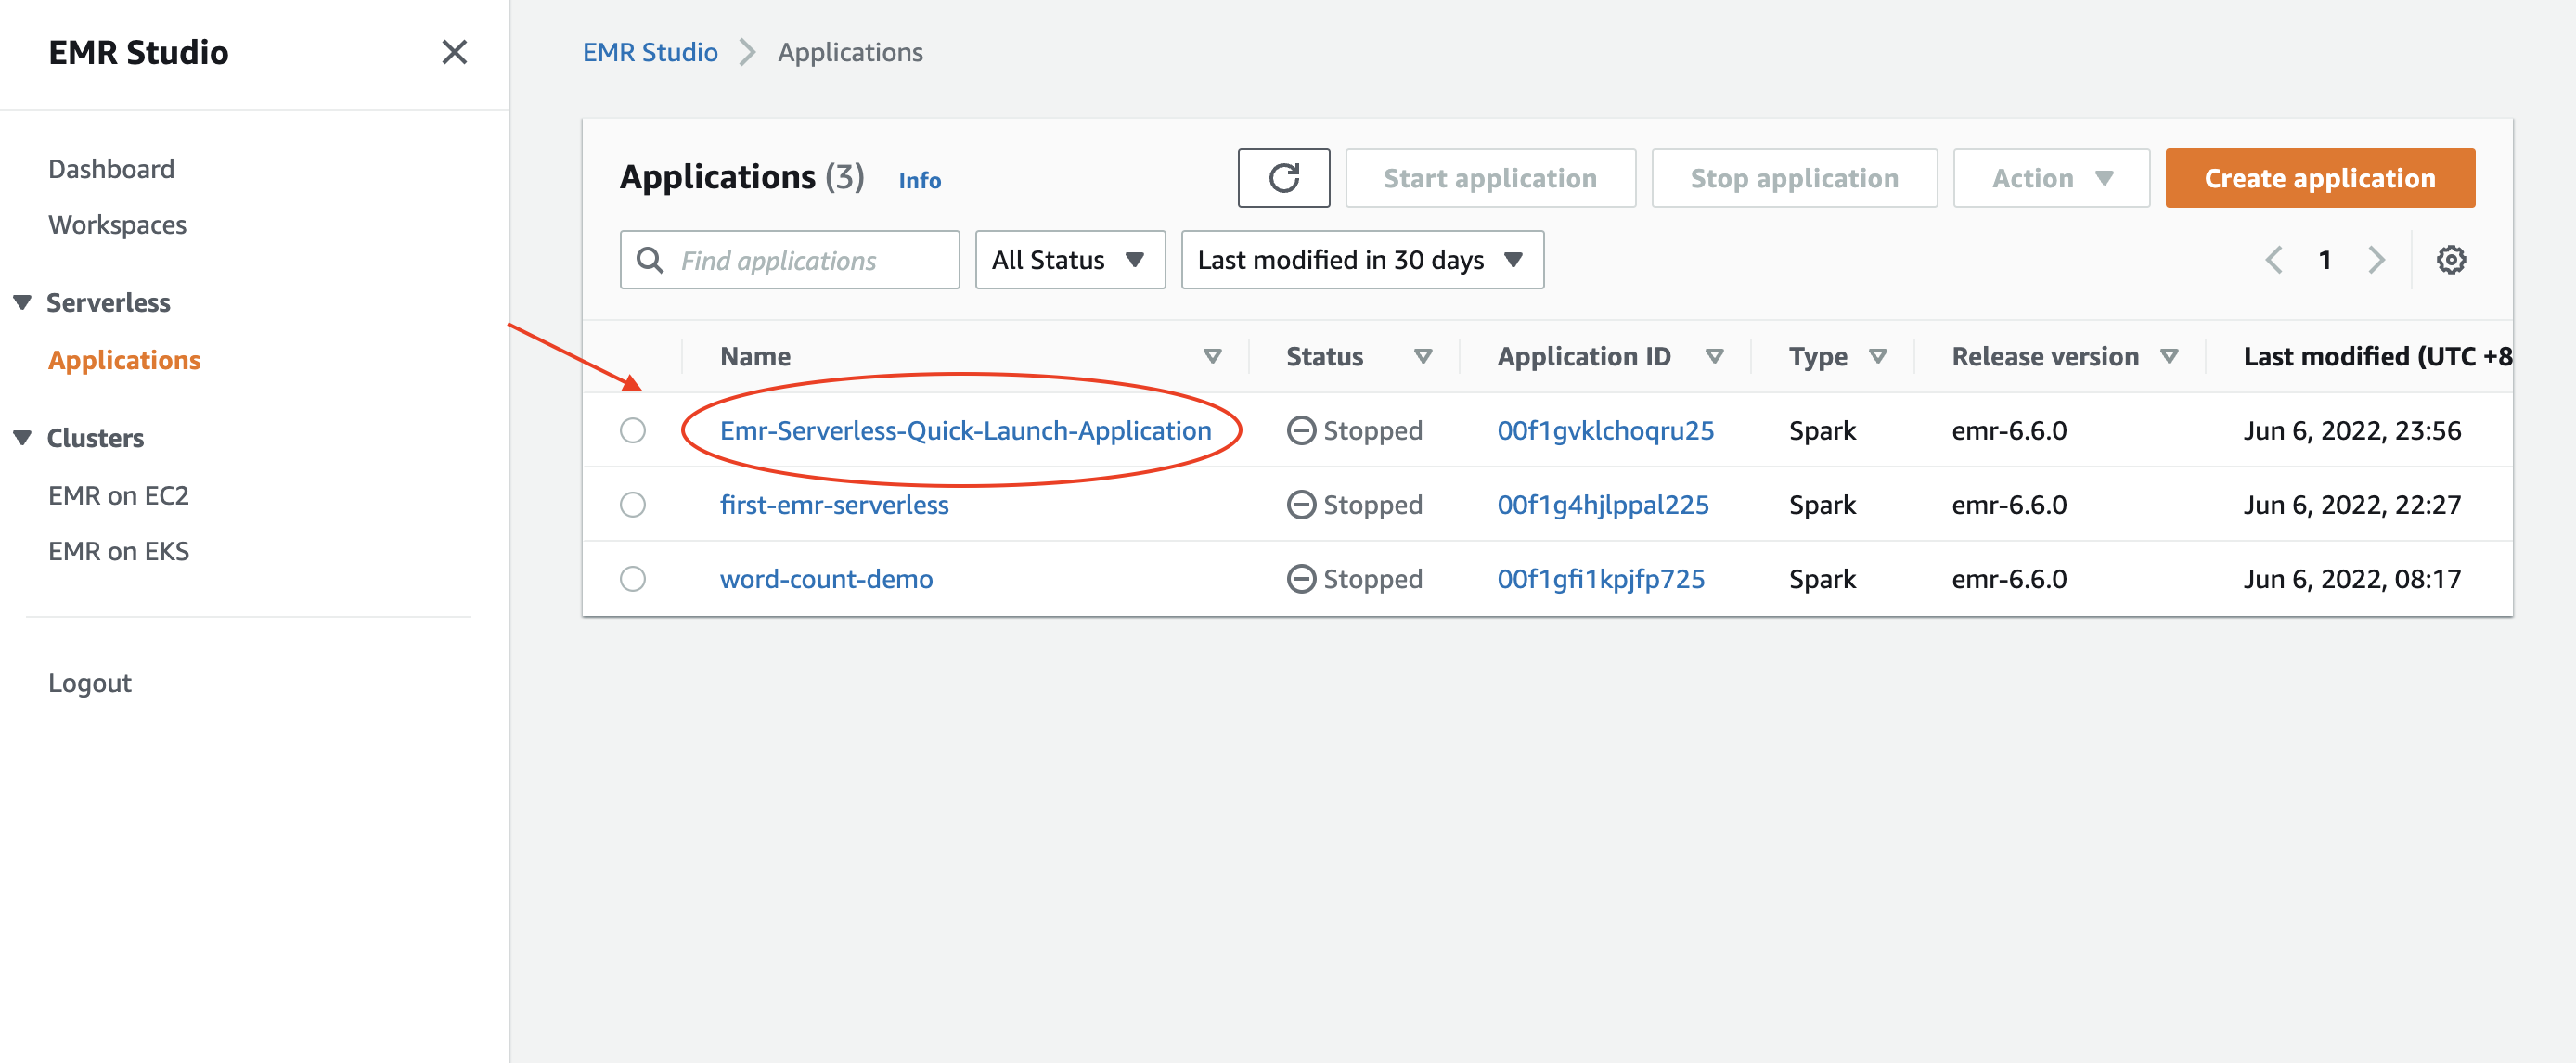
This constrcut builds an EMR studio, a cluster template for the EMR Studio, and an EMR Serverless application. 2 S3 buckets will be created, one is for the EMR Studio workspace and the other one is for EMR Serverless applications. Besides, the VPC and the subnets for the EMR Studio will be tagged {"Key": "for-use-with-amazon-emr-managed-policies", "Value": "true"} via a custom resource. This is necessary for the service role of EMR Studio.
This construct is for analysts, data engineers, and anyone who wants to know how to process Delta Lake data with EMR serverless.

They build the construct via cdkv2 and build a serverless job within the EMR application generated by the construct via AWS CLI within few minutes. After the EMR serverless job is finished, they can then check the processed result done by the EMR serverless job on an EMR notebook through the cluster template.

- Requirements
- Before deployment
- Minimal content for deployment
- After deployment
- Create an EMR Serverless application
- Check the executing job
- Check results from an EMR notebook via cluster template
- Fun facts
- Future work
- Your current identity has the
AdministratorAccesspower. - An IAM user named
Administratorwith theAdministratorAccesspower.- This is related to the Portfolio of AWS Service Catalog created by the construct, which is required for EMR cluster tempaltes.
- You can choose whatsoever identity you wish to associate with the Product in the Porfolio for creating an EMR cluster via cluster tempalte. Check
serviceCatalogPropsin theEmrServerlessconstruct for detail, otherwise, the IAM user mentioned above will be chosen to set up with the Product.
You might want to execute the following command.
PROFILE_NAME="scott.hsieh"
# If you only have one credentials on your local machine, just ignore `--profile`, buddy.
cdk bootstrap aws://${AWS_ACCOUNT_ID}/${AWS_REGION} --profile ${PROFILE_NAME}#!/usr/bin/env node
import * as cdk from 'aws-cdk-lib';
import { Construct } from 'constructs';
import { EmrServerless } from 'cdk-emrserverless-with-delta-lake';
class TypescriptStack extends cdk.Stack {
constructor(scope: Construct, id: string, props?: cdk.StackProps) {
super(scope, id, props);
new EmrServerless(this, 'EmrServerless');
}
}
const app = new cdk.App();
new TypescriptStack(app, 'TypescriptStack', {
stackName: 'emr-studio',
env: {
region: process.env.CDK_DEFAULT_REGION,
account: process.env.CDK_DEFAULT_ACCOUNT,
},
});Promise me, darling, make advantage on the CloudFormation outputs. All you need is copy-paste, copy-paste, copy-paste, life should be always that easy.
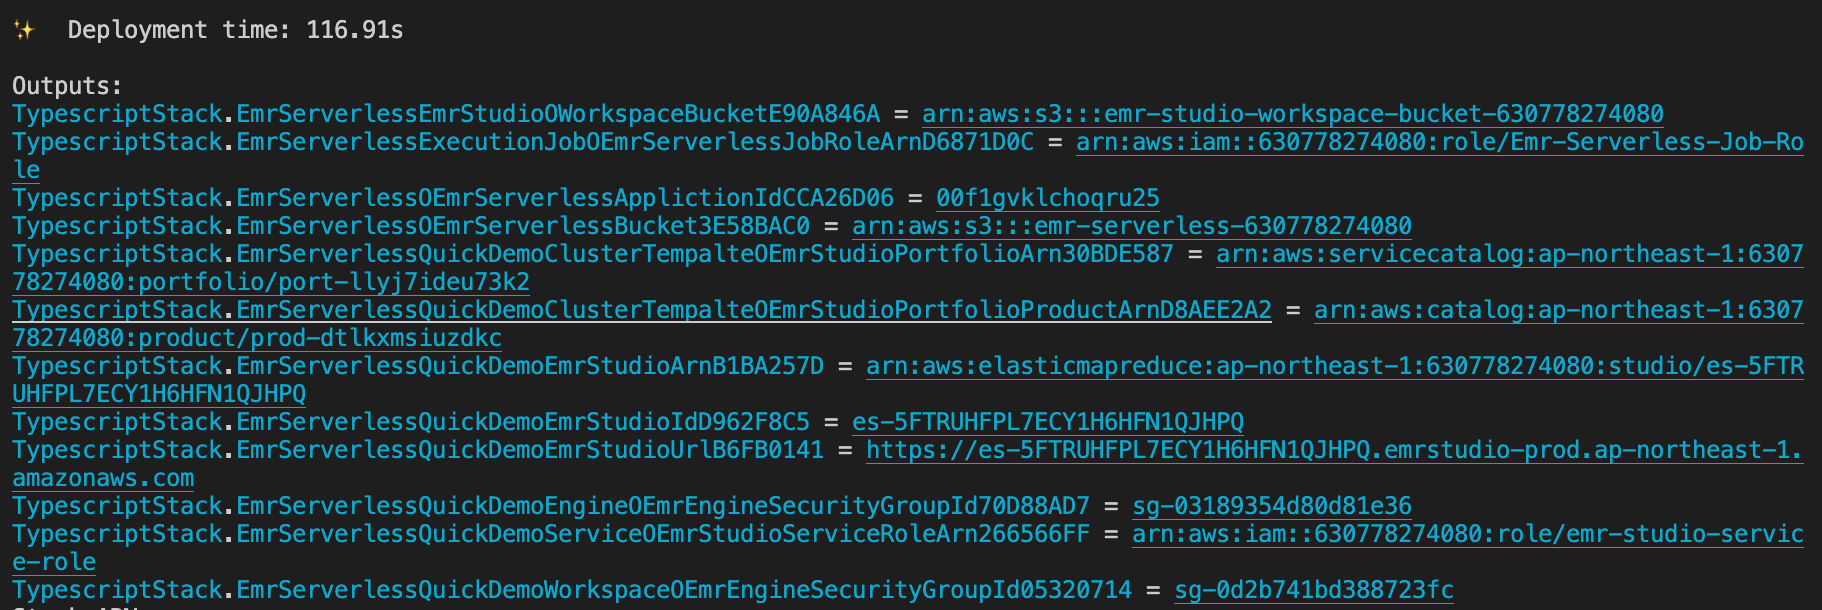
- Define the following environment variables on your current session.
export PROFILE_NAME="${YOUR_PROFILE_NAME}" export JOB_ROLE_ARN="${copy-paste-thank-you}" export APPLICATION_ID="${copy-paste-thank-you}" export SERVERLESS_BUCKET_NAME="${copy-paste-thank-you}" export DELTA_LAKE_SCRIPT_NAME="delta-lake-demo" - Copy partial NYC-taxi data into the EMR Serverless bucket.
aws s3 cp s3://nyc-tlc/trip\ data/ s3://${SERVERLESS_BUCKET_NAME}/nyc-taxi/ --exclude "*" --include "yellow_tripdata_2021-*.parquet" --recursive --profile ${PROFILE_NAME}
- Create a Python script for processing Delta Lake
touch ${DELTA_LAKE_SCRIPT_NAME}.py
cat << EOF > ${DELTA_LAKE_SCRIPT_NAME}.py
from pyspark.sql import SparkSession
import uuid

if __name__ == "__main__":
    """
        Delta Lake with EMR Serverless, take NYC taxi as example.
    """
    spark = SparkSession \\
        .builder \\
        .config("spark.sql.extensions", "io.delta.sql.DeltaSparkSessionExtension") \\
        .config("spark.sql.catalog.spark_catalog", "org.apache.spark.sql.delta.catalog.DeltaCatalog") \\
        .enableHiveSupport() \\
        .appName("Delta-Lake-OSS") \\
        .getOrCreate()

    url = "s3://${SERVERLESS_BUCKET_NAME}/emr-serverless-spark/delta-lake/output/1.2.1/%s/" % str(
        uuid.uuid4())

    # creates a Delta table and outputs to target S3 bucket
    spark.range(5).write.format("delta").save(url)

    # reads a Delta table and outputs to target S3 bucket
    spark.read.format("delta").load(url).show()

    # The source for the second Delta table.
    base = spark.read.parquet(
        "s3://${SERVERLESS_BUCKET_NAME}/nyc-taxi/*.parquet")

    # The sceond Delta table, oh ya.
    base.write.format("delta") \\
        .mode("overwrite") \\
        .save("s3://${SERVERLESS_BUCKET_NAME}/emr-serverless-spark/delta-lake/nyx-tlc-2021")
    spark.stop()
EOF
- Upload the script and required jars into the serverless bucket
# upload script
aws s3 cp delta-lake-demo.py s3://${SERVERLESS_BUCKET_NAME}/scripts/${DELTA_LAKE_SCRIPT_NAME}.py --profile ${PROFILE_NAME}
# download jars and upload them
DELTA_VERSION="3.0.0"
DELTA_LAKE_CORE="delta-spark_2.13-${DELTA_VERSION}.jar"
DELTA_LAKE_STORAGE="delta-storage-${DELTA_VERSION}.jar"
curl https://repo1.maven.org/maven2/io/delta/delta-spark_2.13/${DELTA_VERSION}/${DELTA_LAKE_CORE} --output ${DELTA_LAKE_CORE}
curl https://repo1.maven.org/maven2/io/delta/delta-storage/${DELTA_VERSION}/${DELTA_LAKE_STORAGE} --output ${DELTA_LAKE_STORAGE}
aws s3 mv ${DELTA_LAKE_CORE} s3://${SERVERLESS_BUCKET_NAME}/jars/${DELTA_LAKE_CORE} --profile ${PROFILE_NAME}
aws s3 mv ${DELTA_LAKE_STORAGE} s3://${SERVERLESS_BUCKET_NAME}/jars/${DELTA_LAKE_STORAGE} --profile ${PROFILE_NAME}
Rememeber, you got so much information to copy and paste from the CloudFormation outputs.

aws emr-serverless start-job-run \
  --application-id ${APPLICATION_ID} \
  --execution-role-arn ${JOB_ROLE_ARN} \
  --name 'shy-shy-first-time' \
  --job-driver '{
        "sparkSubmit": {
            "entryPoint": "s3://'${SERVERLESS_BUCKET_NAME}'/scripts/'${DELTA_LAKE_SCRIPT_NAME}'.py",
            "sparkSubmitParameters": "--conf spark.executor.cores=1 --conf spark.executor.memory=4g --conf spark.driver.cores=1 --conf spark.driver.memory=4g --conf spark.executor.instances=1 --conf spark.jars=s3://'${SERVERLESS_BUCKET_NAME}'/jars/'${DELTA_LAKE_CORE}',s3://'${SERVERLESS_BUCKET_NAME}'/jars/'${DELTA_LAKE_STORAGE}'"
        }
    }' \
  --configuration-overrides '{
        "monitoringConfiguration": {
            "s3MonitoringConfiguration": {
                "logUri": "s3://'${SERVERLESS_BUCKET_NAME}'/serverless-log/"
	        }
	    }
	}' \
	--profile ${PROFILE_NAME}
If you execute with success, you should see similar reponse as the following:
{
    "applicationId": "00f1gvklchoqru25",
    "jobRunId": "00f1h0ipd2maem01",
    "arn": "arn:aws:emr-serverless:ap-northeast-1:630778274080:/applications/00f1gvklchoqru25/jobruns/00f1h0ipd2maem01"
}
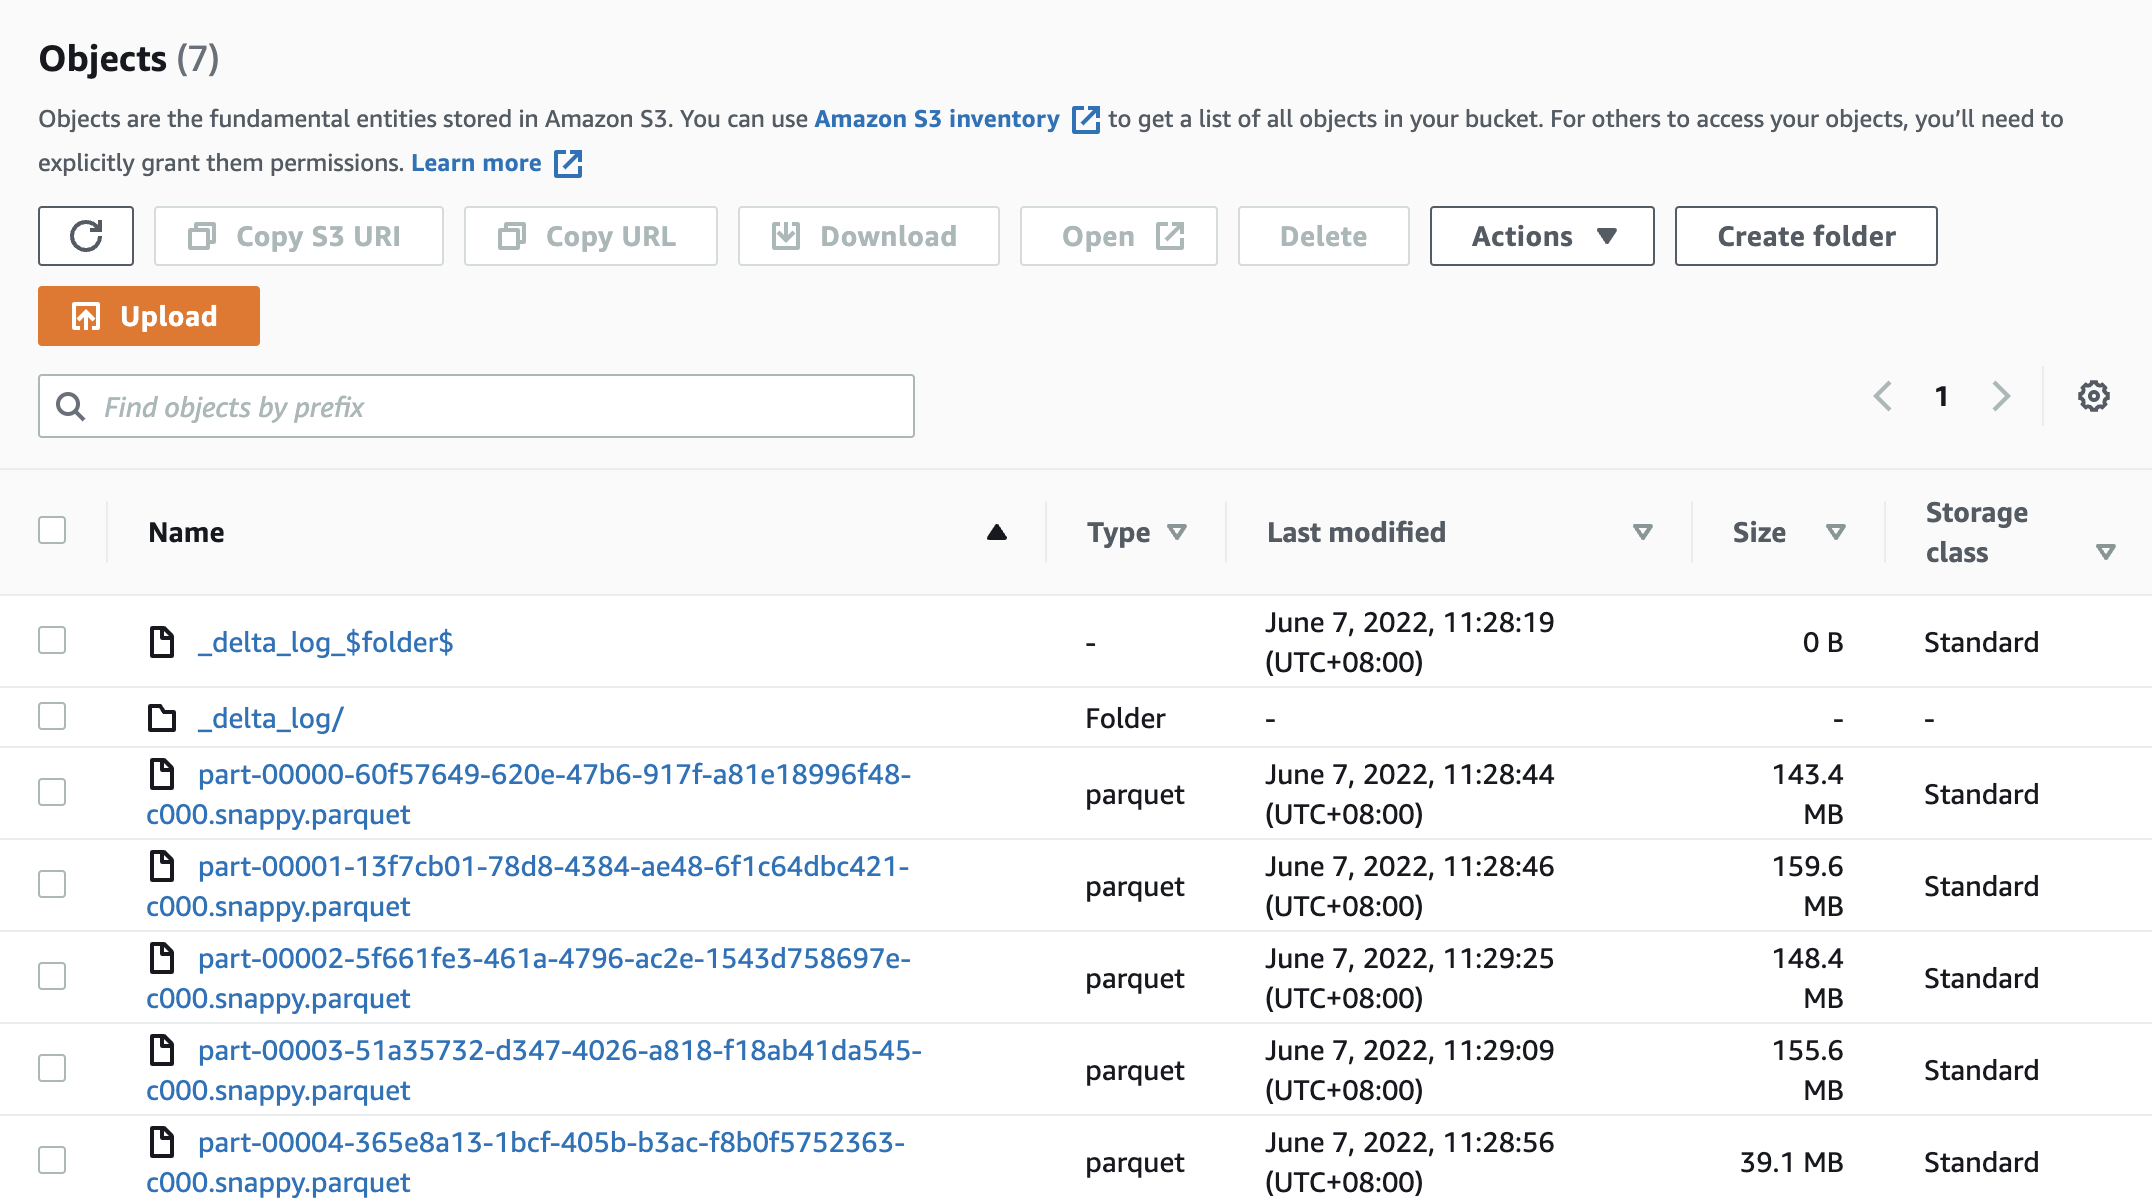
and got a Delta Lake data under s3://${SERVERLESS_BUCKET_NAME}/emr-serverless-spark/delta-lake/nyx-tlc-2021/.
Access the EMR Studio via the URL from the CloudFormation outputs. It should look very similar to the following url: https://es-pilibalapilibala.emrstudio-prod.ap-northeast-1.amazonaws.com, i.e., weird string and region won't be the same as mine.
- Create a workspace and an EMR cluster via the cluster template on the AWS Console
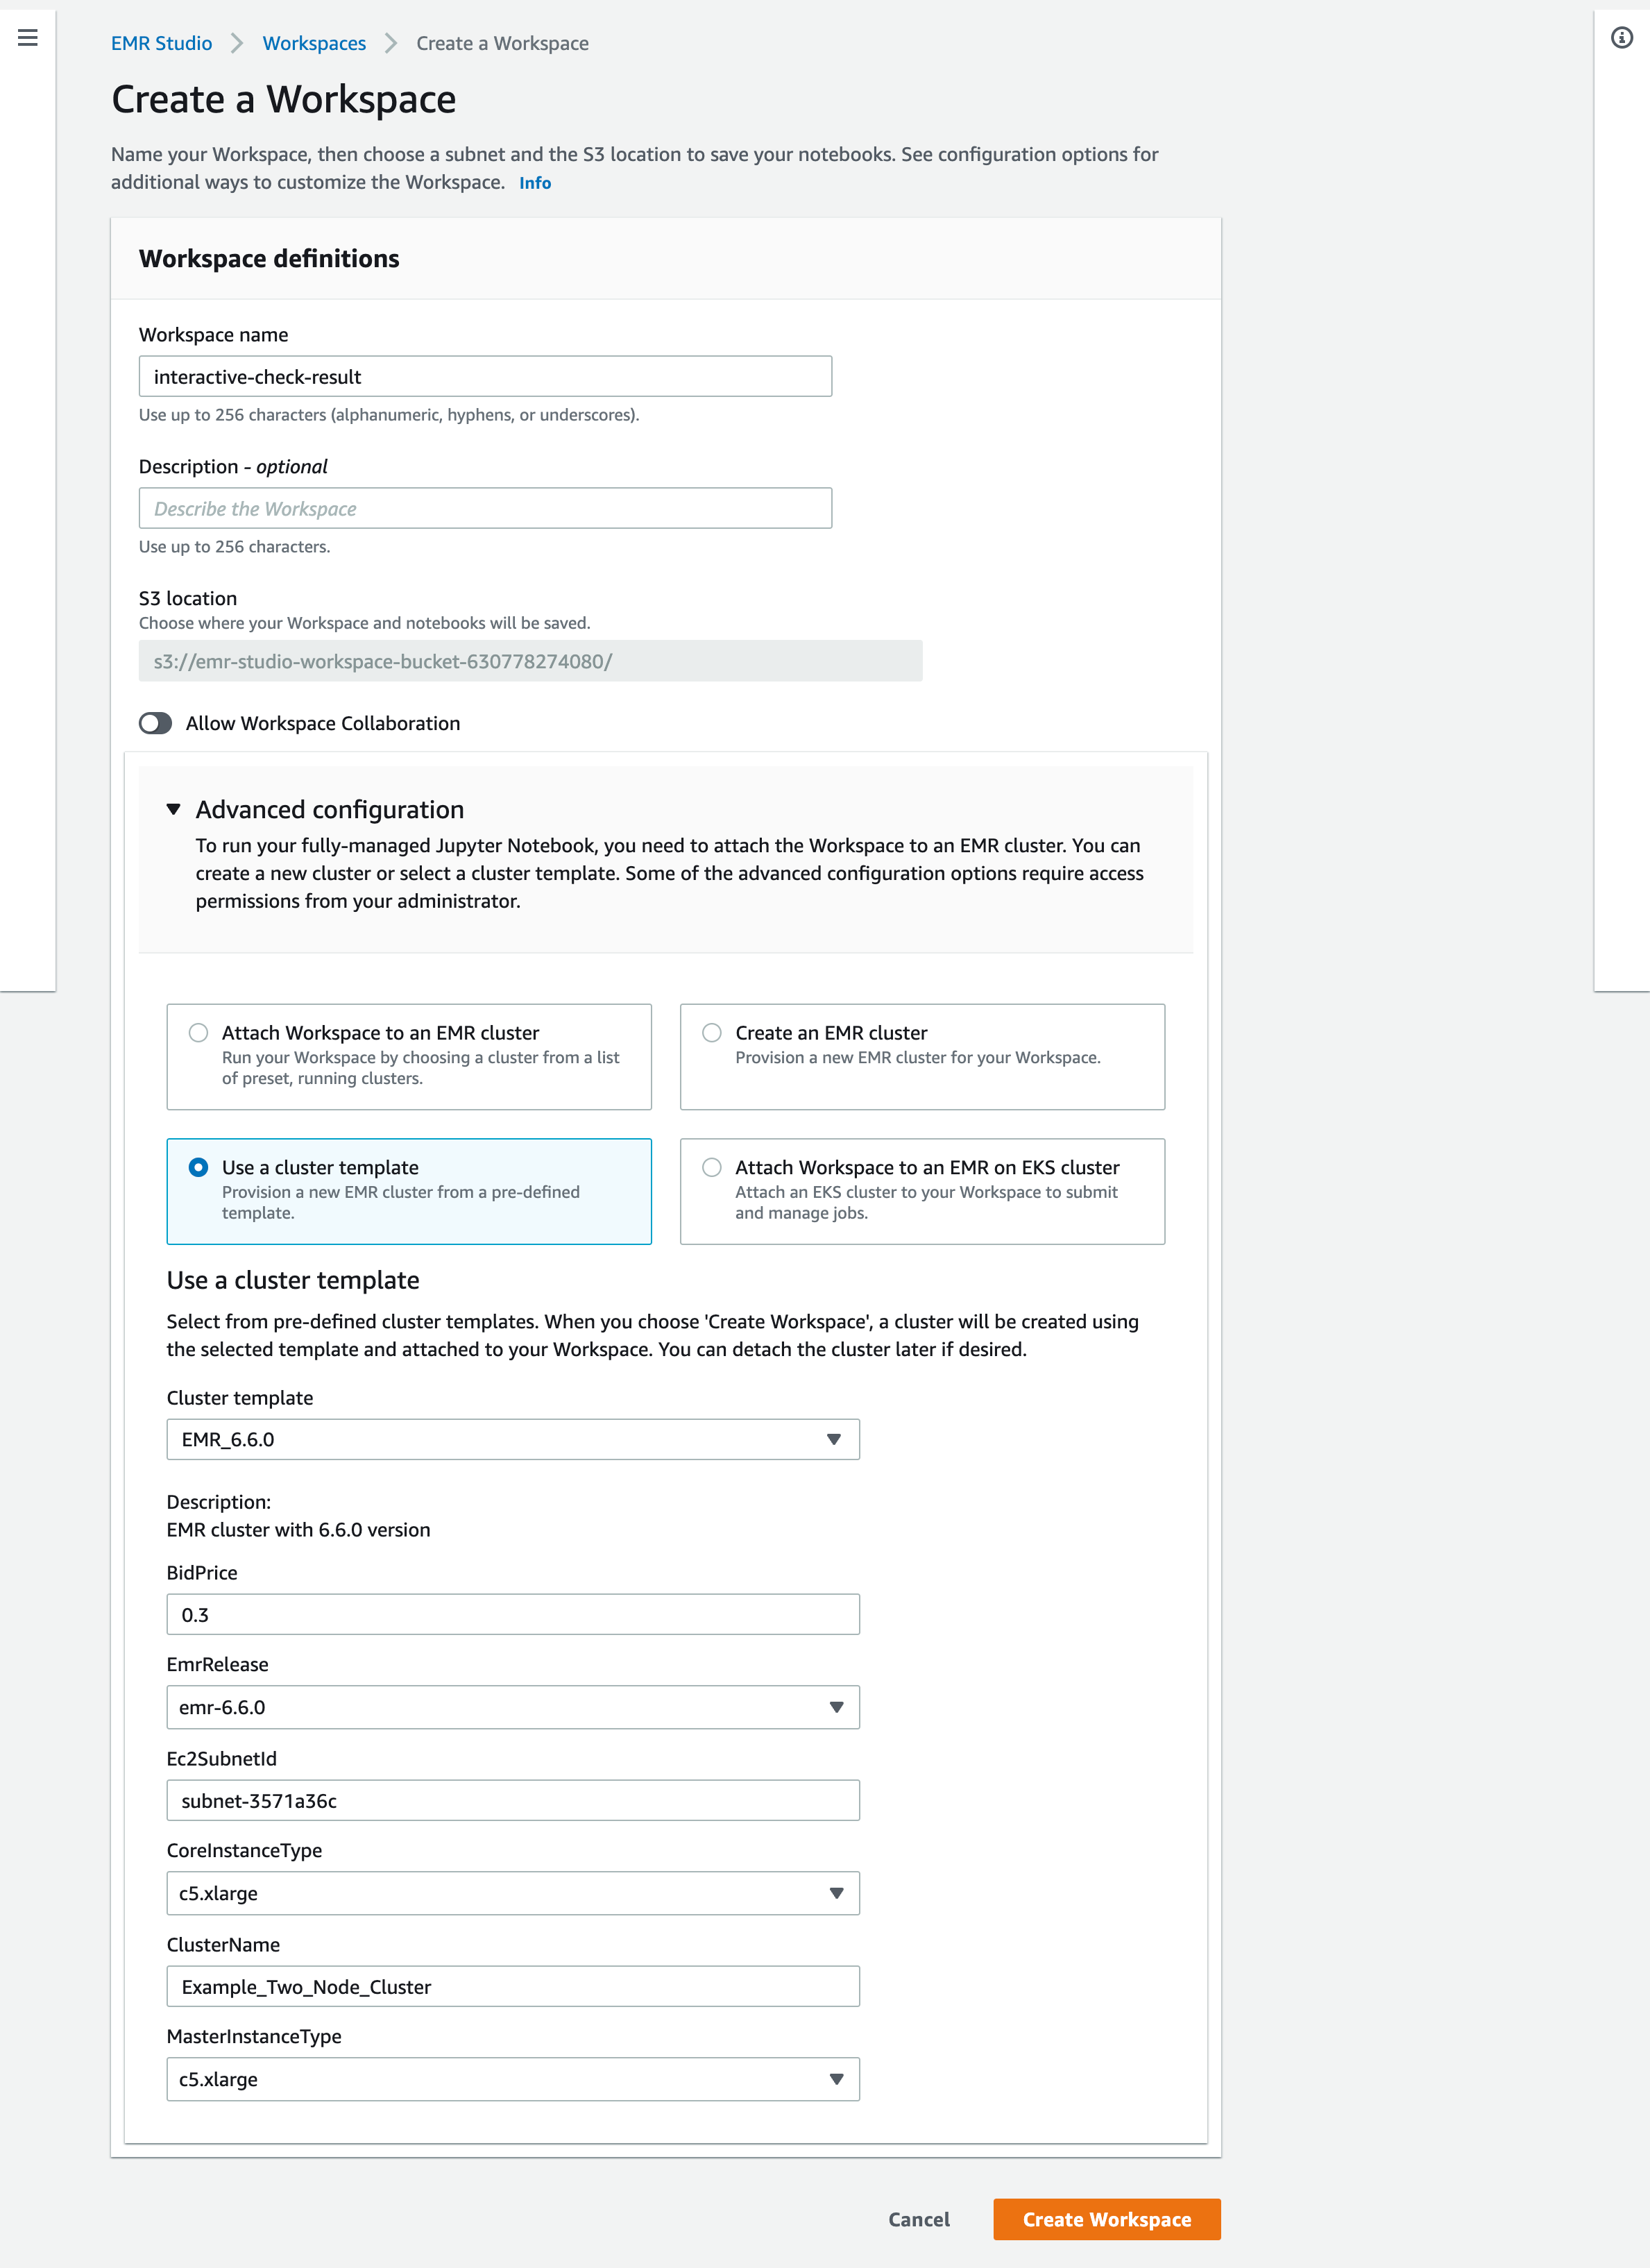
- Check the results delivered by the EMR serverless application via an EMR notebook.
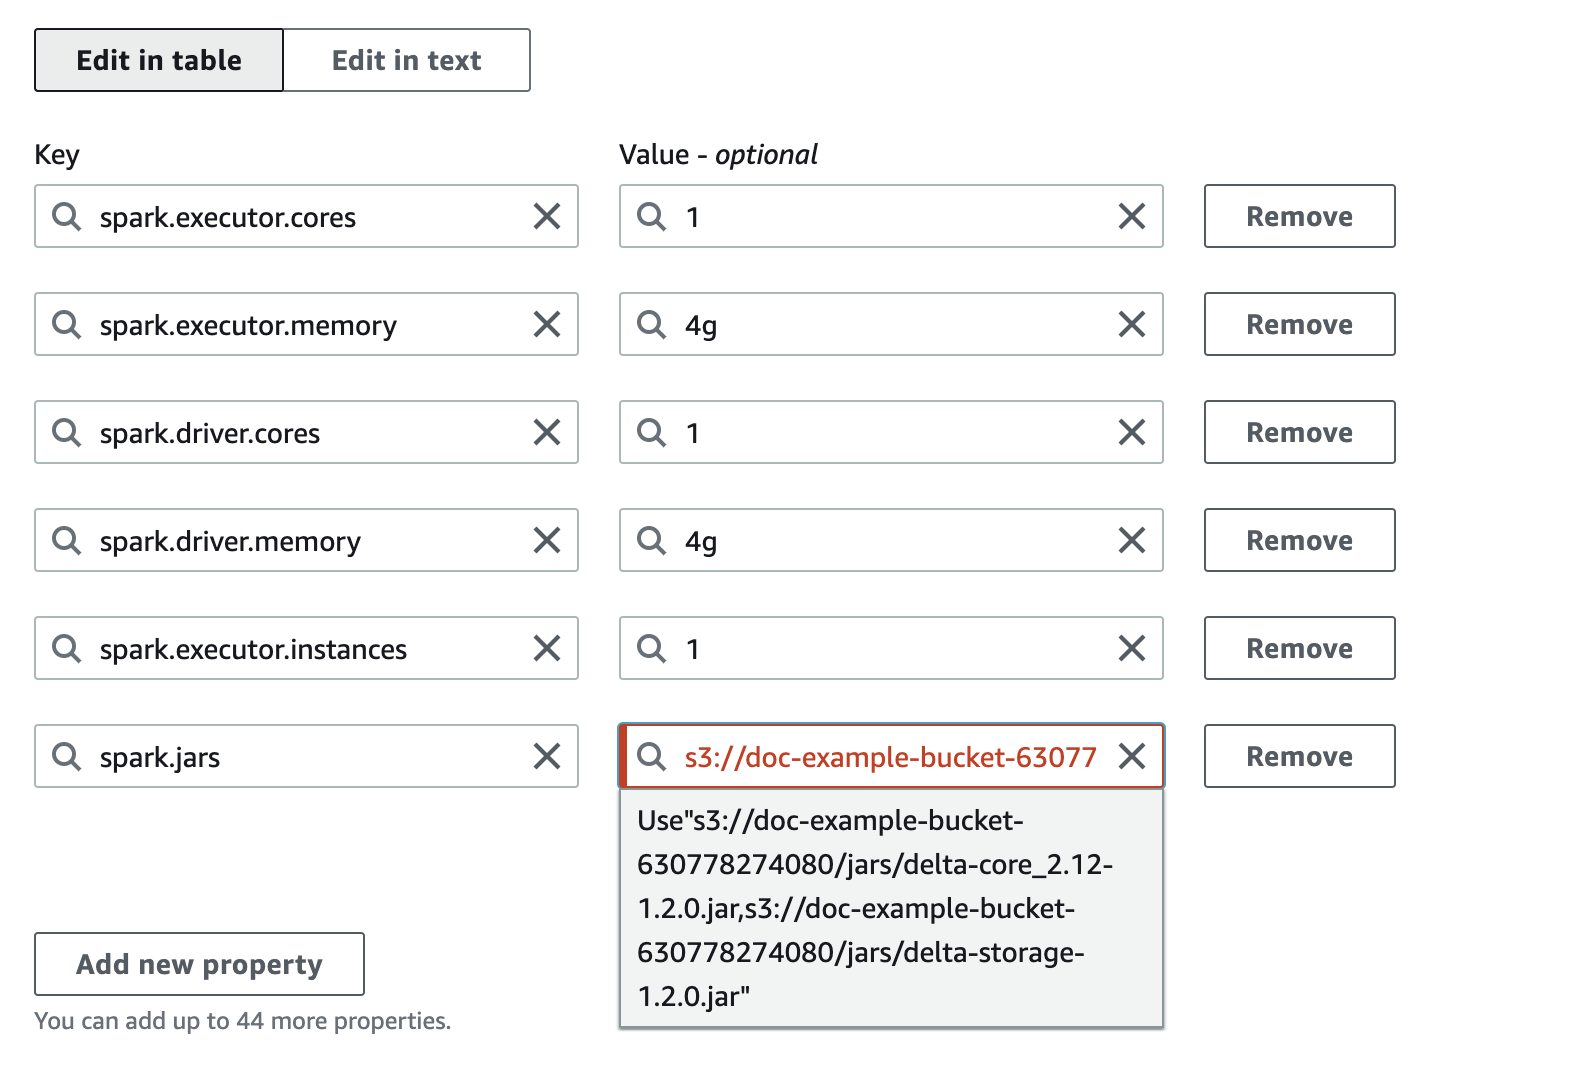
- You can assign multiple jars as a comma-separated list to the
spark.jarsas the Spark page says for your EMR Serverless job. The UI will complain, you still can start the job. Don't be afraid, just click it like when you were child, facing authority fearlessly.
- To fully delet a stack with the construct, you need to make sure there is no more workspace within the EMR Studio. Aside from that, you also need to remove the associated identity from the Service Catalog (this is a necessary resource for the cluster template).
- Version inconsistency on Spark history. Possibly it can be ignored yet still made me wonder why the versions are different.

- So far, I still haven't figured out how to make the s3a URI work. The s3 URI is fine while the serverless app will complain that it couldn't find proper credentials provider to read the s3a URI.
- Custom resuorce for EMR Serverless
- Make the construct more flexible for users
- Compare Databricks Runtime and EMR Serverless.


