-
Notifications
You must be signed in to change notification settings - Fork 93
Synology Setting Up Your Media Library Share
The media library is a key component of your Emby Server setup, the following is a step-by-step guide for a reference setup.
However you decide to setup your library, making sure Emby Server has read/write access to it, is critical.
NOTE: The name of the NAS in this example is JFK, substitute with the name of your system accordingly.
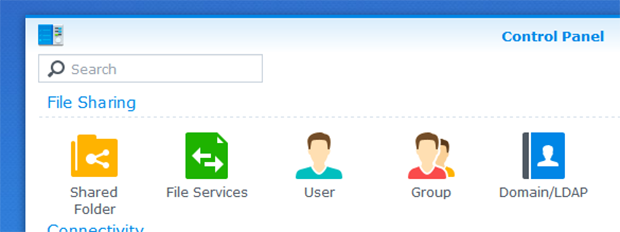
Step 1 : Navigate to Control Panel -> Shared Folder. (shared folders are assumed, as you'll need a way to upload your media)
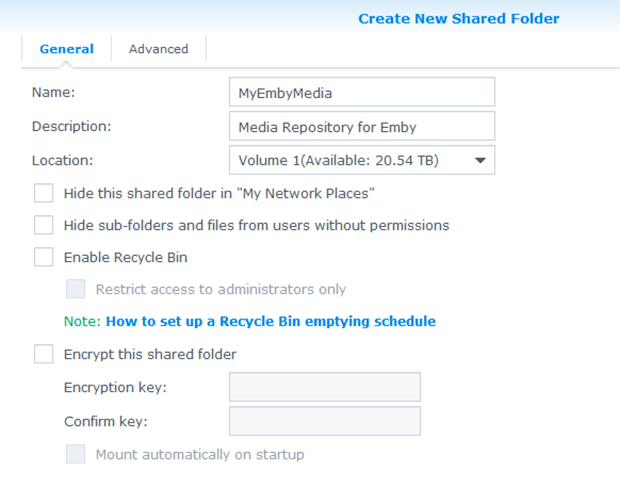
Step 2 : Set the Name, Description and choose a Location. (if you have more than one volume available)
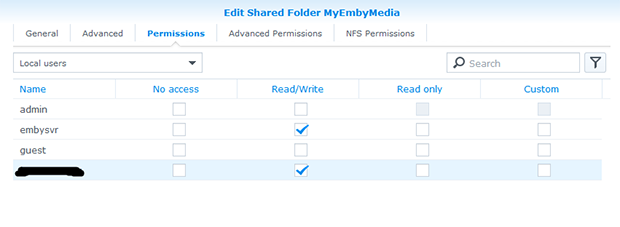
Step 3 : Grant the Emby Server user Read/Write access, along with any other users you wish to have access to upload media.
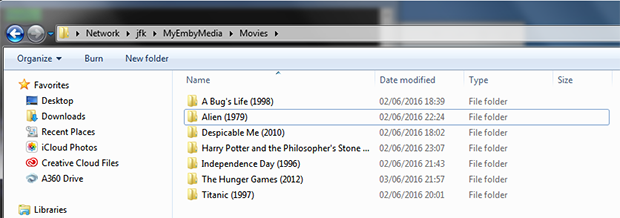
Step 4 : Navigate to the share from your desktop machine and create sub-directories for Movies, TV, etc. (in this case we're doing it from a Windows based machine)

Step 5 : Upload your media to the shared folder.
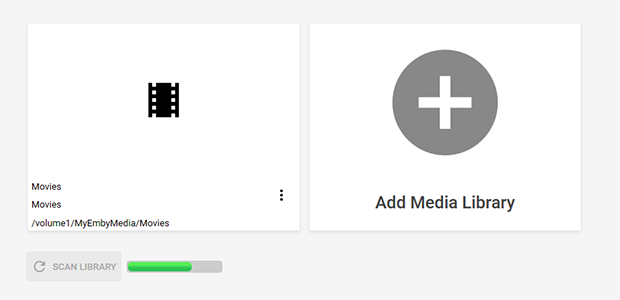
Step 6 : In the Emby server manager navigate to Library -> Add Media Library to configure the media sources. (example below shows adding movies)

Step 7 : Once complete, the media library will be added and you will see Emby make an initial scan.
Step 8 : Configure path substitution to enable clients to direct play media, pay attention to the trailing slashes!

Step 9 : You should now be able to browse your media in Metadata Manager, you can also confirm that path substitution is working as expected.

Step 10 : The end result, your media displayed in the client application and ready to go. (in this case the Web UI, with CoverArt applied)

Emby Home | Latest News | Emby Downloads | Emby Community Forums | © 2019 Emby LLC
- Movie naming
- TV naming
- Music naming
- Audio Book naming
- Book naming
- 3D videos
- Excluding files
- Media stubs
- Strm files
- Subtitles
- Automatic Subtitle Downloads
- Manual Subtitle Downloads
- Theme songs & videos
- Trailers
- Identify
- New Media Date Handling
- Installation
- Connectivity
- Library setup
- Optional Network Paths
- Server settings
- Log Files
- Auto-Organize
- Camera upload
- Channels
- Cinema Intros
- Collections
- Devices
- Hosting settings
- Live TV
- Notifications
- Plugins
- Scheduled tasks
- Transcoding
- Backing up Emby Server
- Emby Server as a Windows Service
- Open Subtitles
- Secure Your Server
- Webhooks
- Users
- Parental controls
- Passwords
- Content access
- Device access
- Emby Connect
- Emby Connect Password Reset
- Live TV (setup)
- Live TV Plugins
- DVR Settings
- Apple TV
- Amazon Alexa
- Amazon Fire TV
- Android Mobile
- Android TV
- Chromecast
- Emby Theater for Windows
- Google Home
- iOS
- Roku
- Web App
- Keyboard and Remote Support
- Emby Premiere
- How do I purchase?
- Membership Options
- Feature Matrix
- How do I get my key?
- Is my Emby Premiere key still valid with Emby 4.0?
- What if I lose my key?
- My Emby Key Says it is Invalid or Missing
- How do I upgrade my membership?
- Is there a limit to Premiere?
- Why is the price different in the App store?
- How do I cancel my membership?
- Multiple servers