-
Notifications
You must be signed in to change notification settings - Fork 5
getting_start_local
The steps below will get you up and running with a local development environment. All of these commands assume you are in the root of your generated project.
- Docker: The installation instructions provide help for first-time users.
- Docker Compose: refer to the official documentation for the installation guide.
For developing with Docker it is recommended to use Linux or Mac OS. On Windows systems there a same problems but it works.
Create a new directory and execute all commands in the new directory.
Download the MapnikTileServer & openstreetmap-carto.
$ git clone git@github.com:OpenHistoricalDataMap/MapnikTileServer.git
$ git clone git@github.com:OpenHistoricalDataMap/openstreetmap-carto.git
Go to the MapnikTileServer and build all images.
$ cd MapnikTileServer
$ docker-compose -f local.yml build
Download the shape files.
$ docker-compose -f local.yml run --rm django /get-shapefiles.shCreate the base mapnik style XML.
$ docker-compose -f local.yml run --rm django python manage.py create_style_xmlStart the postgres server and create the mapnik tables.
$ docker-compose -f local.yml up -d postgres
$ docker-compose -f local.yml run --rm django python manage.py migrate
Create a demo OHDM database.
$ docker-compose -f local.yml up test-databaseConvert the OHDM data into mapnik tables (osm2pgsql).
$ docker-compose -f local.yml run --rm django python manage.py ohdm2mapnikStart celery worker & beat.
$ docker-compose -f local.yml up -d celerybeat celeryworkerStart the django web server.
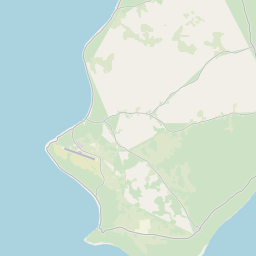
$ docker-compose -f local.yml up djangoNow http://localhost:8000/2020/01/01/0/0/0/tile.png should show the world mapnik as depicted below.

To check if the demo data was set up right, go to http://localhost:8000/YEAR/MONTH/DAY/11/57/1134/tile.png. And change YEAR, MONTH & DAY to your current day. For example the like for the 2020-05-27 will be http://localhost:8000/2020/05/27/11/57/1134/tile.png The result should look like the tile below.
