This scenario introduces how to use the software package to start the perception lidar module, helping developers to get familiar with the Apollo perception module and lay the foundation. You can observe the detection results during the operation of the perception lidar by playing the record data package provided by Apollo.
This document assumes that you have followed Package Installation > Install the Apollo environment management tool to complete step 1 and step 2. Compared with the above three scenarios, the function of the test perception module needs to use the GPU, so the GPU image of the software package must be obtained for test verification .
-
Create a workspace:
mkdir apollo_v8.0 cd apollo_v8.0 -
Enter the following command to enter the container environment in GPU mode:
aem start_gpu -f
-
Enter the following command to enter the container:
aem enter
-
Initialize the workspace:
aem init
-
Enter the following command to download the data package:
wget https://apollo-system.bj.bcebos.com/dataset/6.0_edu/sensor_rgb.tar.xz
-
Create a directory and extract the downloaded installation package into this directory:
sudo mkdir -p ./data/bag/
sudo tar -xzvf sensor_rgb.tar.xz -C ./data/bag/
In the same terminal, enter the following command to install the DreamView program.
buildtool install --legacy dreamview-dev monitor-dev-
In the same terminal, enter the following command to install the perception program.
buildtool install --legacy perception-dev
-
Enter the following commands to install the localization , v2x and transform programs.
buildtool install --legacy localization-dev v2x-dev transform-dev
-
In the same terminal, enter the following command to start Apollo's DreamView program.
aem bootstrap start
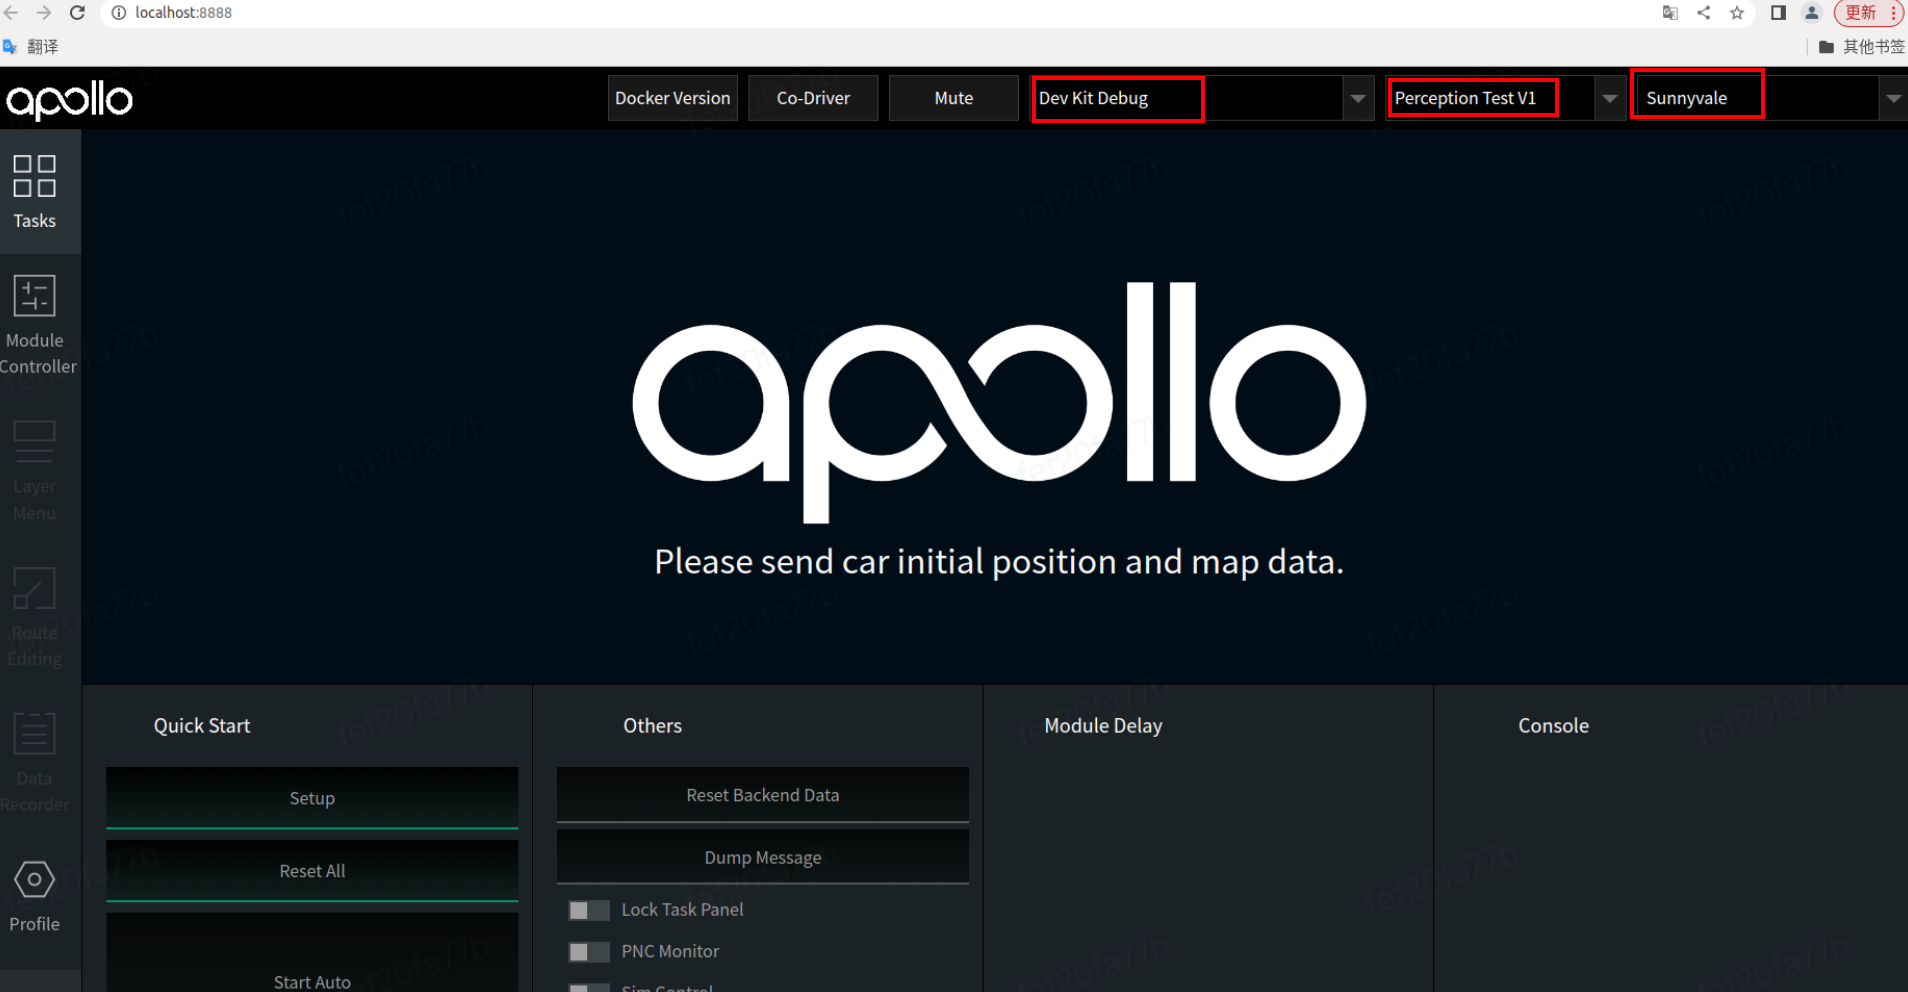
Open the browser and enter the
localhost:8888address, select the model, vehicle configuration, and map.Click the Module Controller module in the status bar on the left side of the page to enable the Transform module:
-
Use the mainboard method to enable the Lidar module:
mainboard -d /apollo/modules/perception/production/dag/dag_streaming_perception_lidar.dag

-
It is necessary to use the -k parameter to mask out the perception channel data contained in the record.
cyber_recorder play -f ./data/bag/sensor_rgb.record -k /perception/vehicle/obstacles /apollo/perception/obstacles /apollo/perception/traffic_light /apollo/prediction
-
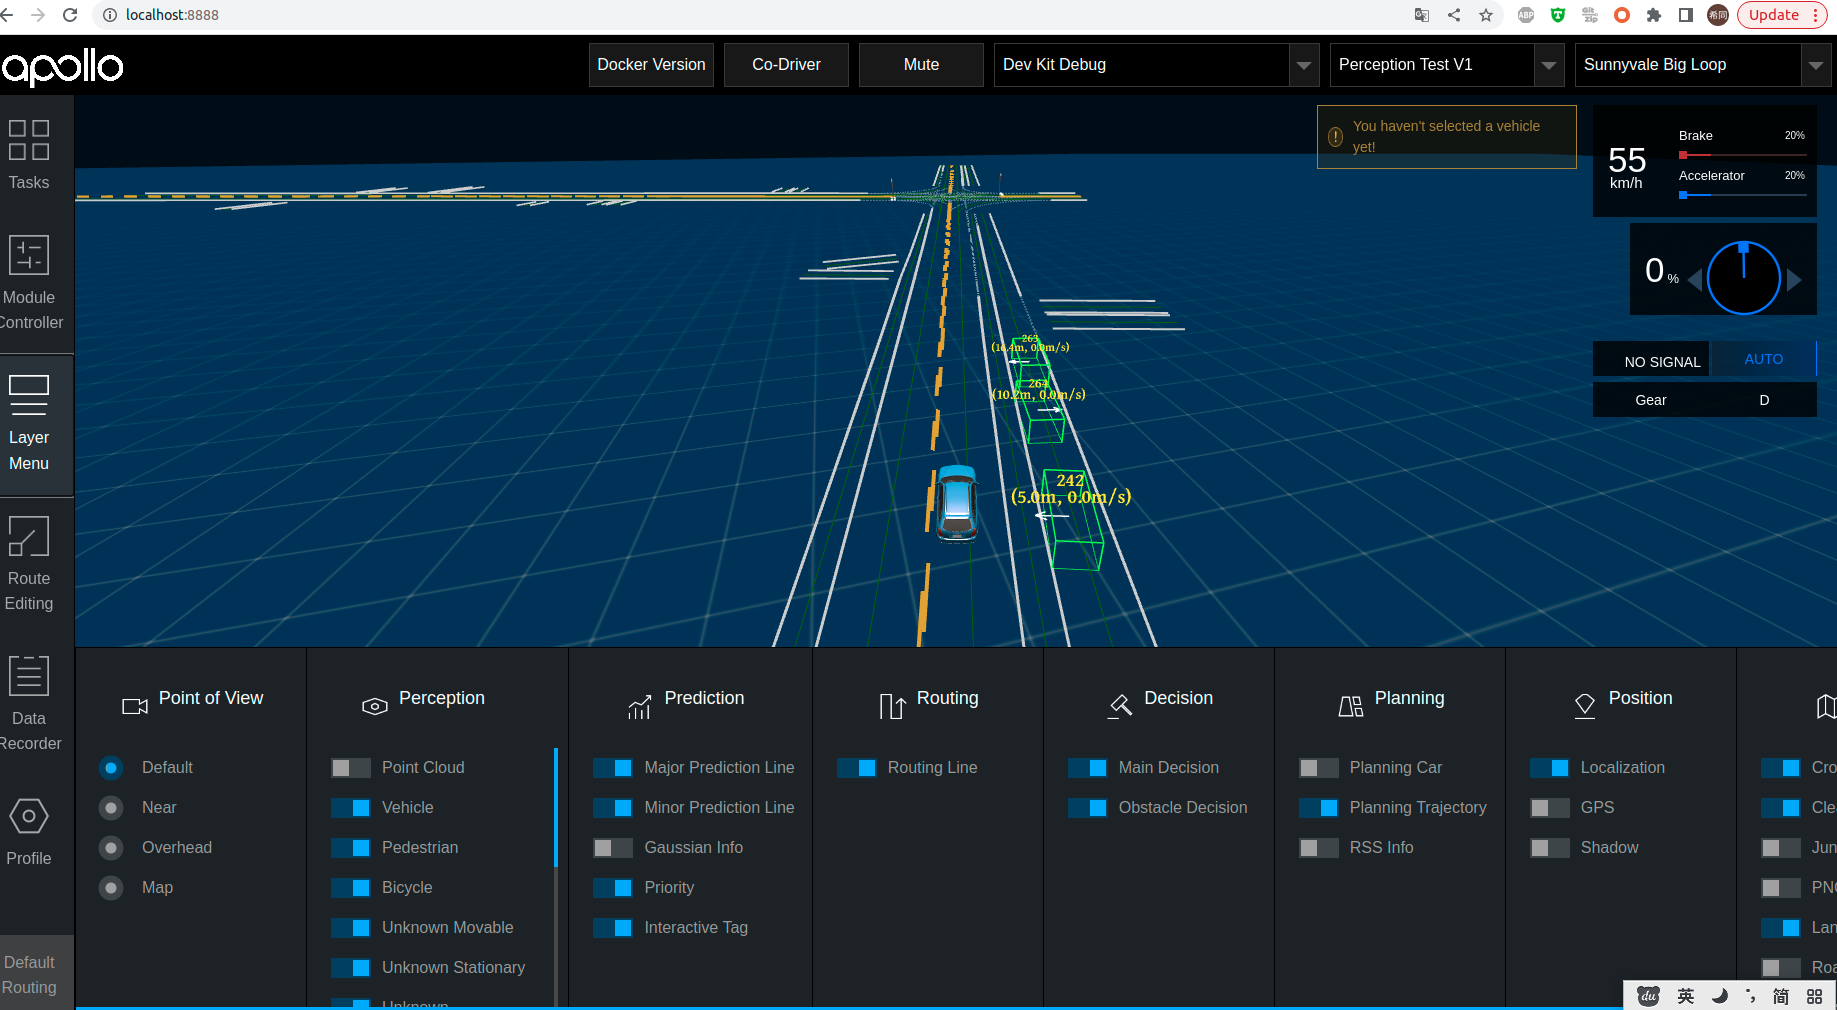
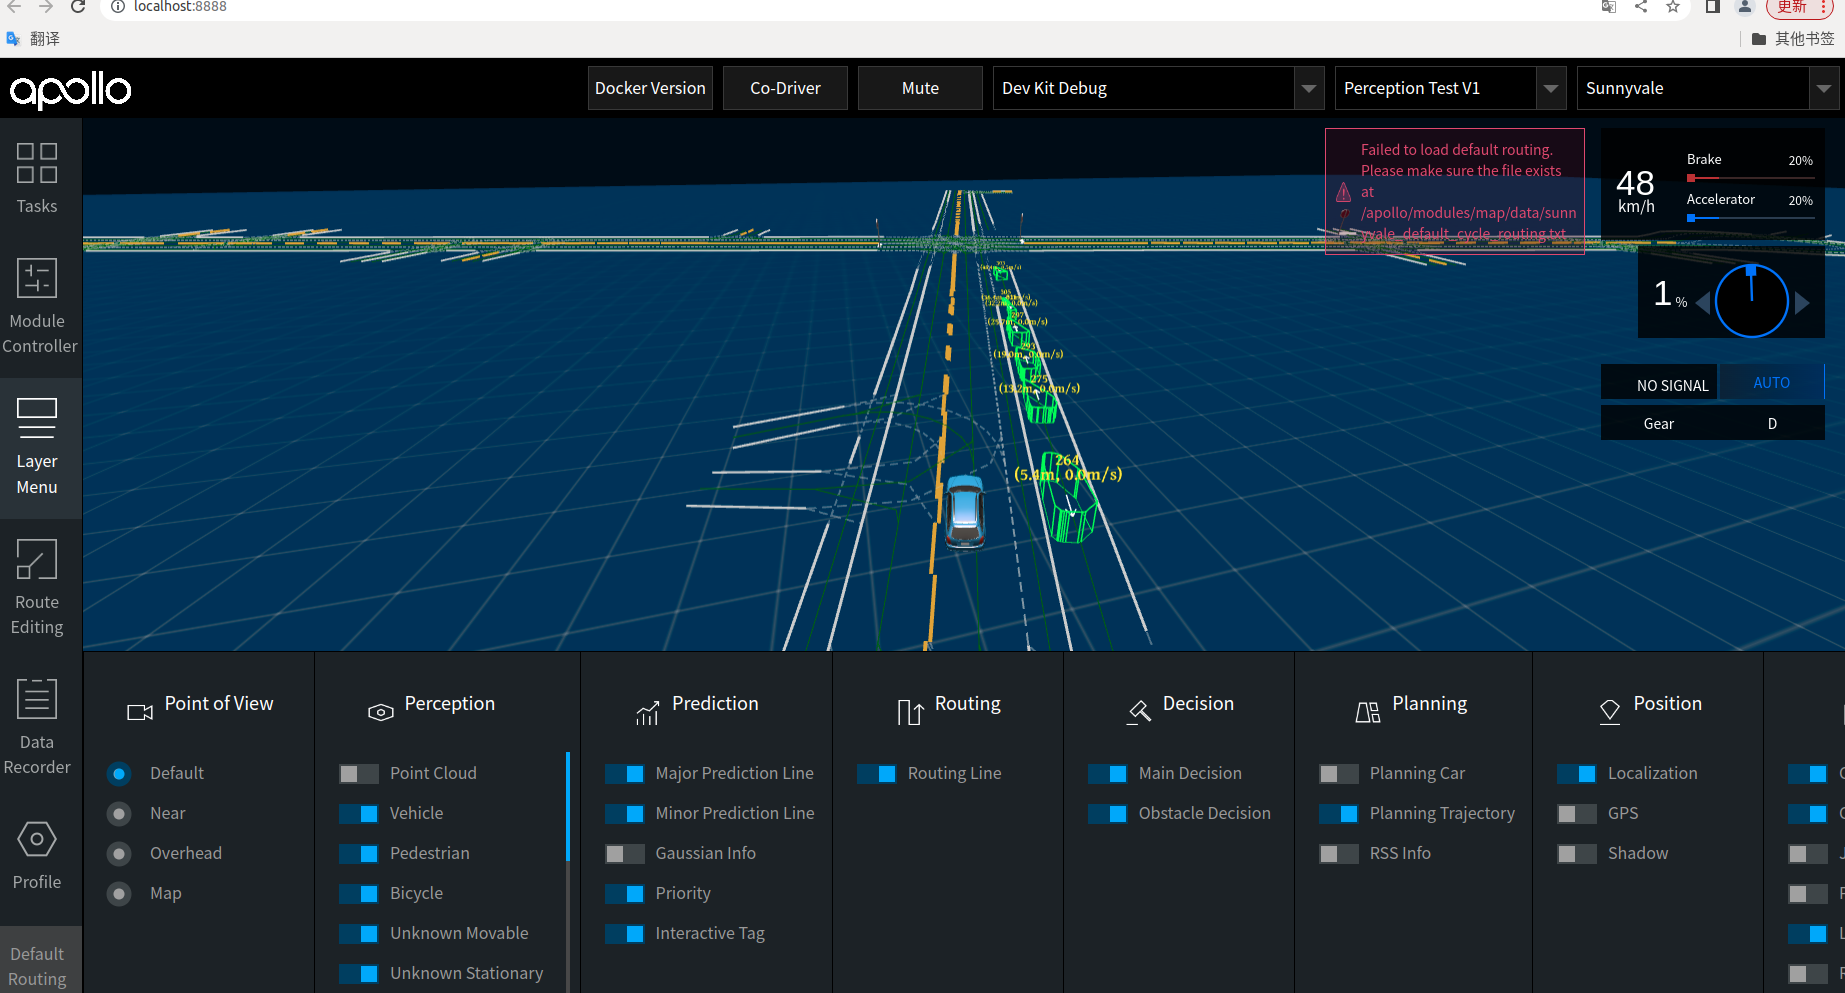
Verify detection results: View detection results in DreamView. Click LayerMenu in the toolbar on the left side of Dreamview, open the Point Cloud in Perception, and select the corresponding channel to view the point cloud data. Check whether the 3D detection results can correspond to the Lidar sensor data.
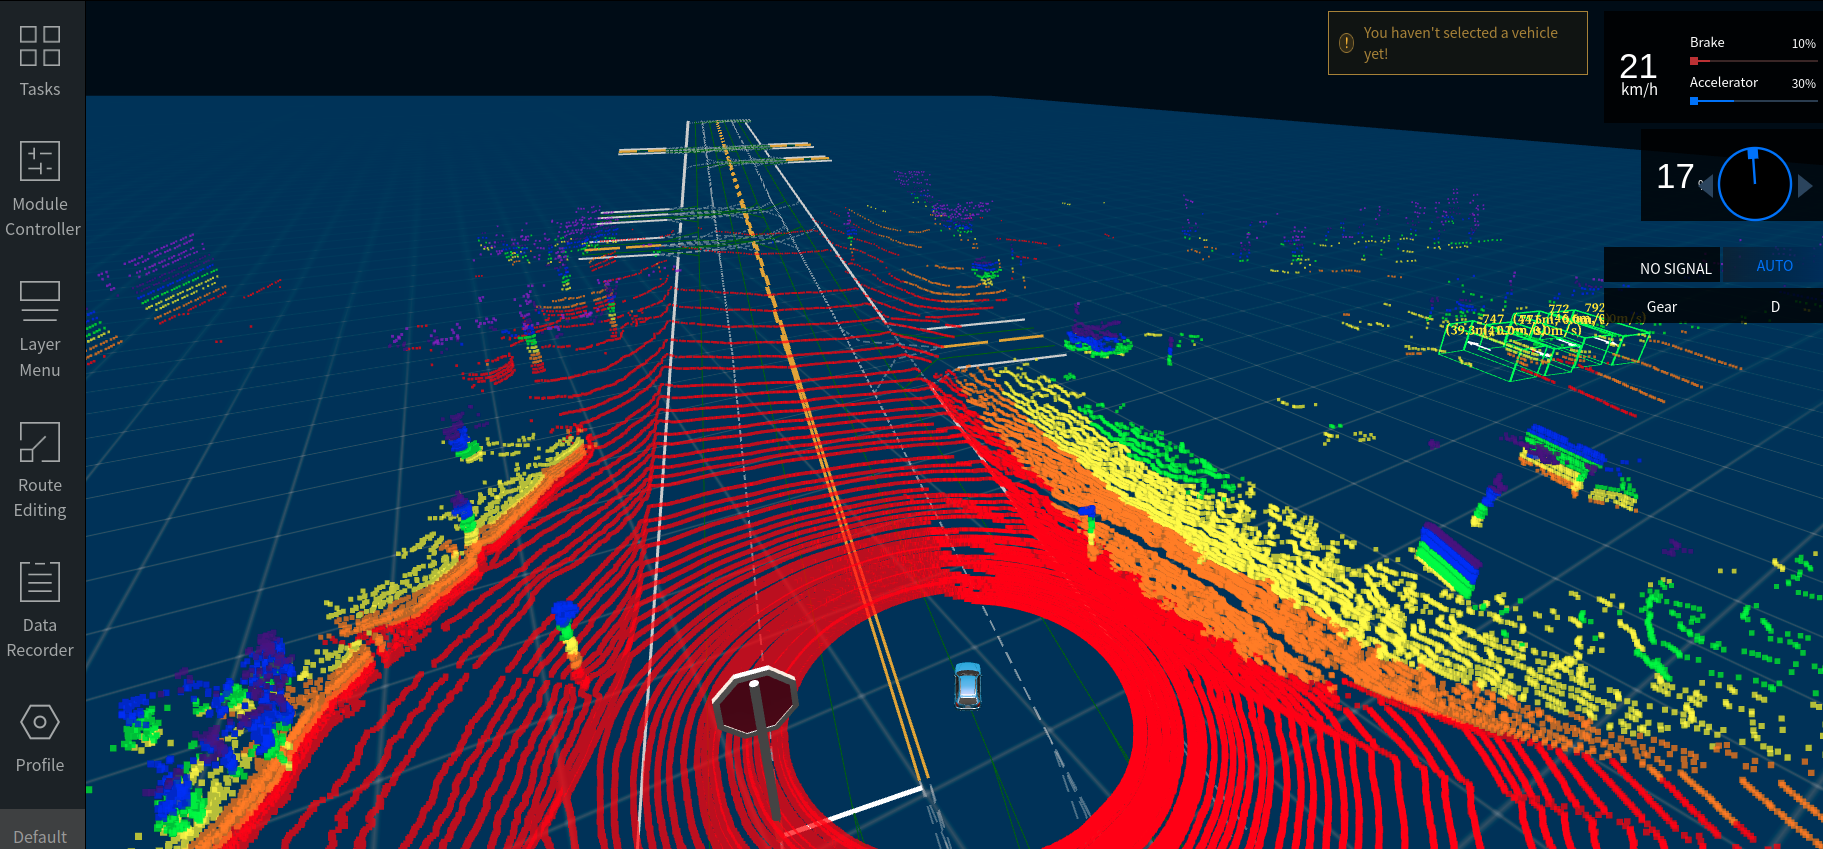
View Results:

The following describes the parameter configuration and replacement process of the MASK_PILLARS_DETECTION, CNN_SEGMENTATION and CENTER_POINT_DETECTION models in the lidar detection process. You can easily replace these configurations in lidar_detection_pipeline.pb.txt to load and run different models.
Modify the configuration file content in lidar_detection_pipeline.pb.txt:
vim /apollo/modules/perception/pipeline/config/lidar_detection_pipeline.pb.txtReplace stage_type with MASK_PILLARS_DETECTION:
stage_type: MASK_PILLARS_DETECTION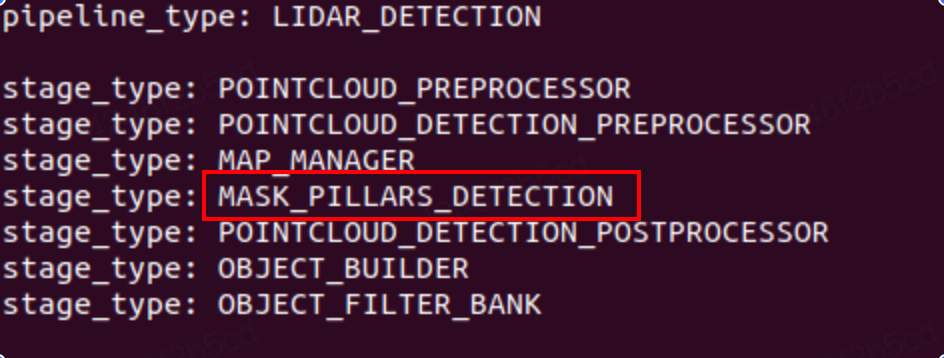
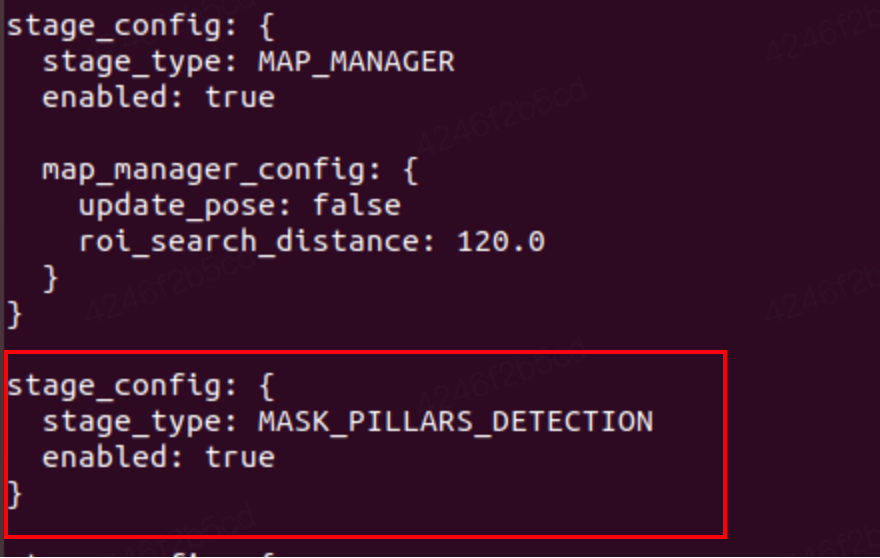
And modify the configuration file information content of the corresponding stage:
stage_config: {
  stage_type: MASK_PILLARS_DETECTION
  enabled: true
}
After saving the modified configuration file, enable the Lidar module and play the record to verify the detection result:

Modify the configuration file content in lidar_detection_pipeline.pb.txt: replace stage_type with CNN_SEGMENTATION, and modify the configuration file content of the corresponding stage accordingly:
stage_type: CNN_SEGMENTATION
stage_config: {
  stage_type: CNN_SEGMENTATION
  enabled: true

  cnnseg_config: {
    sensor_name: "velodyne128"
    param_file: "/apollo/modules/perception/production/data/perception/lidar/models/cnnseg/cnnseg64_param.conf"
    proto_file: "/apollo/modules/perception/production/data/perception/lidar/models/cnnseg/cnnseg64_caffe/deploy.prototxt"
    weight_file: "/apollo/modules/perception/production/data/perception/lidar/models/cnnseg/cnnseg64_caffe/deploy.caffemodel"
    engine_file: "/apollo/modules/perception/production/data/perception/lidar/models/cnnseg/cnnseg64_caffe/engine.conf"
  }
}
Enable the lidar module and play the record verification detection result:
Replace stage_type with CENTER_POINT_DETECTION:
stage_type: CENTER_POINT_DETECTIONModify the configuration file information content of the corresponding stage:
stage_config: {
  stage_type: CENTER_POINT_DETECTION
  enabled: true
}
Enable the lidar module and play the record verification detection result: