RAdvantage May 2022

RAdvantage is where you share your tricks about how to unlock that one specific challenging achievement that took you hours to do.
Examples:
- where you farmed extra-lives
- where's that spot where the boss can't hit you
- or even your super-personal approach to get it done!
And if your strategy is hard to describe with words, no problem! Send us some images or even a video.
Submit your tricks to RANews! Go to {% rauser RANews %} page and then "Send Private Message".
NOTE: Be sure to provide the link to the achievement you're writing about! 😉
| Achievement | Game |
|---|---|
| |
 Professor Layton and the Curious Village Professor Layton and the Curious Village |
- Tip by: {% rauserpic GibusWearingMann %}
The 23-move solution is hard to find on the Internet and apparently only recently discovered. Move the tiles in this order: left, down, right, right, down, left, up, right, up, left, left, down, right, right, up, left, left, down, right, down, right, up, left (for each direction, move the tile that can move in that direction, i.e. to move right, move the tile on the left of the empty space right into it).
| Achievement | Game |
|---|---|
| |
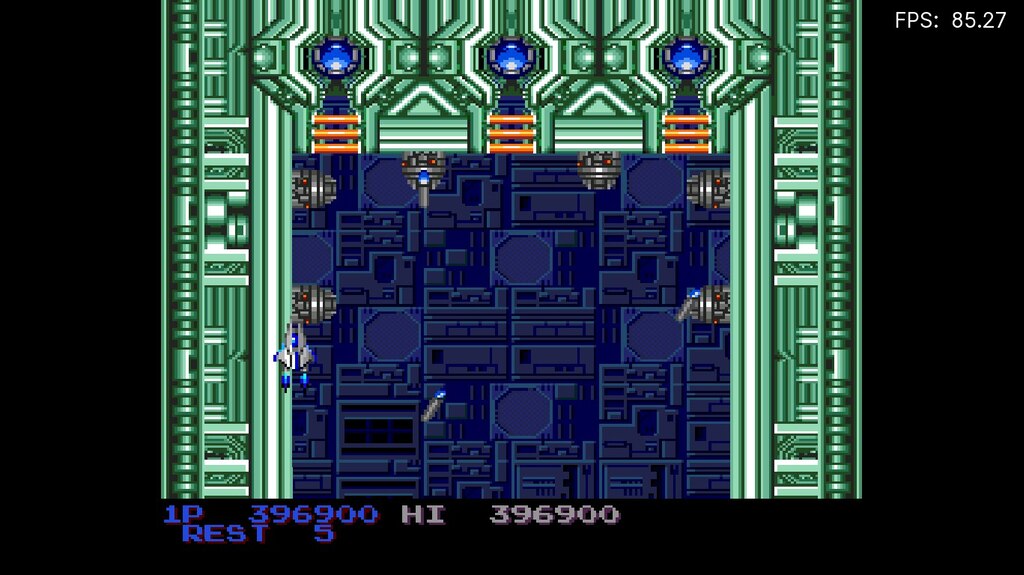
![Mega Man 7 [Subset - Bonus]](https://retroachievements.org/Images/047971.png) Mega Man 7 [Subset - Bonus] Mega Man 7 [Subset - Bonus] |
- Tip by: {% rauserpic donutweegee %}
Required items - Freeze Cracker & Rush Jet
The first 3 Tsuranattori are easy to dodge, however, the 4th one can only spawn after touching the edge of the platform with Tel Tel. So, in order to avoid headache, shoot one Freeze Cracker at it to make despawn. At 1:19, use Rush Jet and go All the way up to 100% avoid taking damage. Do the same at 2:04, except you need to jump before Rush takes damage.
You can shoot at both Tel Tels in the stage and the achievement will still trigger since they weren't technically killed.
| Achievement | Game |
|---|---|
| |
 StarCraft 64 StarCraft 64 |
- Tip by: {% rauserpic Mendil %}
Intro
Kerrigan faces three fleets teamed up to fight against her treachery. She deals with Arcturus Mengsk of the Terran Dominion, Artanis of the Protoss, and General DuGalle of the United Earth Directorate. With the disappearance of Duran and most of Kerrigan's broods still back in Char, you will deal with this on your own.
This is the last mission on the zerg campaign and it's quite difficult. You have to face against 3 opponents, the two terrans which are DuGalle and Mengsk, and one protoss, Artanis. Start with defeating Dugalle's Base (White Terran), then go for Mengsk (Red Terran) and then lastly Artanis (Blue Protoss).
Avoid going for mass Ultralisk, (its too costly on both minerals and gas) and not that suited for this mission.
Defensive Tactics
Start building drones (aka workers) on both the Hatcheries and send two per mineral patch, and 4 on vespene extractor. Then build a defense by building six Sunken Colonies at each entrance to your base, (north, southwest and southeast) and Overlords (also get the fast overlord upgrade later on) for detection. The next thing you need is Hydralisk with Burrow tech upgraded, train 12 of them for each entrance, and borrow them there. When Mengsk sends his ground force including two Siege Tanks, or the Protoss sends a Reaver, unborrow the Hydralisks and quickly kill them off. Build a Queen's Nest and scout with a Queen, using Parasite ability on an enemy unit.
Offensive Tactics
Begin to attack DuGalle's base (White Terran) from the northeast with mass Hydralisk, (you should also have 3 Hatcheries so that you can replace lost Hydralisks faster). Some mass zerglings waves can be a good way to soften DuGalle's defense. Build a second Evolution Chamber for faster upgrades, start upgrade Missile Attack (gives +1 attack dmg for Hydralisk) and Carapace (+1 armor) simultaneously. Also upgrade Hydralisk Speed and Range on the Hydralisk Den building. The first attack wont be enough, but don't worry and keep producing new Hydralisks, eventually he will surrender and turn neutral. Build more (expansion) bases that can mine minerals and gas at DuGalle's base. There is also free expansions Northwest and Southeast from your main base.
Now focus on attacking Mengsk's base (Red Terran) with Guardians (at least morph 12 Mutalisks to Guardians, and try get a total of 36 of them later on), which you can get from building the Spire. You need to upgrade it to a Greater Spire and build a second Spire for faster upgrades of Flyer Attacks and Flyer Carapace. Start attack his base from the northwest. Also have some Mutalisk + Devourers to protect Guardians from his Wraiths. And have a few Overlords in the mix for detection.
Alternatively, go mass Hydralisk with Dark Swarm (upgrade) from Defilers. You need to build a Defiler Mound to get them. Put down a Dark Swarm (it cost 100 energy to cast so use them wisely.) on top of the Hydralisk group, while they are going "Attack Move". This makes them invulnerable to damage and is very good against Terran units, because most of them have ranged attacks except Firebat. Dark Swarm against Protoss is less effective due to Zealots.
Artanis' base (Blue Protoss) is hardest to destroy due to the Carriers, High Templars and Photon Cannons. To counter the Carriers, train a couple of Scourges (a strong anti-air unit) and focus them on the Carriers while ignoring the Interceptors. Attack with mass Hydralisk and a few Guardians to take out Photon Cannons from the southwest. This will require many tries to bring down the base so keep building new Hydralisks, Guardians and Scourges.
This mission requires a lot of endurance and patience.
Good luck!
| Achievement | Game |
|---|---|
| |
 Lufia & The Fortress of Doom Lufia & The Fortress of Doom |
- Tip by: {% rauserpic DM4S %}
The best way to get a Might Sword is going to the last island where the town Epro is. Buy 99 Holy Water (scares away monsters) and equip yourself with a Monster Ring. Because of the Monster Ring, Holy Water will become Foul Water (attracts monsters). Be sure to unequip any Clear Silk equipment as this equipment will void the transform from Holy Water to Foul Water. Once ready, go all the way to the left side of this island. Start running around and try to get Lufia stoned by a Rock Golem. You do this because she is very squishy and your hero, Aguro and Jerrin are not, so it will save time because you don't have to heal her so much (also, she will still gain experience this way). Once she is stoned, start using the Holy Water so you will be attacked at every step you take and start farming Hydras for the Might Sword.
| Achievement | Game |
|---|---|
| |
 Superman Superman |
- Tip by: {% rauserpic VenHur %}
To earn this achievement, you need to get at least a decent understanding of the game's map layout. Try practicing your run to memorize most of the rooms before attempting this achievement.
I definitely recommend finding a map of the game's layout online if you ever get stuck, but at least I can still tell you about my fastest route.
As soon as you get out of the phone booth, after changing to Superman, grab all three bridge parts in their respective rooms before the yellow helicopter takes off with one of them, and carry them, one by one, to the broken bridge area as fast as possible.
Don't worry about finding the bridge parts. As long as the yellow helicopter doesn't takes off with one of them, they are always stationed in the same rooms in every playthrough.
Afterwards, search around for the thugs, and Lex Luthor around the map.
This is where the subway shortcuts can come in handy, as some of the thugs, and even Lex Luthor, can sometimes hide in one of the four subway systems.
Once you get the thug of your choice, quickly head to the red subway by flying upwards, and head to the left of the screen. You should now be in the purple room with the jail door.
Quickly dispose all of the thugs and Lex Luthor in there.
By now, you should be a minute or so into the game. If you are not in the purple room with the jail door, head to the nearest door to the subway, and head to the purple jail room via the red subway to the left of the screen.
If you are already on that screen, go down, and head to the left to the starting room with the phone booth.
Quickly change back into Clark Kent, and head for the Daily Planet by taking the yellow subway, and heading to the left of that screen.
Go inside of the Daily Planet and you should now finish the entire game in record time.
Oh yeah, and one last thing. Avoid the Kryptonite satellites as much as possible, you will lose the ability of flight, and unless if you luck out on finding Lois Lane (the lady in blueish green), you will lose a lot of time to get the achievement.
| Achievement | Game |
|---|---|
| |
 Paperboy Paperboy |
- Tip by: {% rauserpic Aeliana %}
100k points over a 7-day week boils down to an average of 14.3k points per day. You'll want to ensure you are "on track" to that goal at the end of each day; ~15k on Monday, ~30k on Tuesday, ~45k on Wednesday, and so forth. You may consider restarting the run if you find yourself significantly behind the curve early into the week, as the difficulty ramps up in the latter half of the week and it will only become harder and harder to close the gap.
Your first priority is "not dying 4head." You have 7 days to complete, each day is progressively harder than the day before it in terms of the number of obstacles/enemies the game throws at you, and you have 4 lives to do it in (there is no mechanism to earn more than the 4 lives you start with). A dead paperboy can't earn points! Like most old-school games, this will require reps to anticipate appearance of various obstacles/enemies and development of muscle memory on how to dodge them in different combinations; "practice makes perfect" in this regard, and don't be afraid to slow down if it means avoiding a death.
In general, your goal is to stay on the sidewalk and dodge left (toward the houses) rather than right (onto the street) as required; cars on the street are unpredictable and hit hard and fast, you are farther from the houses so it is harder to be accurate with your throws, and you are stuck down there until you come across a driveway via which you can climb back onto the sidewalk. Avoid this as much as possible, unless it is the only means to prevent the loss of a life.
Your second priority is maximizing scoring; a successful throw into a mailbox is worth 700 points, a successful throw onto a doorstep is worth 300 points, and everything else (windows, trees, trash cans, tombstones, lawn ornaments...) are also worth 300 points.
You will want to hit mailboxes (and retain subscribers, so that there are mailboxes to hit) as much as possible; like "not dying 4head," this will also require reps and development of muscle memory in order to find your preferred speed/angle of throwing to each of the different houses' mailboxes. The arc of a throw is tied to the paperboy's speed, and you can speed up or slow down in order to make micro-adjustments to a paper's trajectory while it is mid-air.
When riding by non-subscriber houses, your goal is as much destruction of the aforementioned windows, trees, trash cans, tombstones, lawn ornaments et. al. as possible, while remaining cognizant of the number of papers in your possession such that you don't blow through them all and find yourself empty-handed in front of a subscriber's mailbox. I approach this by, at the start of each day, taking simple mental notes on "where" and "how many" subscribers I have throughout the level, i.e. "5 subscribers on the first block, 2 of which are back-to-back at the very end of it." That way, as tempting as it may be to unload the entire bag of papers on a non-subscriber house's windows, I remember to keep at least 2 on-hand (preferably 3 or even 4, because you don't know when/where the next paper refill will appear) to deliver to those 2 subscribers' mailboxes at the end of the first block.
Last but not least, the Training Course at the end of each day rewards speed (100 points per second remaining on the clock - you should be able to earn ~2.5k points fairly consistently) and the "hoops" are worth 200 points whereas the "squares" are worth 100 points; prioritize hoops, and spam throws as much as possible here because you will get a full refill of your papers after each "jump" in the course. Good luck!
| Achievements | Game |
|---|---|
|
|
 Salamander Salamander |
- Tip by: {% rauserpic ModelZGolden %}
For Pacifist achievements I, II, III, and V:
In Salamander, you can defeat the boss just by staying in the fight for a while, this will make him die, and so you get the achievement. Now, how can you facilitate this?
Salamander has a "Rank" system in which the better you are and the more power-ups you have, the harder the game becomes. Since you're not going to fight the Boss, you can make it easier by simply dribbling the power-ups. Get at least 2 speed power-ups, though, as they will make the bosses much easier to dodge. This will make the level a little more difficult for the small amount of offensive power, so if you are willing to lose 1 life at the last checkpoint, it will make it easier, because you will only have to pass a small part of the level.
For Pacifist IV: in this achievement, you can't attack the boss once and neither can the cannons that are in his fight. Thankfully, there is a safe spot in the left corner, almost touching the wall and almost touching the first cannon. If you have fewer speed power-ups, you will fit into the wall more easily.
| Achievement | Game |
|---|---|
| |
 Persona 3 Portable Persona 3 Portable |
- Tip by: {% rauserpic FBernkastelKues %}
Prerequisites: General knowledge of the fight Calculator Void Naginata/sword with +100 HP Armor of Light with Resist Magic (High) Shoes of Light Divine Pillar A strong persona to get you through Monad quickly and easily (preferably with Victory Cry). A persona (doesn't matter which) with all 3 Auto abilities. Messiah with High Counter, Sharp Student, Magic Skill Up, Ice Amp, Resist Slash, Resist Strike, Resist Pierce, and Niflheim. Chi You with Mind Charge, Null Poison, Unshaken Will, Sharp Student, Resist Strike, Resist Fire, High Counter, and Enduring Soul 80+ Homunculuses At least 20 of the following: Infinity, Best Friends, Beads, and Somas Armageddon
Because we don't have much HP to work with (529 at level 98) we're going to want to get some more, fusing Legion will give your weapon the +100 HP ability which makes the fight much more manageable.
Armor/Shoes of Light can be gotten from Messiah at level 98. You'll want to fuse him the second you reach level 90 and register him in the compendium right before he reaches level 98 to easily get multiple items from him. In order to get him with Niflheim do the following fusions and reset until Niflheim gets passed along:
Skadi + Yomotsu Shikome = Titania Titania + Samael = Succubus Succubus + Yomotsu Shikome = Loa Loa + Alice + Mot + Samael + Pale Rider + Ghoul = Thanatos Thanatos + Orpheus = Messiah
The rest of the skills can be gotten from skill cards.
Divine Pillar can be gotten from Alilat at level 90.
The skill items can be gotten from the shop with the gemstones that drop from random enemies in the Tartarus from block 2 onwards.
The Battle Itself: Start the battle with your tri-auto skill persona and switch to Chi You immediately to use a Mind Charge. Once he attacks he'll be in his fire phase and take double damage from ice attacks so switch to Messiah and hit him with a Niflheim.
Now he'll be in his ice phase and absorb ice attacks so heal this turn. In his elec phase it should be safe to attack if you're on normal but if you're on Maniac you need to keep your HP topped off.
In his wind phase you're going to need to switch to Chi You because his next phase is light which Messiah reflects, that means you're getting hit with a Megidolaon that will kill you 20x over. Needless to say, that's bad, so switch to Chi You and sacrifice the Homunculus. This part is a little RNG heavy on Maniac mode, if he's rude and uses physical attacks you'll have to heal, but if not you're free to use a Mind Charge. On Normal mode you don't need to heal as often so it's not as RNG-reliant. It's not really worth it to attack yet so just keep your HP up. After the Status Effect phase you'll need to use Infinity and then use Best Friends if you're at high HP. They'll loop around and be back to their fire phase so hit them with a Niflheim. That's generally how the fight goes. You're going to want to keep an eye on their HP and when they get down to around 10,000 HP you can either play the RNG game and try to skip the 2nd half of the fight with a high-counter on their second attack or just get them down to less than 10,000 HP normally in which case they'll heal up and make you do it all over again but this time they won't heal until they're below 9000 HP letting you get them down to Armageddon-killing range normally. However you do it once they have less than 10,000 HP use an Armageddon to win the fight.
| Achievement | Game |
|---|---|
| |
 Magical Taruruuto-kun Magical Taruruuto-kun |
- Tip by: {% rauserpic roukanumachi %}
At first, I thought this was quite a bit more difficult than doing any of the other bosses damageless. However, before facing Raibar in stage 6, you will get the chance to obtain two items from Mimora. Both times, she will offer the clock item, which will stop time. During the boss, you will be able to stop time twice, allowing you to get plenty of free damage in on the boss, and have a much easier time earning this achievement.
| Achievement | Game |
|---|---|
| |
 Bleach: Heat the Soul 2 Bleach: Heat the Soul 2 |
- Tip by: {% rauserpic MatheusBrazuca85 %}
While adding more characters to the second game with most of the same stuff from the first game (excluding a new game mode), this time attack is the hardest achievement from the seven Bleach: Heat The Soul games on PSP.
Chad is slow, he doesn't have a good combo or even a decent basic attack. His skillshot is powerful, but extremely slow to activate, and the special attack mostly probably will miss and leave you stunned since it sucks, so my hint for his time attack is the following:
- Always have beaten Ichimaru, Reiji and Hitsuguya before the sixth round, because if any of these three characters are your last or semi-final opponent just reset the run because you need a miracle to beat them.
- To save time for the 10 minutes Chad achievement, try to spam special attacks in the first three rounds, since the AI is dumb until round 4.
- On the fourth round onward, if your opponent is either Rukia, Uryu, Orihime or Byakuya, play safe, defend yourself from their skillshots, and either try to predict when they're attacking and attack before with your own skillshot or try to pick them off-guard after a shot to attack on distance with his B + Foward or close with a special.
- If the opponent is either Ichigo, Ichigo², Urahara or Renji, get close and then step back on sequence to bait an attack from them, then defend, wait until the end of their combo, and use your own special attack to win.
- Ichimaru is somewhat close to Renji (excluding his annoying special) and Hitsugaya is broken, so just give up if you're not against him on the start of the run.
- This achievement can take a lot of time, so be warned.