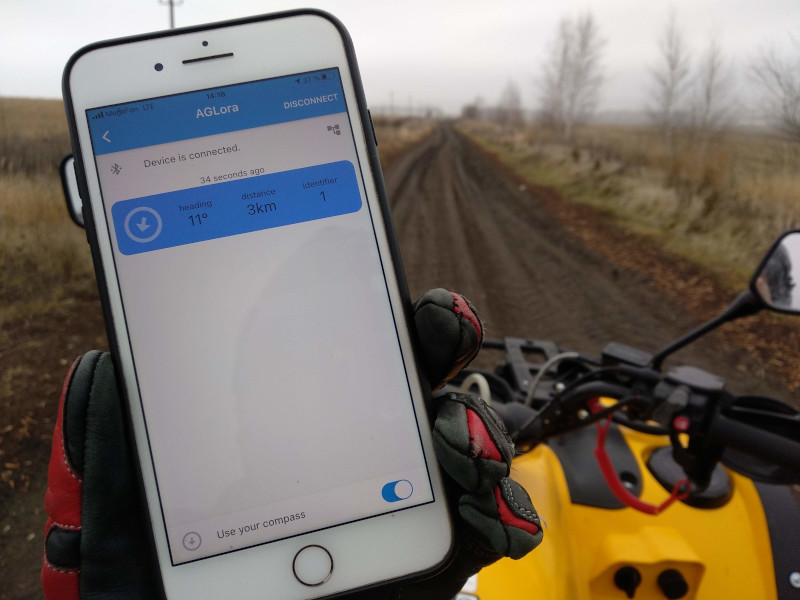
Project AGLoRa - easy opensource LoRa GPS tracker. Created by Eugeny Shlyagin (shlyagin@gmail.com)
Click to open video.
AGLoRa is an acronym for "Arduino GPS LoRa". LoRa (from "long range") is a proprietary low-power wide-area network modulation technique. https://en.wikipedia.org/wiki/LoRa
AGLoRa is a simple open-source satellite tracking system for hiking, sailing, pet finding, and other outdoor activities. All components are widely available to buy online (aliexpress etc.).
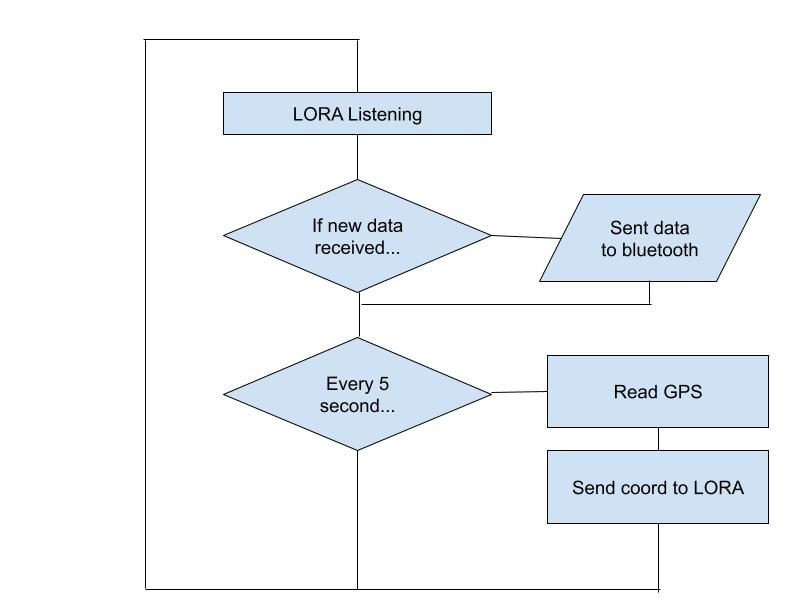
AGLoRa receives the GPS coordinates from other trackers (via LoRa) and immediately transmits them to the phone app. By default the tracker sends its coordinates via LoRa every 10 seconds, when its GPS data is valid.
We are going to test E32-E433T30D. It is a wireless transceiver module, operating at 433 MHz based on original RFIC SX1278 from SEMTECH. Aglora broadcasts coordinates to other trackers.
- Arduino Nano or Arduino UNO (ATMEGA328P, not ATmega168)
- LoRa Module (EBYTE E220-900T22D (868 MHz), E433T30D (433 MHz))
- GPS Module (Generic)
- AT-09 (HM-10) Bluetooth Low Energy Module
- iOS or Android device
- Arduino IDE
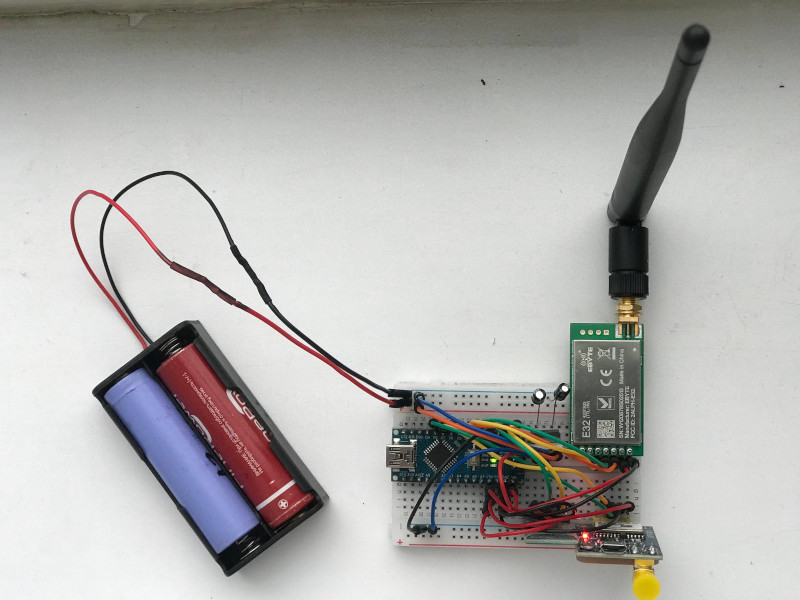
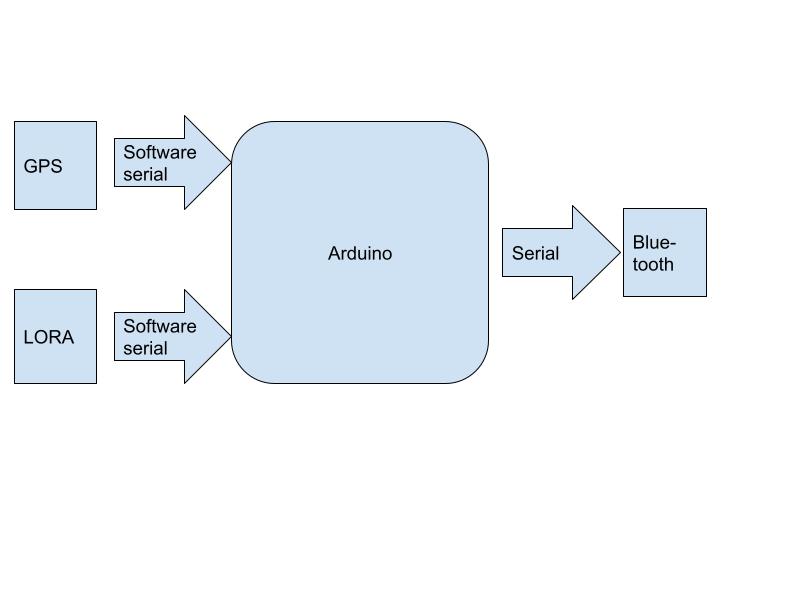
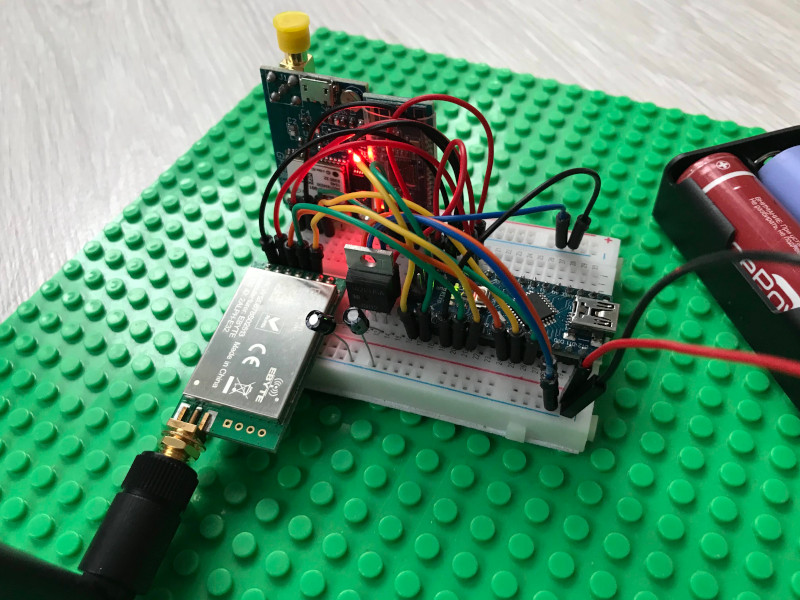
Let’s Start Building. The circuit is so simple, there are a few connections to be made.
Also you can read step-by-step instructions in AGLoRa Wiki
Arduino Pins	 	  LoRa Pins
Pin 2		——>		TX
Pin 3		——>		RX
Pin 4		——>		M0
Pin 5		——>		M1
Pin 6		——>		AX
5V		——>		VCC
GND		——>		GND
Arduino Pins	 	  GPS Pins
Pin 7		——>		TX
Pin 8		——>		RX
5V		——>		VCC
GND		——>		GND
Arduino Pins		  Bluetooth Pins
RX (Pin 0)	——>		TX
TX (Pin 1)	——>		RX
5V		——>		VCC
GND		——>		GND
Add a 5V stabilizer for battery power (like LM7805).
Three steps:
-
Download or copy the Sketch from here: https://github.com/Udj13/AGLoRa/blob/main/AGLoRa-tracker.ino Just one file! Easy!
-
Change the “MY_NAME” setting. Сheck the debug mode is off.
char MY_NAME[NAME_LENGTH] = "Morty";
#define DEBUG_MODE false
- Install "EByte LoRa E220 by Renzo Mischianty" library and "TinyGPSPlus by Mikal Hart" library from Arduino IDE library manager ("Tools" -> "Manage Libraries")
Ready! Upload a Sketch to an Arduino.
NOTES:
Value “NAME_LENGTH” must be same for all your devices
Remove Bluetooth module Tx-Rx connection before uploading the program!
I strongly recommend using the PlatformIO and the full project (https://github.com/Udj13/AGLoRa-full)! This way you will have the latest version of the code!
- Source code is available for free on github: https://github.com/Udj13/AGLoRa-client-flutter
- You can download the iOs app from Apple App Store: https://apps.apple.com/ru/app/aglora/id1600250635
- You can download the Android app APK from here: https://github.com/Udj13/AGLoRa-client-flutter/releases/tag/AGLoRa2.0
Permissions:
-
Bluetooth permission required to connect to your AGLoRa device
-
Location permission is required to calculate distance between AGLoRa devices. Without this permission the app will only show the coordinates.
- Install application on your device
- Turn on the AGLoRa trackers. When the GPS data is correct, the built-in LED will turn on.
- Scan for available devices
- Select your Bluetooth module from the List (“AGLoRa”)
- Wait to receive data from other trackers
If the modules do not work, then you can run test sketch from "hardware-tests" folder.
Just follow the white rabbit the instructions in the code.
GPS_PACKET_INTERVAL - how often the tracker will be send data
USE_EEPROM_MEMORY - set "false" to use SRAM memory, "true" to use EEPROM
SRAM_STORAGE_SIZE - if you are using SRAM you can set the size of memory. In this case check the free memory in Arduino IDE.
If you need you can add any sensors and then see its values in the application. To do this, just edit the section with the main data structure and the section with the protocol. Note that all software versions must be the same for all trackers. Example:
struct DATA {
  char id[NAME_LENGTH];  // name

  float lat;  // coordinates
  float lon;
  unsigned char sat;

  unsigned char year;  // the Year minus 2000
  unsigned char month;
  unsigned char day;

  unsigned char hour;
  unsigned char minute;
  unsigned char second;

  // Add more data fields here if you need
  // ...
  // unsigned char speed;
  // unsigned char battery;
  // unsigned char sensor1;
  // ...
};
void sendPackageToBluetooth(DATA *package){
....
// Sensors and additional data
Serial.print(F("&sat="));    //record separator
Serial.print(package->sat);  // satellites  1 byte

// Add more data here if you need ...
// Serial.print("&speed=");       // data's name in app
// Serial.print(package->speed);   // value

// Serial.print("&batt=");
// Serial.print(package->battery);

// Serial.print("&alienSensor=");
// Serial.print(package->sensor1);
AGLoRa Wiki: https://github.com/Udj13/AGLoRa/wiki
Full project (C++, PlatformIO): https://github.com/Udj13/AGLoRa-full/
Mobile client (Dart, Flutter): https://github.com/Udj13/AGLoRa-client-flutter
Description in Russian: https://bitlite.ru/aglora-lora-gps-tracker/

