Note
This article is based on information as of November 2024. Please check the official website for the latest updates.
With the ability to export GA4 data to BigQuery, utilizing BigQuery has become much more accessible. However, it's not uncommon for other datasets, such as membership information, to reside outside BigQuery.
This time, I needed to access BigQuery from Databricks, so I’ve summarized the steps and code for the process.
- Create a service account in the BigQuery project that contains the GA4 tables.
- Generate a service account key.
- Add the key to a Notebook file.
- Execute a Python file to create a temporary view (
temp_bigquery_ga4_tables). - Run SQL queries.
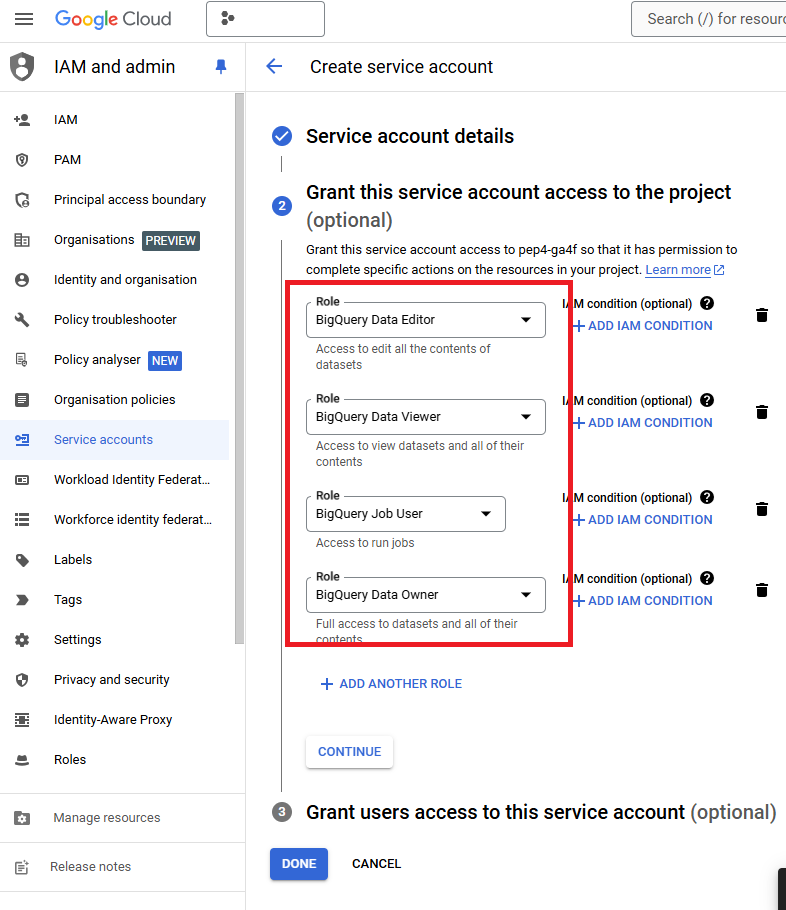
Since there are plenty of tutorials on creating a service account, the steps are omitted here. Note that permissions can be assigned to the service account, such as:
- BigQuery Data Owner
- BigQuery Data Editor
- BigQuery Data Viewer
- BigQuery Job User
While these permissions should cover most use cases, ensure they are adjusted as needed to avoid granting excessive access.
-
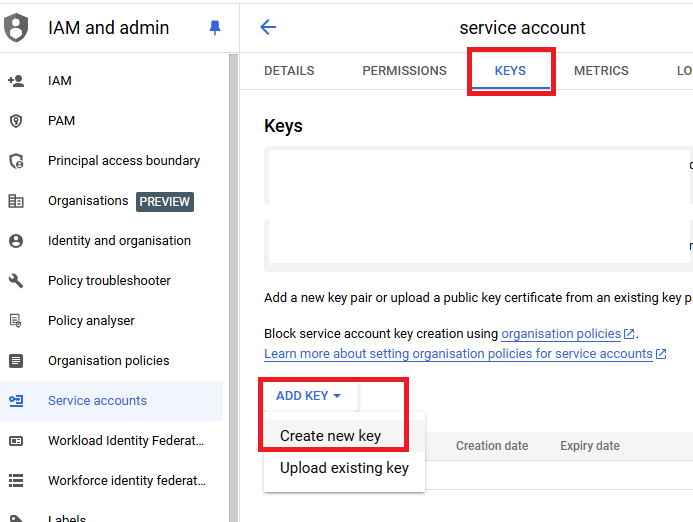
After creating the service account, click on the account from the service account list.
-
Click the "Keys" tab at the top, then select "Add Key" and choose "Create new key."
-
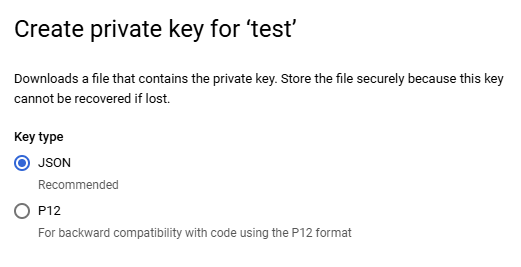
Select "JSON" as the key type and generate the key.
-
Download the JSON file after creation.
The generated key (JSON file) should look something like this:
{
  "type": "service_account",
  "project_id": "project_id",
  "private_key_id": "xxxxxxxxxxxxxxxxxxxxxxxxxxxxxxx",
  "private_key": "-----BEGIN PRIVATE KEY-----xxxxxxxxxxxxxxxxxxx\n-----END PRIVATE KEY-----\n",
  "client_email": "databricks@project_id.iam.gserviceaccount.com",
  "client_id": "1234567890",
  "auth_uri": "https://accounts.google.com/o/oauth2/auth",
  "token_uri": "https://oauth2.googleapis.com/token",
  "auth_provider_x509_cert_url": "https://www.googleapis.com/oauth2/v1/certs",
  "client_x509_cert_url": "https://www.googleapis.com/robot/v1/metadata/x509/databricks%40project_id.iam.gserviceaccount.com",
  "universe_domain": "googleapis.com"
}
This concludes the steps in BigQuery.
From here, we proceed to Databricks. This is not an ideal method, but for the sake of demonstration, we will embed the service account key directly in the Python code within a Databricks Notebook.
See main.ipynb
The code itself is straightforward, but note the handling of timestamps. In BigQuery, you can convert event_timestamp to a DATETIME type using DATETIME(TIMESTAMP_MICROS(event_timestamp), 'Asia/Tokyo'). However, if you import it into Databricks as a DATETIME, the dates can be inaccurate. Instead, convert event_timestamp directly in Databricks using:
spark_df = spark_df.withColumn("event_datetime", F.to_utc_timestamp(F.from_unixtime(F.col("event_timestamp") / 1000000, 'yyyy-MM-dd HH:mm:ss'), 'UTC'))
Running the above Python Notebook will create the temp_bigquery_ga4_tables view.
You can run SQL queries within the same Notebook to extract data from the GA4 table in BigQuery.
%sql
SELECT *
FROM temp_bigquery_ga4_tables
However, note that Databricks does not support BigQuery's STRUCT and ARRAY types. Columns such as event_params, user_property, and items may require special handling for extraction. For example, to extract ecommerce.transaction_id, use:
get_json_object(to_json(ecommerce), '$.transaction_id') AS transaction_id


