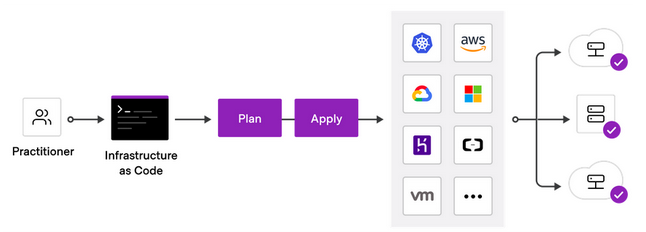
HashiCorp Terraform is an Infrastructure as Code (IaC) tool that lets you define cloud resources in human-readable configuration files that you can version, reuse, and share.
Want to create exactly the same EC2 instance in 3 environments (dev, test, prod), or in 15 different regions? You can't really do it manually using the web console...
Using Terraform, it's as simple as configure the below code in a .tf file:
resource "aws_instance" "app_server" {
  ami           = "ami-0123456789abcdef0"
  instance_type = "t2.micro"

  tags = {
    Name = "some-instance"
    Terraform = "true"
  }
}
And perform the terraform apply command to provision the infrastructure in AWS.
- Automated Provisioning: Automates the creation and configuration of infrastructure, less human errors.
- Consistent Environments: Ensures uniformity across development, testing, and production environments.
- Repeatable Process: Allows for the replication of infrastructure setups, or reproduced infrastructure in a case of Disaster Recovery (RD).
- Versioned and Documented: IaC scripts are version-controlled, enabling teams to track changes over time and roll back to previous states if needed.
https://learn.hashicorp.com/tutorials/terraform/install-cli?in=terraform/aws-get-started
Before we start, let's see how to interact with the AWS API from your local machine using the AWS CLI (Command Line Interface). This will allow you to manage AWS resources and services programmatically, in addition to using the AWS Management Console.
-
Follow AWS's official docs to install AWS cli on your Ubuntu machine.
-
Once installed, verify your installation by
aws --version, and make sureaws-cliversion2.*was installed! -
You will then need to create credentials in the IAM service and configure them on your local machine before running CLI commands to interact with AWS services.
- Use your AWS account ID or account alias, your IAM username, and your password to sign in to the IAM console.
- In the navigation bar on the upper right, choose your username, and then choose Security credentials.
- In the Access keys section, choose Create access key. If you already have two access keys, this button is deactivated and you must delete an access key before you can create a new one.
- On the Access key best practices & alternatives page, choose your use case to learn about additional options which can help you avoid creating a long-term access key. If you determine that your use case still requires an access key, choose Other and then choose Next.
- Set a description tag value for the access key. This adds a tag key-value pair to your IAM user. This can help you identify and rotate access keys later. The tag key is set to the access key id. The tag value is set to the access key description that you specify. When you are finished, choose Create access key.
- On the Retrieve access keys page, choose either Show to reveal the value of your user's secret access key, or Download .csv file. This is your only opportunity to save your secret access key. After you've saved your secret access key in a secure location, choose Done.
-
Open a new terminal session on your local machine, and type
aws configure. Enter the access key id and the access secret key. You can also provide the default region you are working on, and the default output format (json). -
Test your credentials by executing
aws sts get-caller-identity. This command returns details about your AWS user, which indicats a successful communication with API cli.
Note
It's recommended to create a dedicated GitHub repo for this module.
Terraform creates and manages resources on cloud platforms through their APIs.
Providers are plugins that allow Terraform to interact with different platforms. Providers enable Terraform to create, read, update, and delete infrastructure resources in the platform you work with. You can find all publicly available providers that Terraform can work with on the Terraform Registry, including AWS, Azure, GCP, Kubernetes, Helm, GitHub, Splunk, DataDog, and many more.
The set of files used to describe infrastructure in Terraform is known as a Terraform configuration files (.tf).
Let's provision a single AWS EC2 instance:
terraform {
  required_providers {
    aws = {
      source  = "hashicorp/aws"
      version = ">=5.55"
    }
  }

  required_version = ">= 1.7.0"
}

provider "aws" {
  region  = "<aws-region>"
  profile = "default"  # change in case you want to work with another AWS account profile
}

resource "aws_instance" "netflix_app" {
  ami           = "<ec2-ami>"
  instance_type = "t2.micro"

  tags = {
    Name = "<instance-name>"
  }
}
- The
terraformblock contains Terraform settings, including the required providers used to provision infrastructure. In this example, the aws provider's source is defined ashashicorp/aws. - The
providerblock configures the specified provider, in this caseaws. - The
resourceblocks to define a physical or a virtual component in your infrastructure. In this example, the block declares a resource of typeaws_instance(EC2 instance) with a local namenetflix_app. The resource local name is used internally by Terraform, but has no meaning in AWS.
-
In your repo, create a file called
main.tf, copy the above code and change it as follows:<aws-region-code>is the region in which you want to deploy your infrastructure.<ec2-ami>is the AMI you want to provision (choose an Ubuntu AMI according to your region).<instance-name>is the name of you EC2 instance.
-
The directory containing your
.tffile is known as Terraform workspace dir. When first working with your TF workspace, you have to initialize it by:terraform init.Initializing a configuration directory downloads and installs the providers defined in the configuration, which in this case is the
awsprovider. -
Run the
terraform planto create an execution plan, which lets you preview the changes that Terraform plans to make to your infrastructure. -
Apply the configuration now with the
terraform applycommand.
When you applied your configuration, Terraform wrote data into a file called terraform.tfstate.
Terraform stores the IDs and properties of the resources it manages in this file, so that it can update or destroy those resources going forward.
The Terraform state file is the only way Terraform can track which resources it manages, and often contains sensitive information, so you must store your state file securely, outside your version control.
Note
- You can make sure your configuration is syntactically valid and internally consistent by using the
terraform validatecommand. - Inspect the current state using
terraform show. - To list all resources in the state file, perform
terraform state list.
The terraform destroy command terminates resources managed by your Terraform project.
You can destroy specific resource by terraform destroy -target RESOURCE_TYPE.NAME.
- Add another tag to the
aws_instance.netflix_appresource. Plan and apply. Can you see the updated EC2 in the AWS web console? What does in-place update mean? - Change the instance type (e.g. from
t2.microtot2.nano). Plan and apply. Is terraform destroying your instance in order to perform the update? - Update the
amiof your instance. How many resources are going to be added or destroyed? Why?
Use the user_data argument to configure a bash script to be executed when the instance is launching.
resource "aws_instance" "netflix_app" {
  ...
+ user_data = file("./deploy.sh")
  ...
}
Create a bash script named deploy.sh.
The bash script should install Docker on the machine, and run the Netflix stack in the background.
Make sure you are able to visit the app after applying your configurations.
Note: Updates to the user_data argument for an existing instance will trigger a stop/start of the instance by default.