Note: Tried of creating this doc as a demo with all process/steps in creating this project
Terraform is an infrastructure as code tool that lets you define both cloud and on-prem resources in human-readable configuration files that you can version, reuse, and share.
- First you have the terraform code.
- Then we have Terraform Plan phase. The terraform plan command creates an execution plan, which lets you preview the changes that Terraform plans to make to your infrastructure.
- Terraform Apply phase executes the actions proposed in a Terraform plan.
- And everything gets deployed over the CSP, here Azure.
Terraform Cloud is a managed service offering by HashiCorp that eliminates the need for unnecessary tooling and documentation for practitioners, teams, and organizations to use Terraform in production. It allows you to provision infrastructure in a remote environment that is optimized for the Terraform workflow.
In this project, we will be creating Azure Infrastructure using Terraform and will be deploying it over to Azure using Terraform Cloud.
We are creating a VM and resources related to it.
# Configure Azure Provider
terraform {
  required_providers {
     azurerm = {
      source = "hashicorp/azurerm"
      version = ">= 3.59.0"
    }
  }
  required_version = ">= 0.14.9"
}

provider "azurerm" {
  features {}

  skip_provider_registration = "true"
}

variable "prefix" {
  default = "terraform"
}

resource "azurerm_resource_group" "rg" {
  name     = "${var.prefix}-ResourceGroup"
  location = "Central India"
}

resource "azurerm_virtual_network" "vnet" {
  name                = "${var.prefix}-VNet"
  address_space       = ["10.0.0.0/16"]
  location            = azurerm_resource_group.rg.location
  resource_group_name = azurerm_resource_group.rg.name
}

resource "azurerm_subnet" "internal" {
  name                 = "${var.prefix}-internal"
  resource_group_name  = azurerm_resource_group.rg.name
  virtual_network_name = azurerm_virtual_network.vnet.name
  address_prefixes     = ["10.0.2.0/24"]
}

resource "azurerm_network_interface" "nic" {
  name                = "${var.prefix}-NIC"
  location            = azurerm_resource_group.rg.location
  resource_group_name = azurerm_resource_group.rg.name

  ip_configuration {
    name                          = "tfconfiguration1"
    subnet_id                     = azurerm_subnet.internal.id
    private_ip_address_allocation = "Dynamic"
  }
}

resource "azurerm_virtual_machine" "vm" {
  name                  = "${var.prefix}-vm"
  location              = azurerm_resource_group.rg.location
  resource_group_name   = azurerm_resource_group.rg.name
  network_interface_ids = [azurerm_network_interface.nic.id]
  vm_size               = "Standard_DS1_v2"

  storage_image_reference {
    publisher = "Canonical"
    offer     = "UbuntuServer"
    sku       = "16.04-LTS"
    version   = "latest"
  }
  storage_os_disk {
    name              = "myosdisk1"
    caching           = "ReadWrite"
    create_option     = "FromImage"
    managed_disk_type = "Standard_LRS"
  }
  os_profile {
    computer_name  = "hostname"
    admin_username = "tfadmin"
    admin_password = "Password1234!"
  }
  os_profile_linux_config {
    disable_password_authentication = false
  }
  tags = {
    environment = "staging"
  }
}
- Create Terraform Cloud Account - Terraform Cloud
- Create a Project in Terraform Cloud:
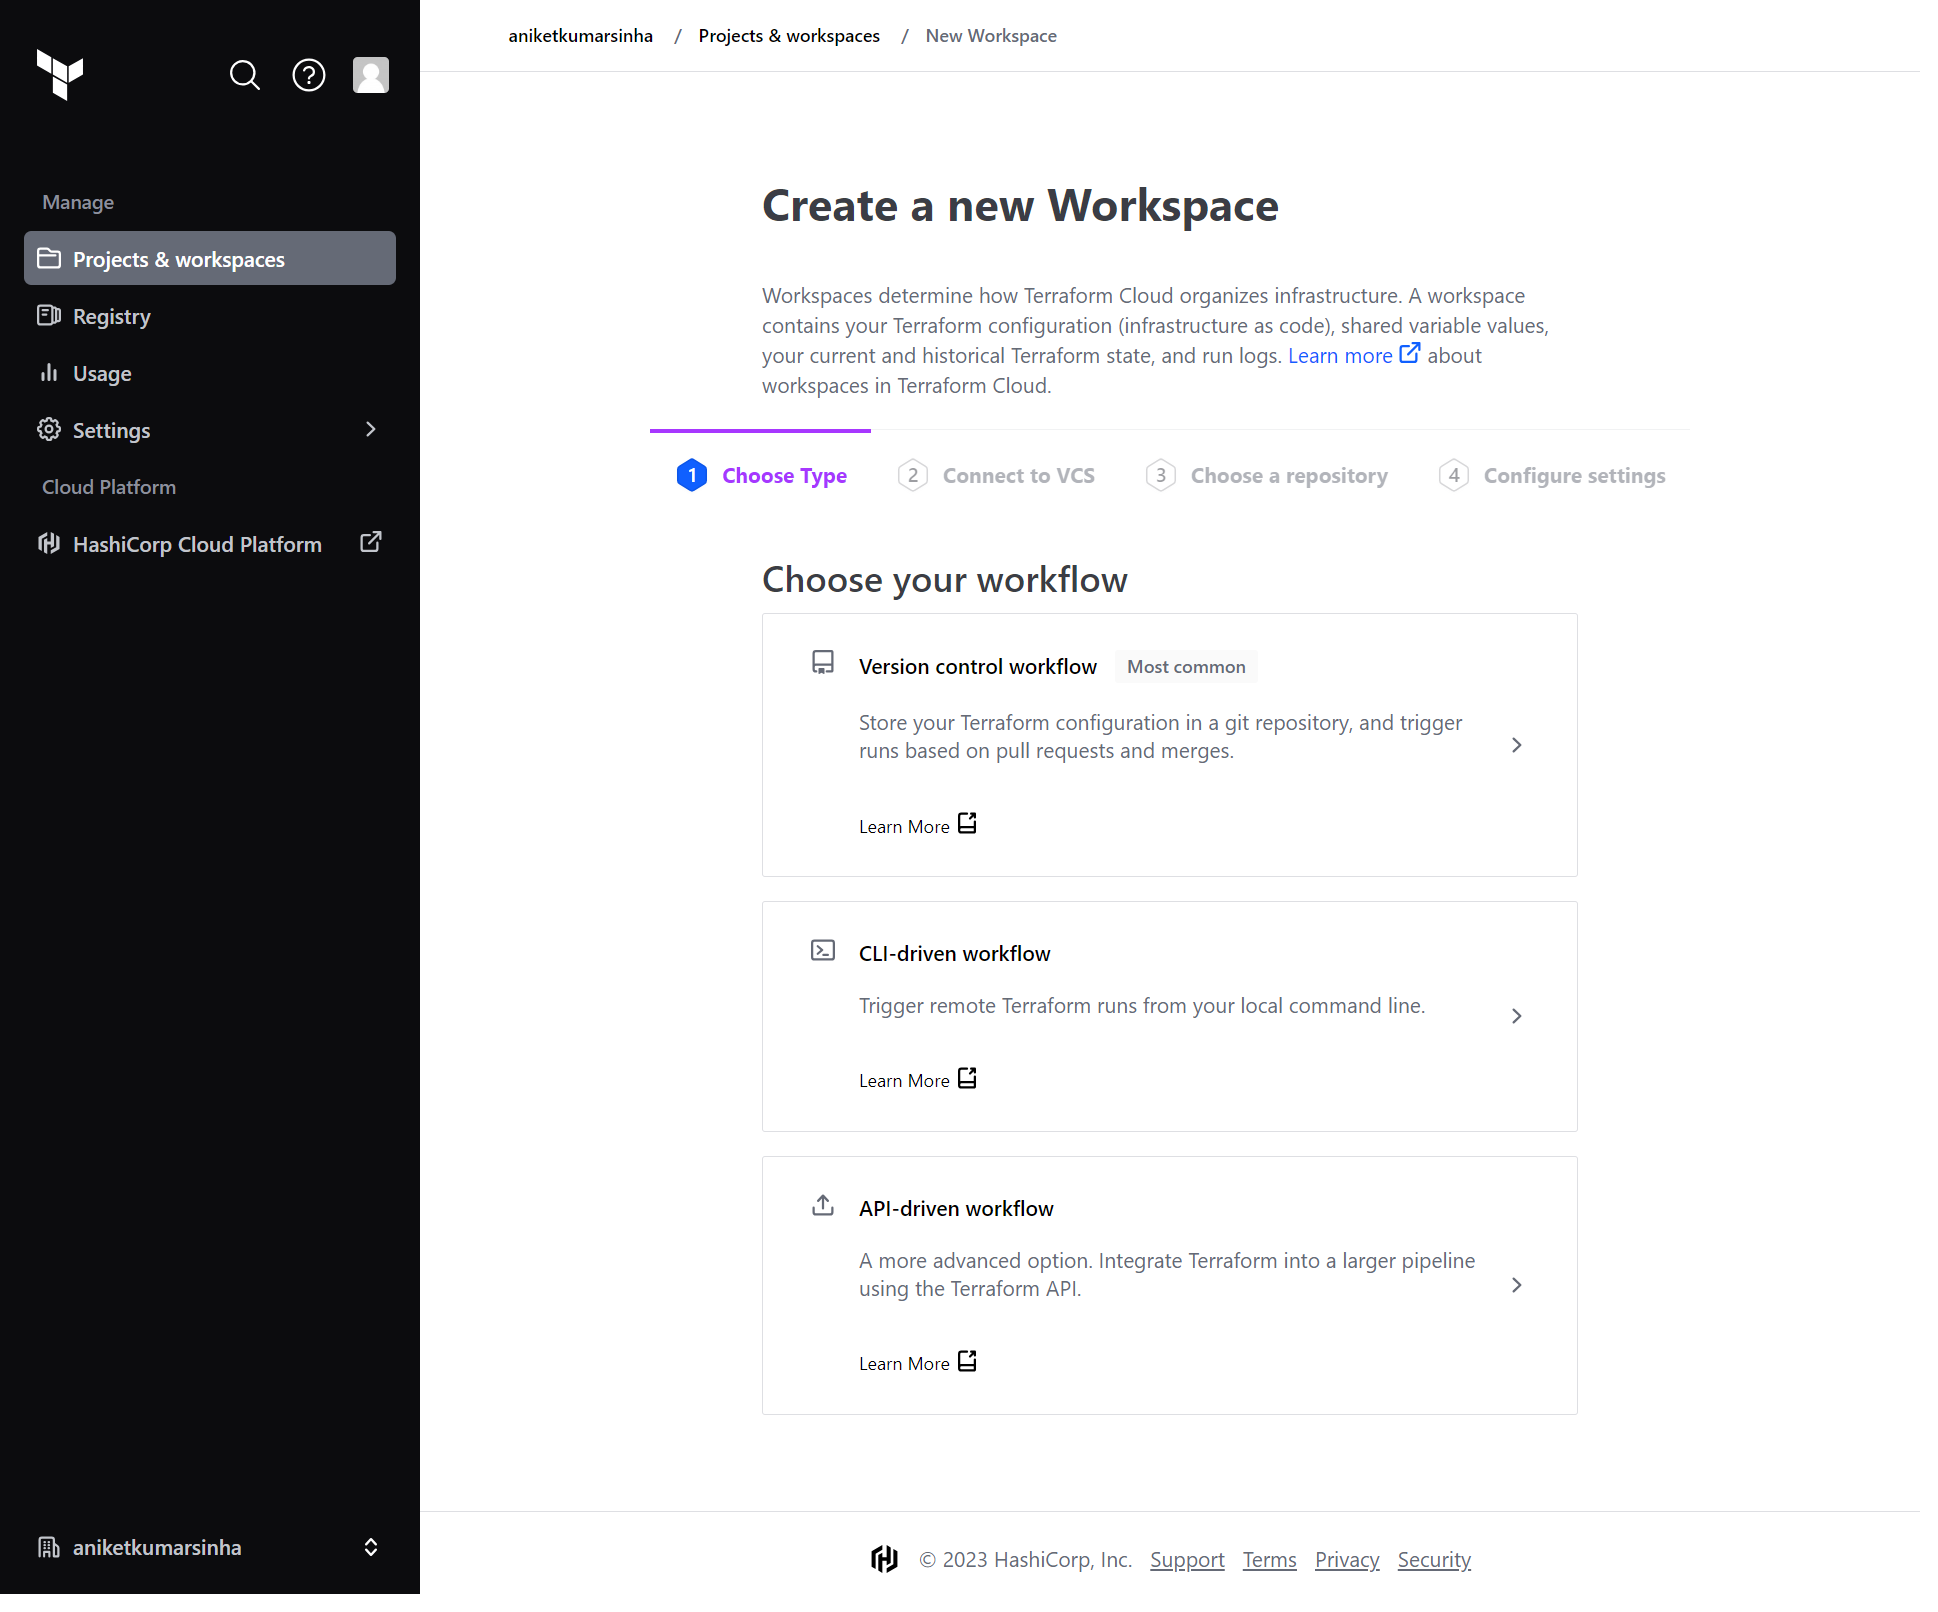
- Create a Workspace.
- Choose Version control workflow
- Connect to a version control provider
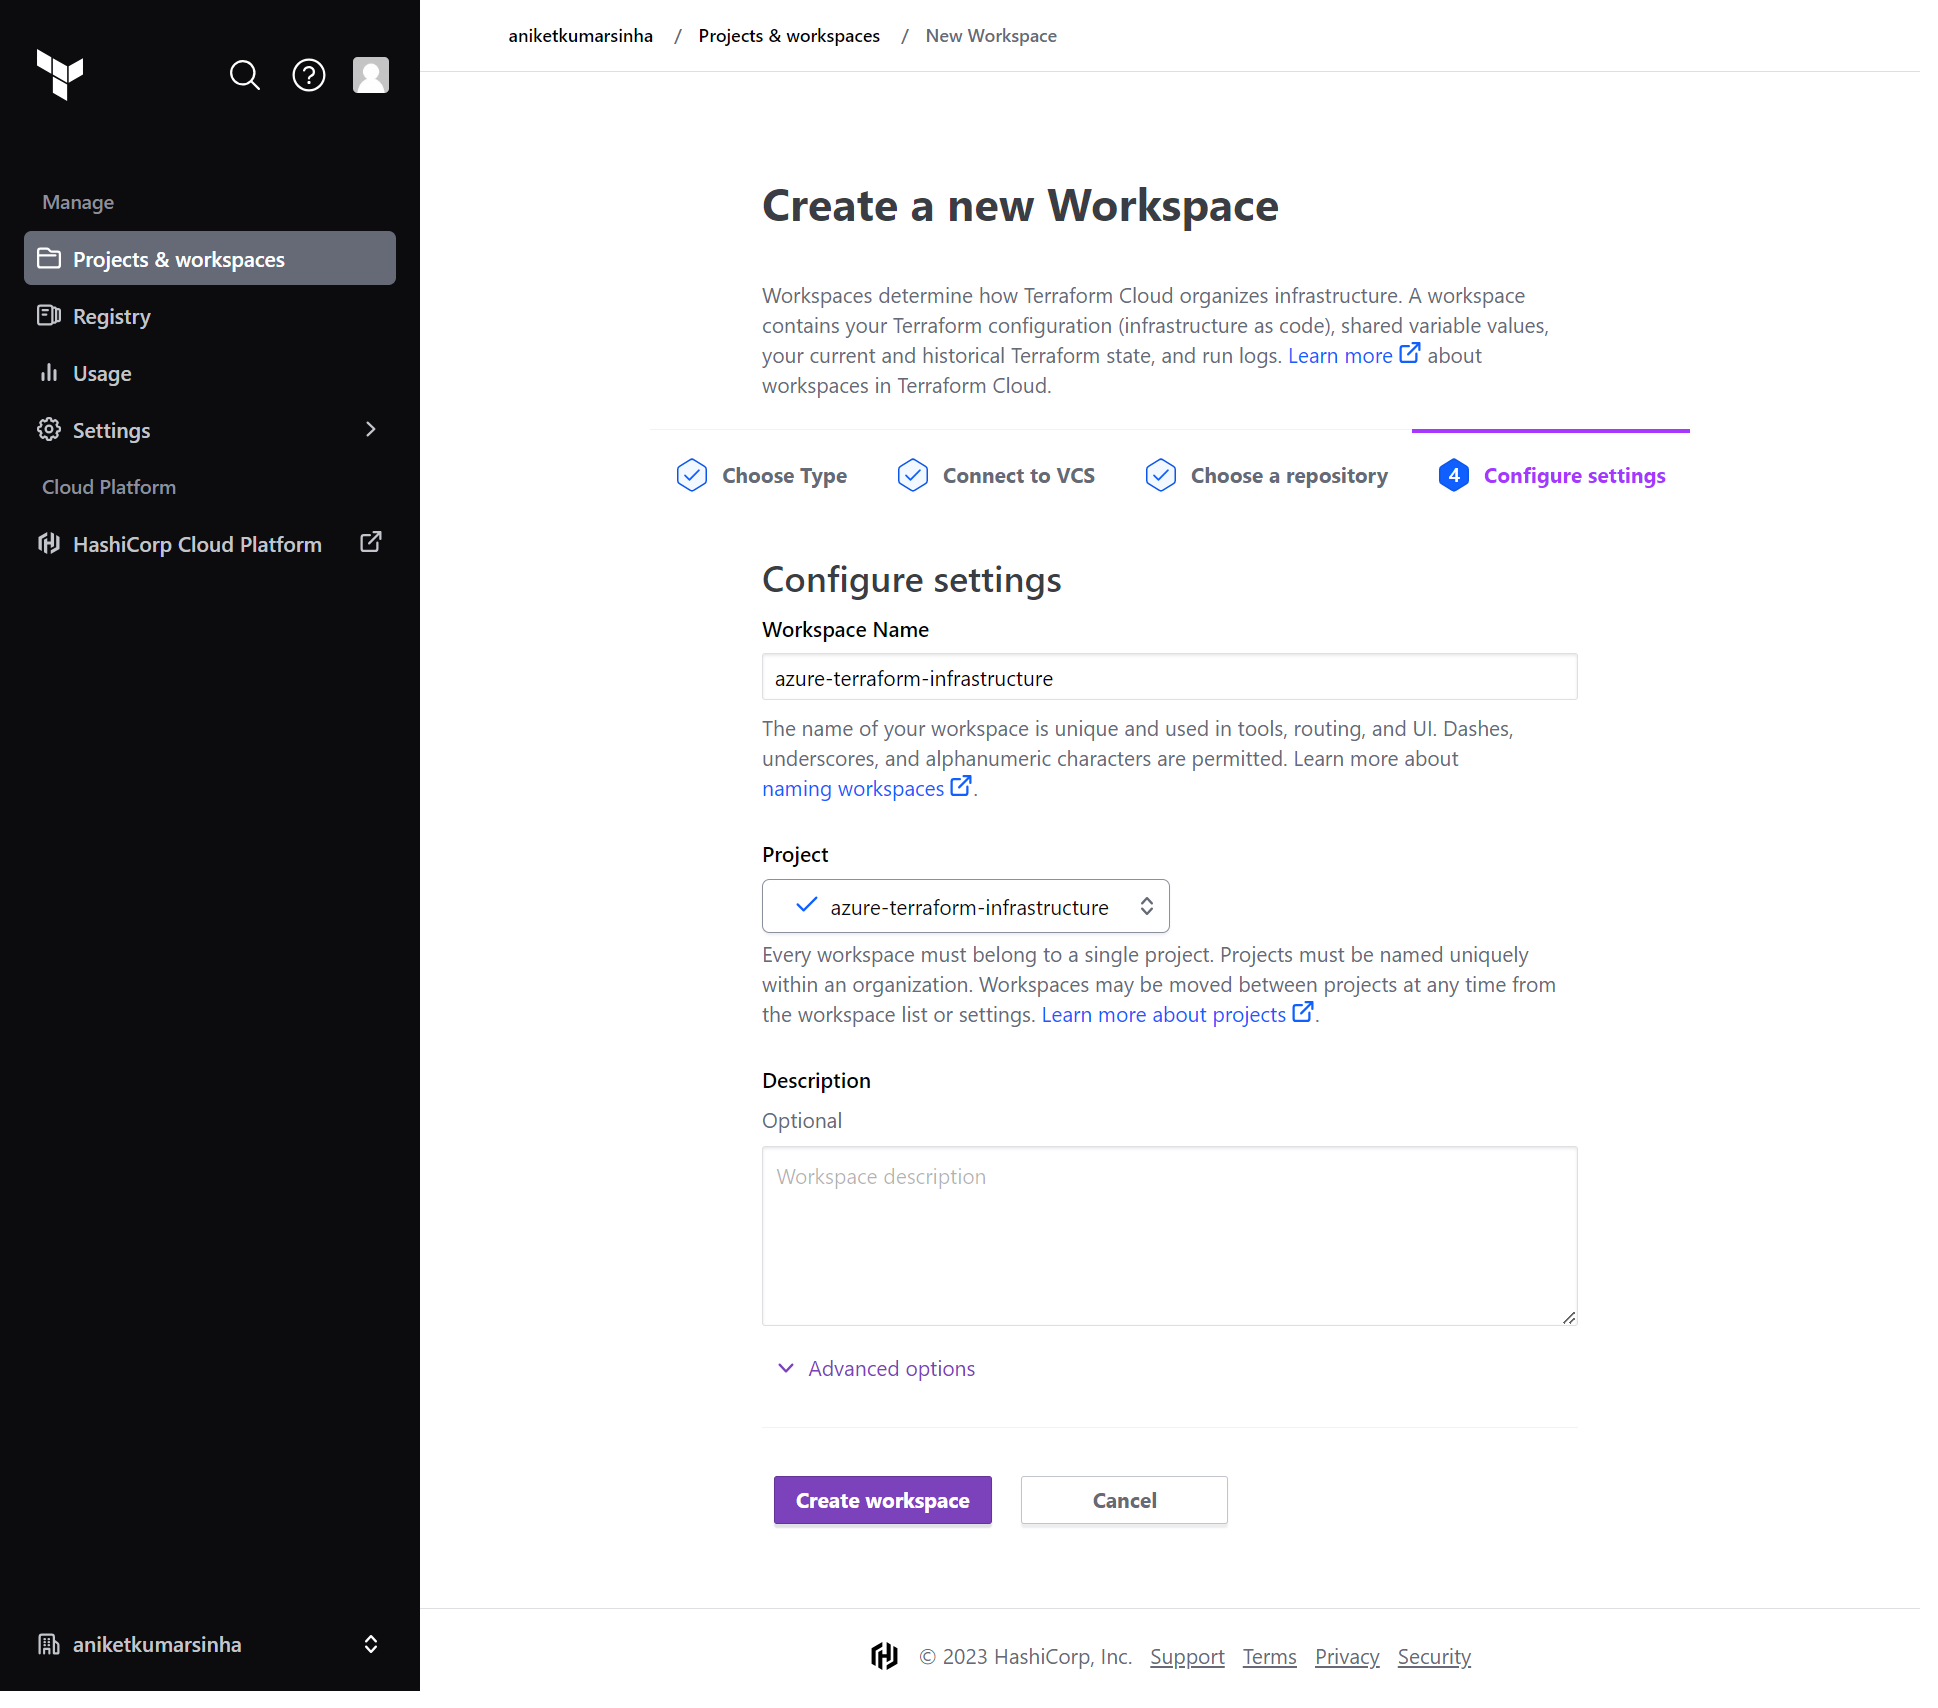
- Choose your Azure Infrastructure repository from your repository list. You can check the advance settings if you want to configure the workflow.
- Tap on Create Workspace button to create your workspace in terraform cloud Or Start new run from workspace overview page.
- Choose Version control workflow
- You can directly start your plan phase.
- You can verify in your projects page that your workspace has been created.
- Open your workspace to start new run.
- Choose your run type and start run.
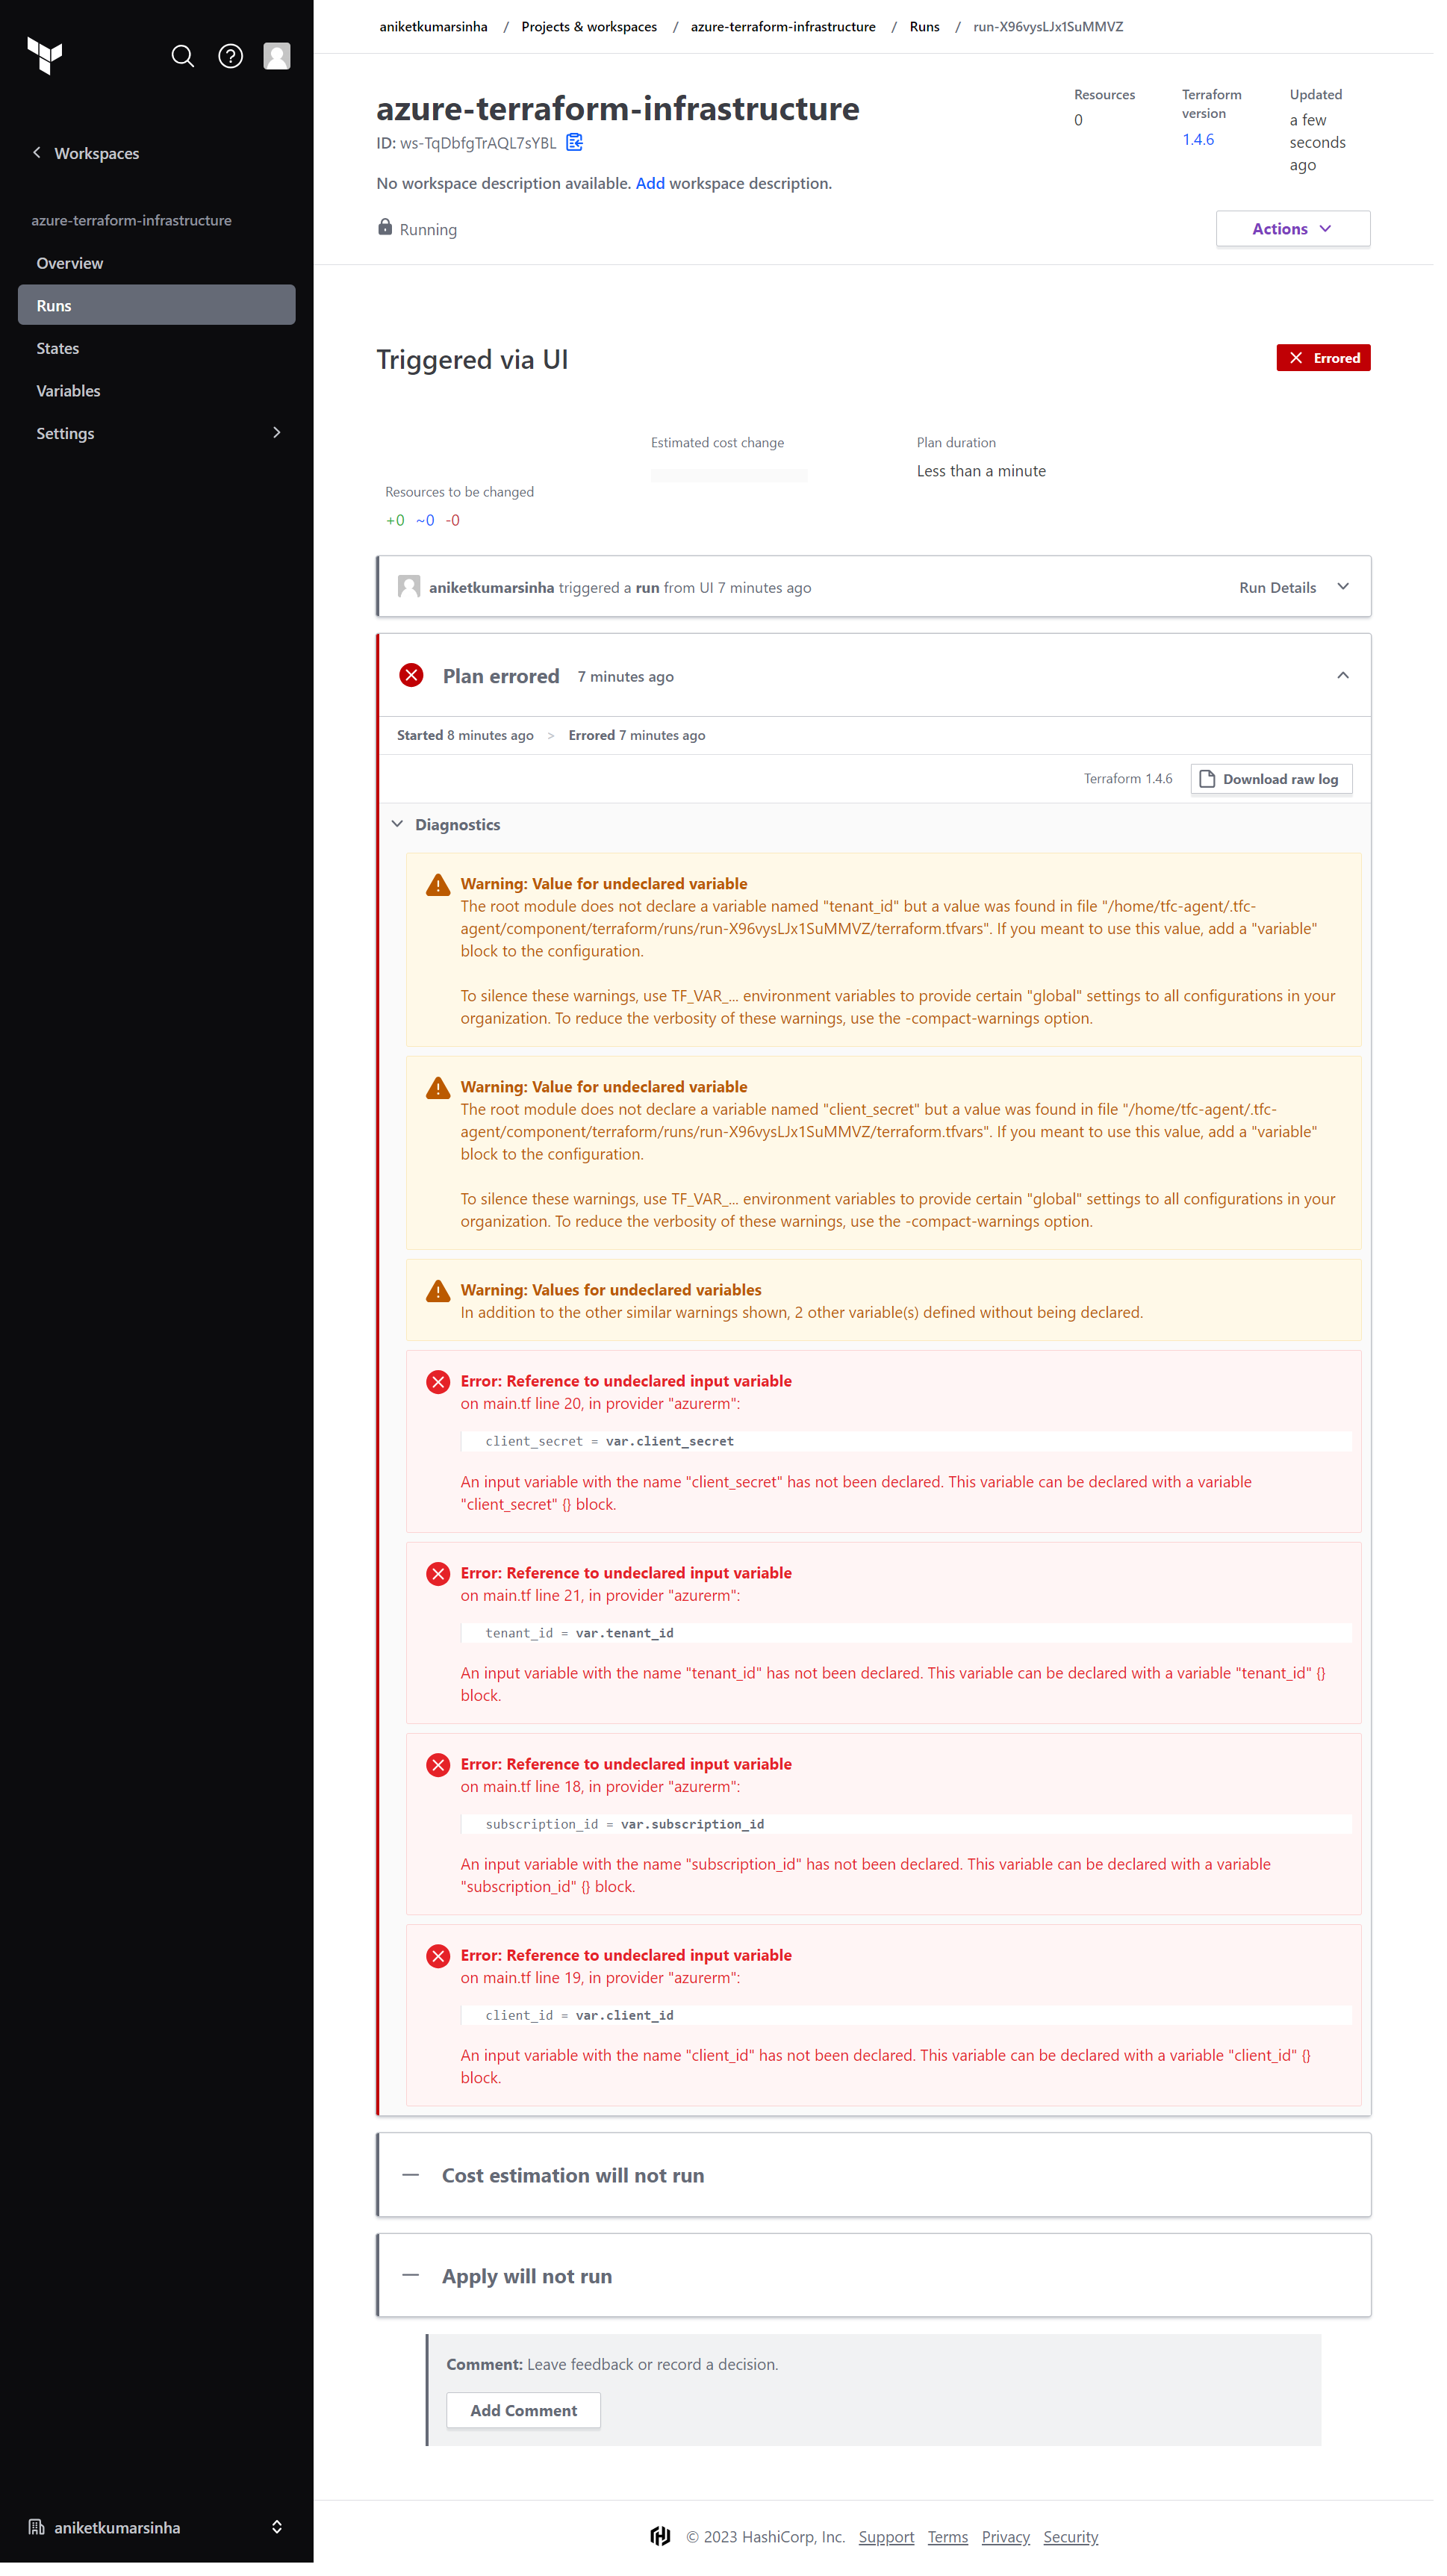
- Ouch!! Errors!!
We are getting error in provider phase. The reason behind this is that we have authorized our infrastructure to connect and write over our Azure. We will be creating an App provide all the necessary details to our infrastructure.
- We are creating an App over Azure to authorize using Client Id, Client Secret and Tenant Id. So in your Azure Portal move into Azure Active Directory, and open
App registrationsfrom left pane, And add a new registration. - Add your App details and register.
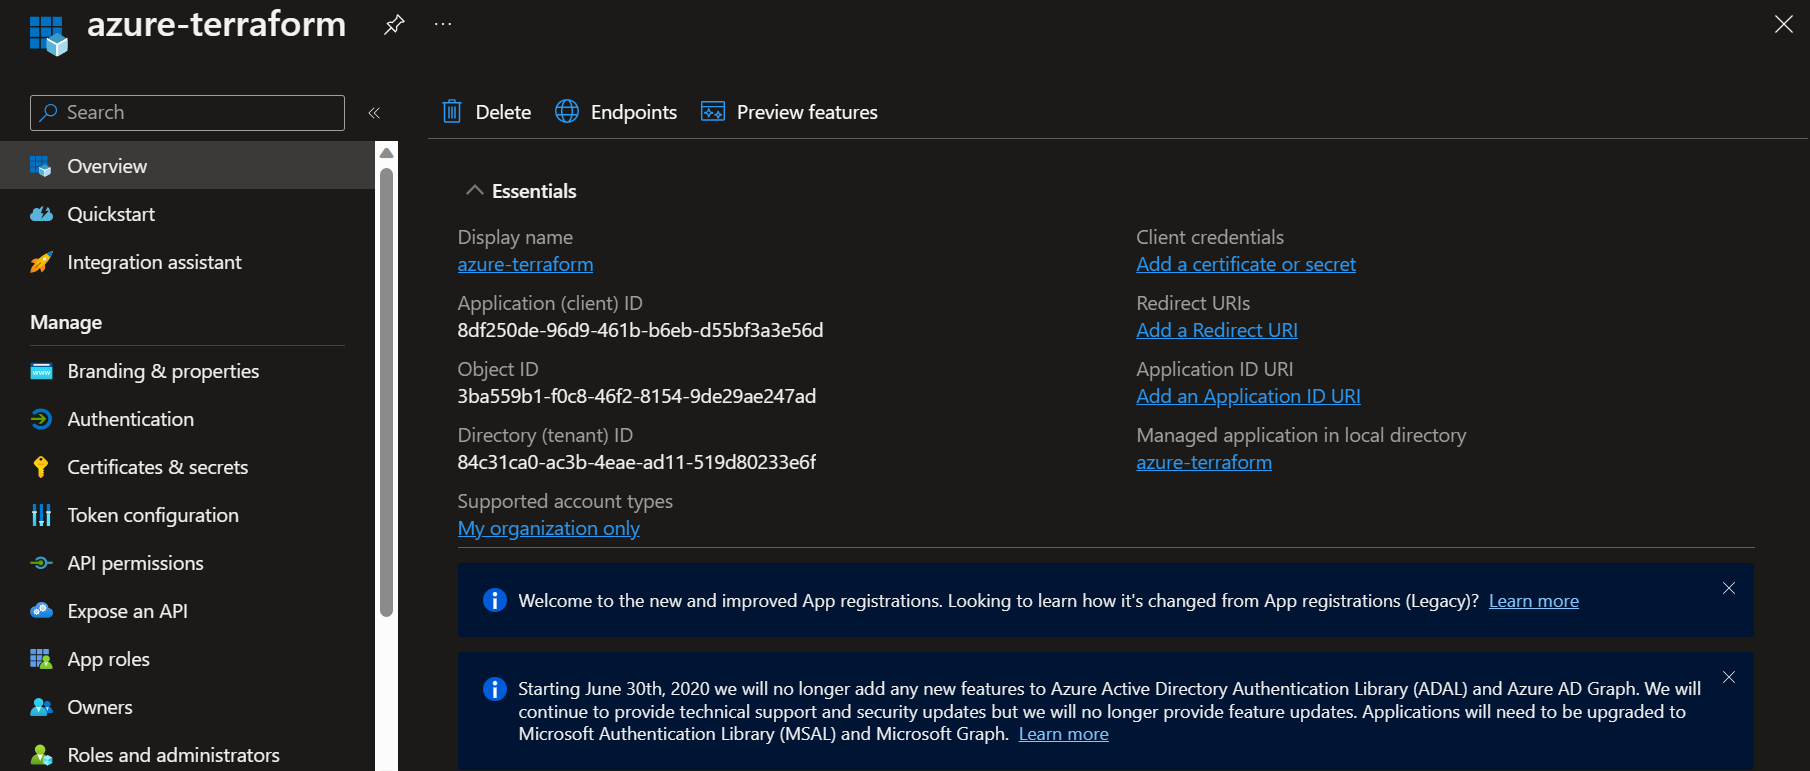
- So we have finally created our app.
- To connect our Infrastructure we need 4 details:
- Client Id
- Client Secret
- Tenant Id
- Subscription Id We would be getting this one by one.
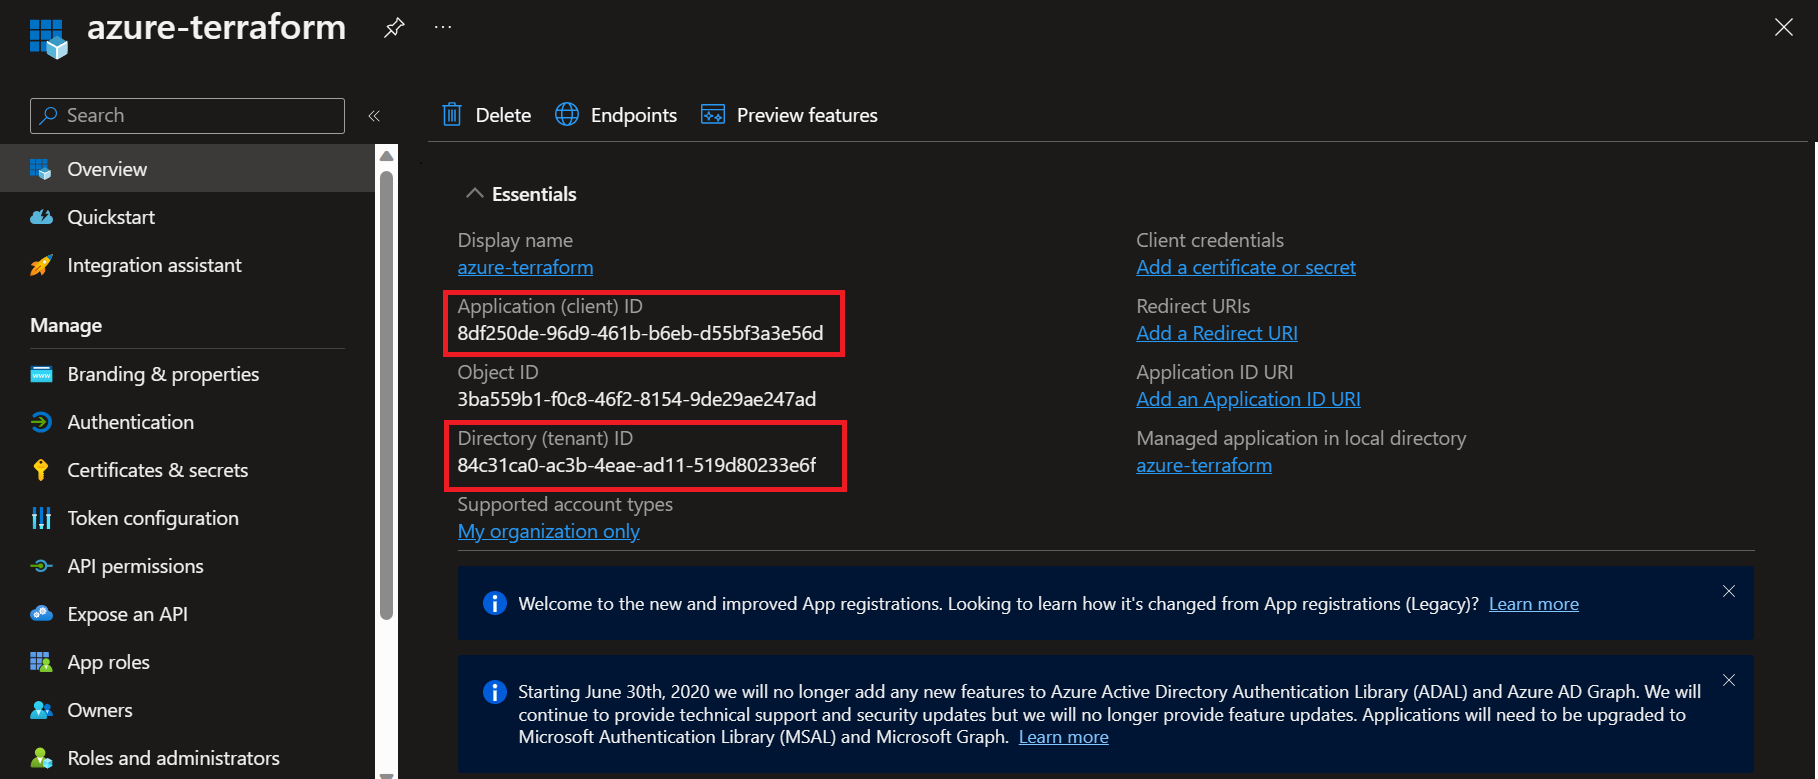
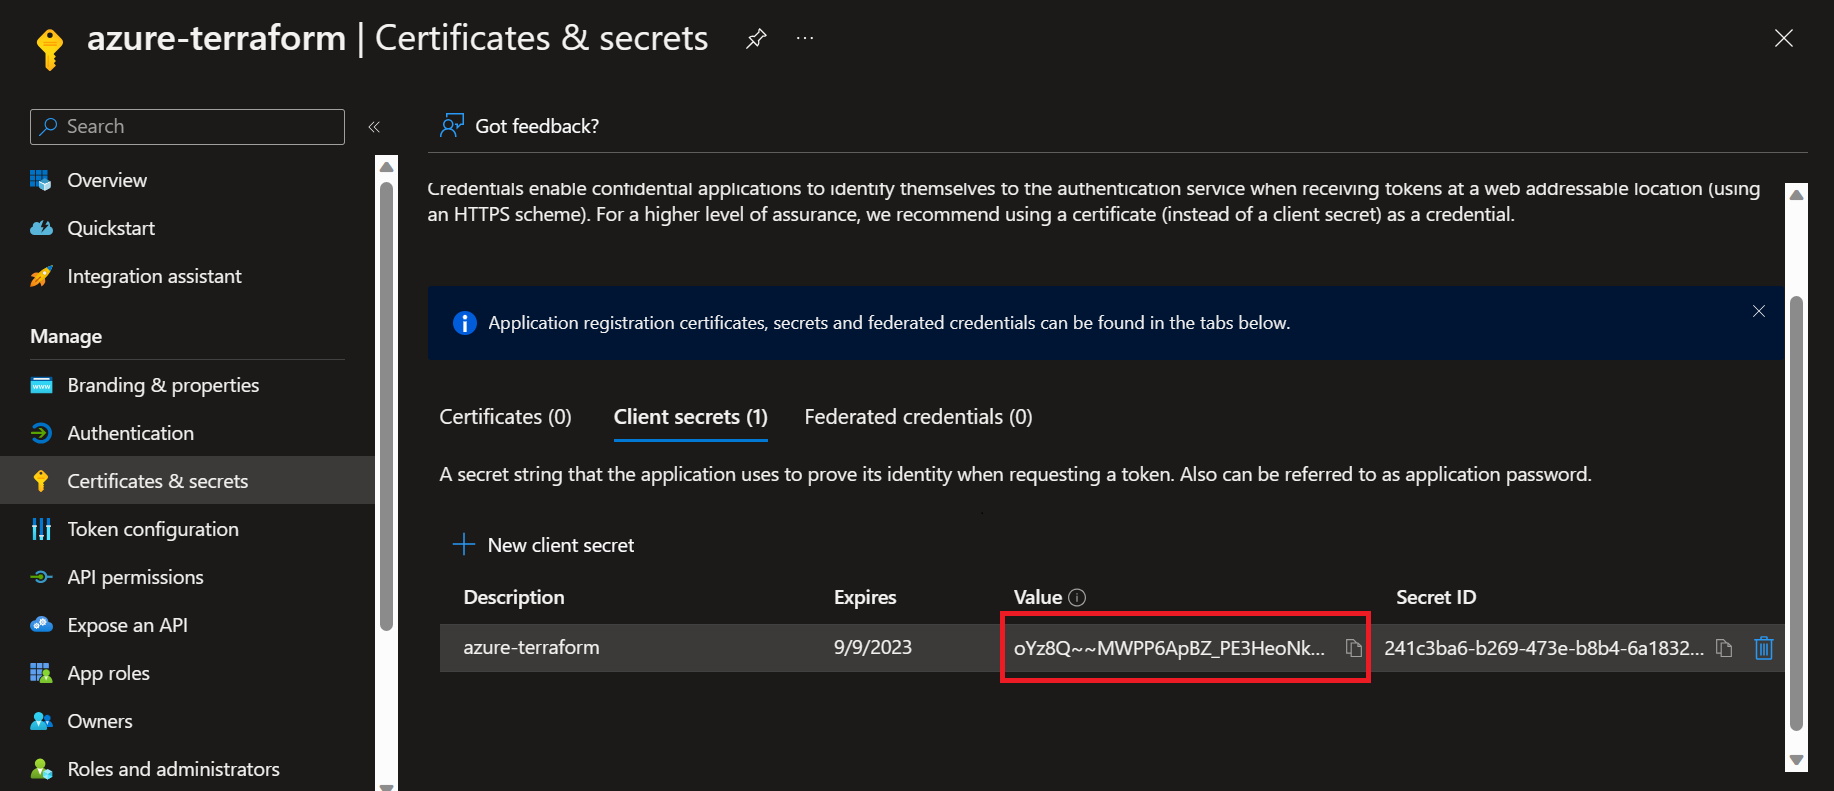
Application (client) IDis Client Id.Directory (tenant) IDis Tenant Id.- To get the Client Secret, we first need to create the secret.
- Add description and expiry of this secret which you're creating.
- Copy this value under Value column, and save it somewhere as we wouldn't be able to access this later. This is our Client secret.
- Search Subscription from search box and open your subscription. Copy your subscription id.
So now we have all the required values.
- Let's add these values in our Infrastructure.
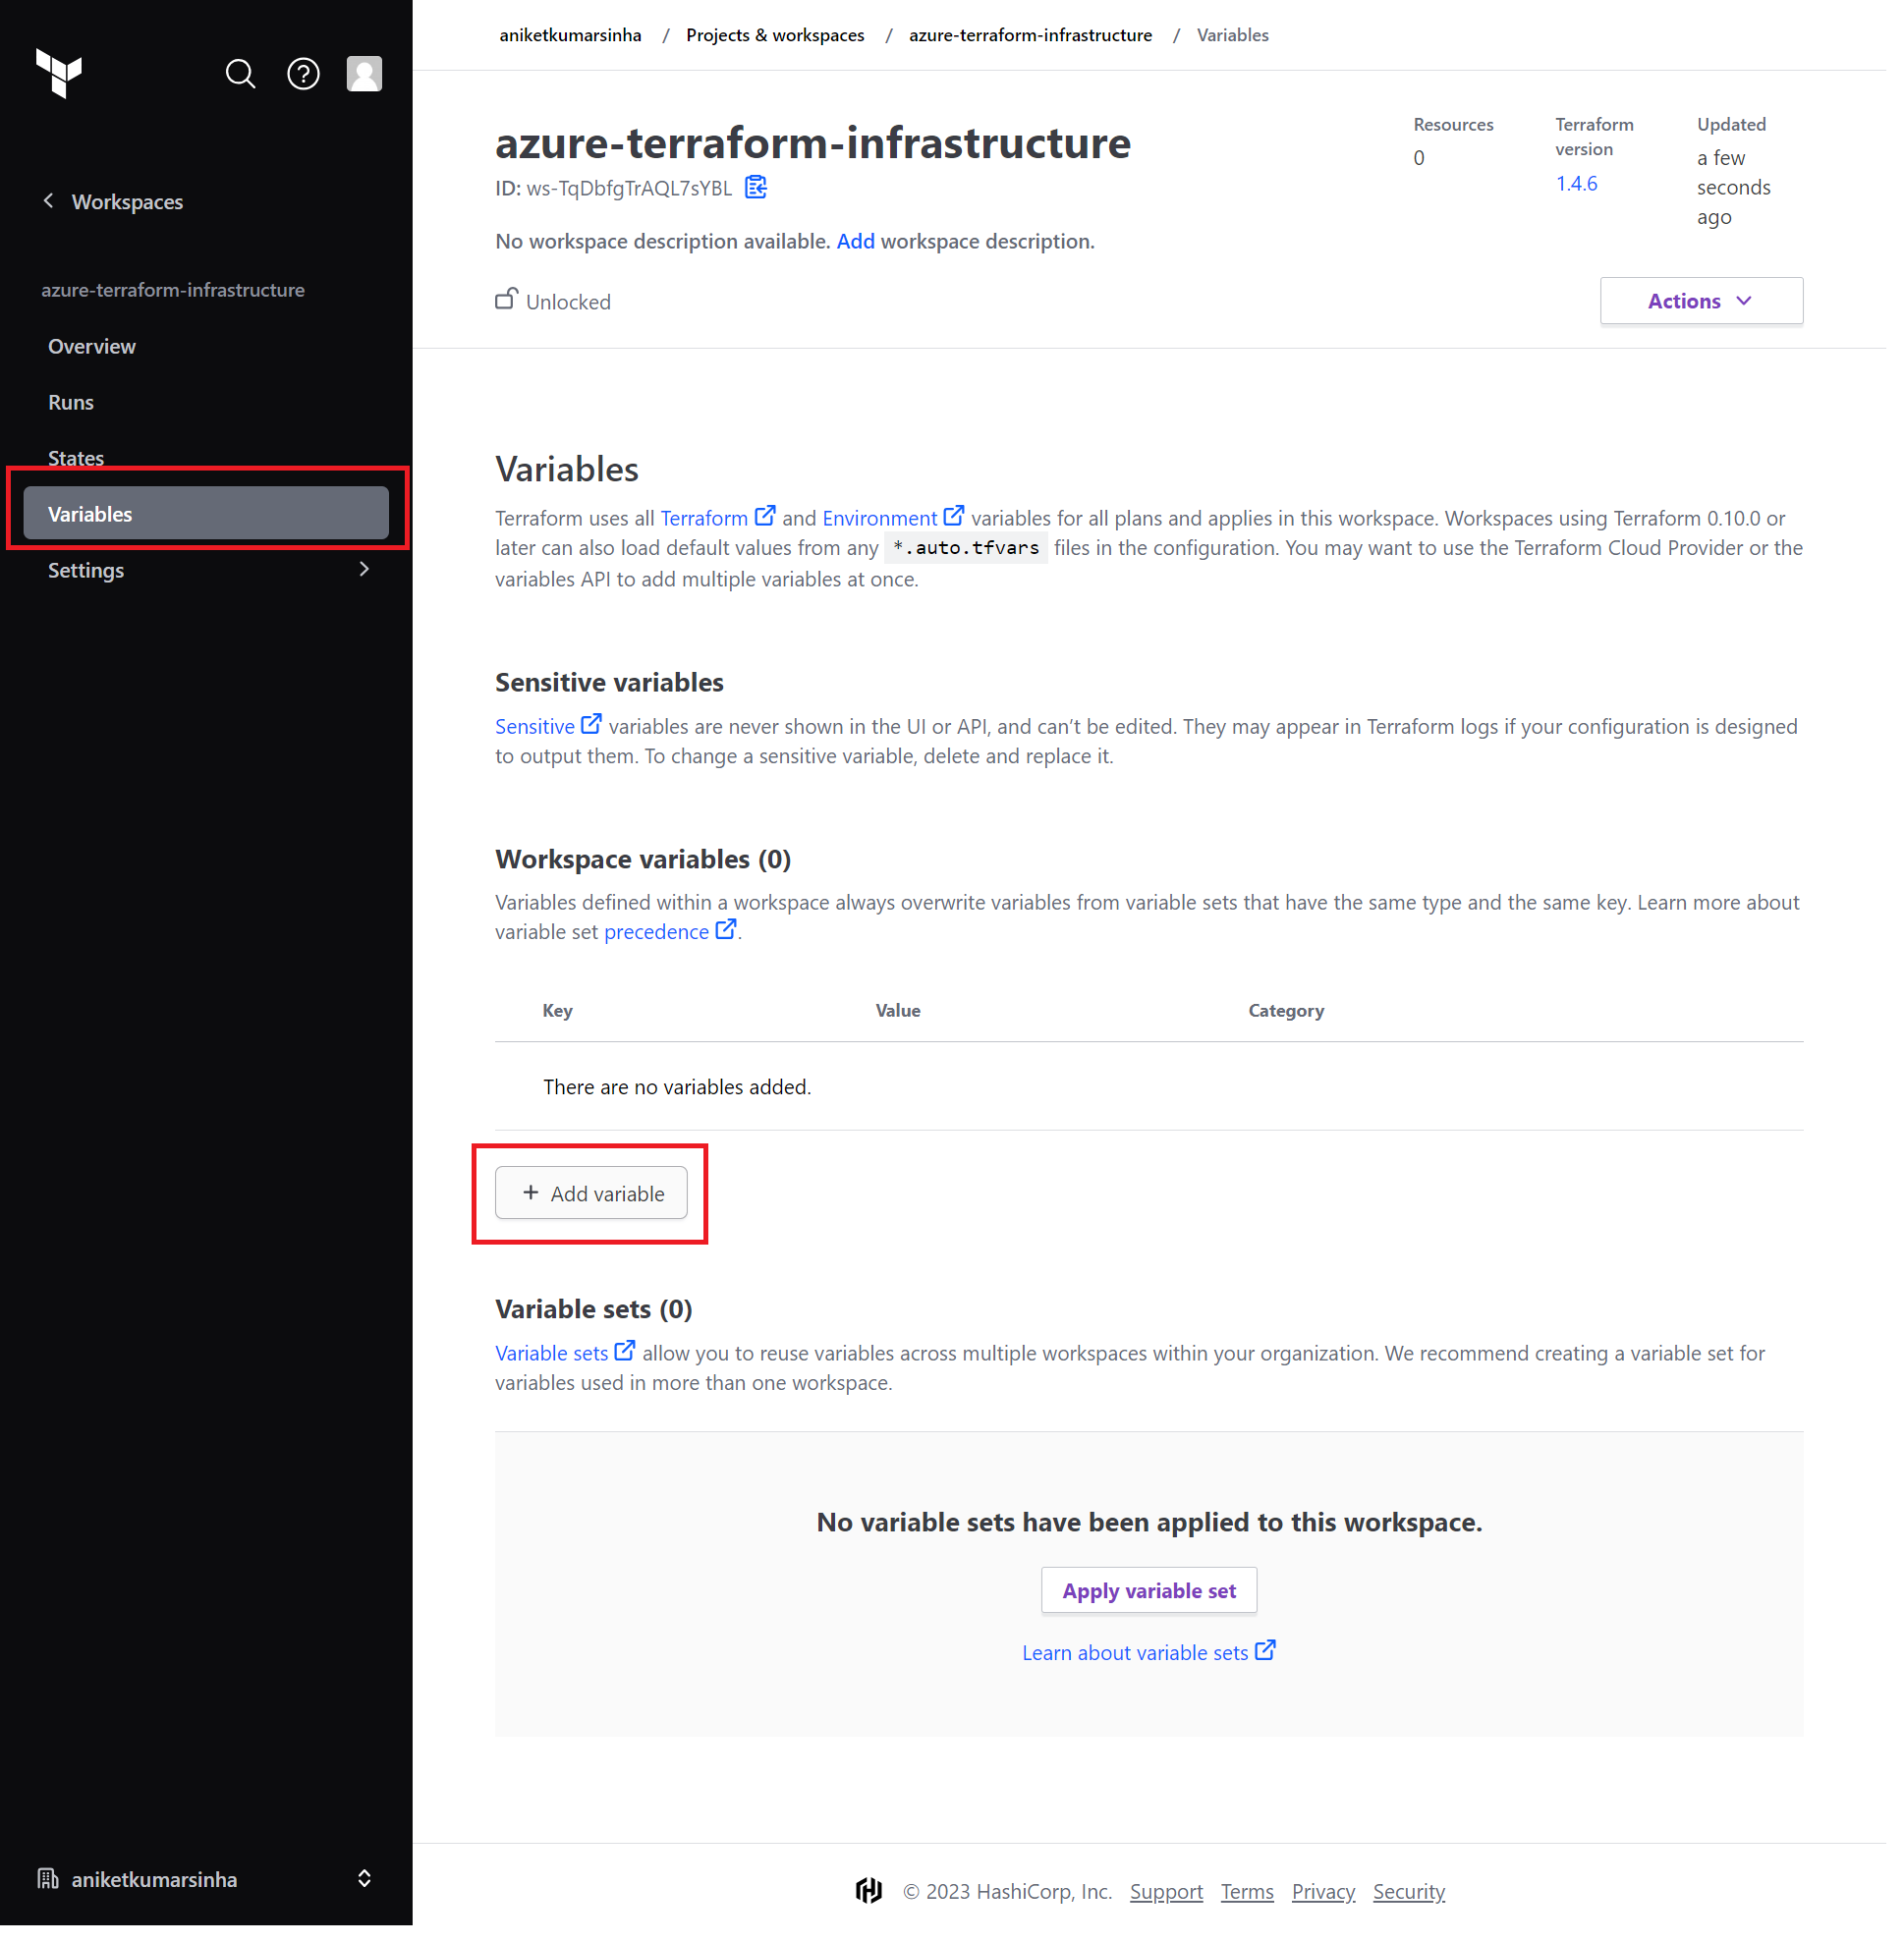
- In the provider block add all four details. We would be saving the values in Terraform Cloud variables for security purpose.
provider "azurerm" {
  features {}

  skip_provider_registration = "true"

  # Connection to Azure
  subscription_id = var.subscription_id
  client_id = var.client_id
  client_secret = var.client_secret
  tenant_id = var.tenant_id
}
- Add variables in Variables page.
- In
Keyadd the words with var, i.e., var.key, and inValueadd required Ids' and Secret.
Let's rerun the workflow!
But we are still left with some more code :P We need to add variables.tf file mentioning about these variables.
variable "client_id" {
  type = string
}

variable "client_secret" {
  type = string
}

variable "subscription_id" {
  type = string
}

variable "tenant_id" {
  type = string
}
And now finally we can get the results from Plan and Apply phase. Let's rerun the pipeline.
- Wohooo!! Our Plan phase ran successfully:
- Expand Plan phase to check what resources are getting created. And if every configuration is fine then tap on
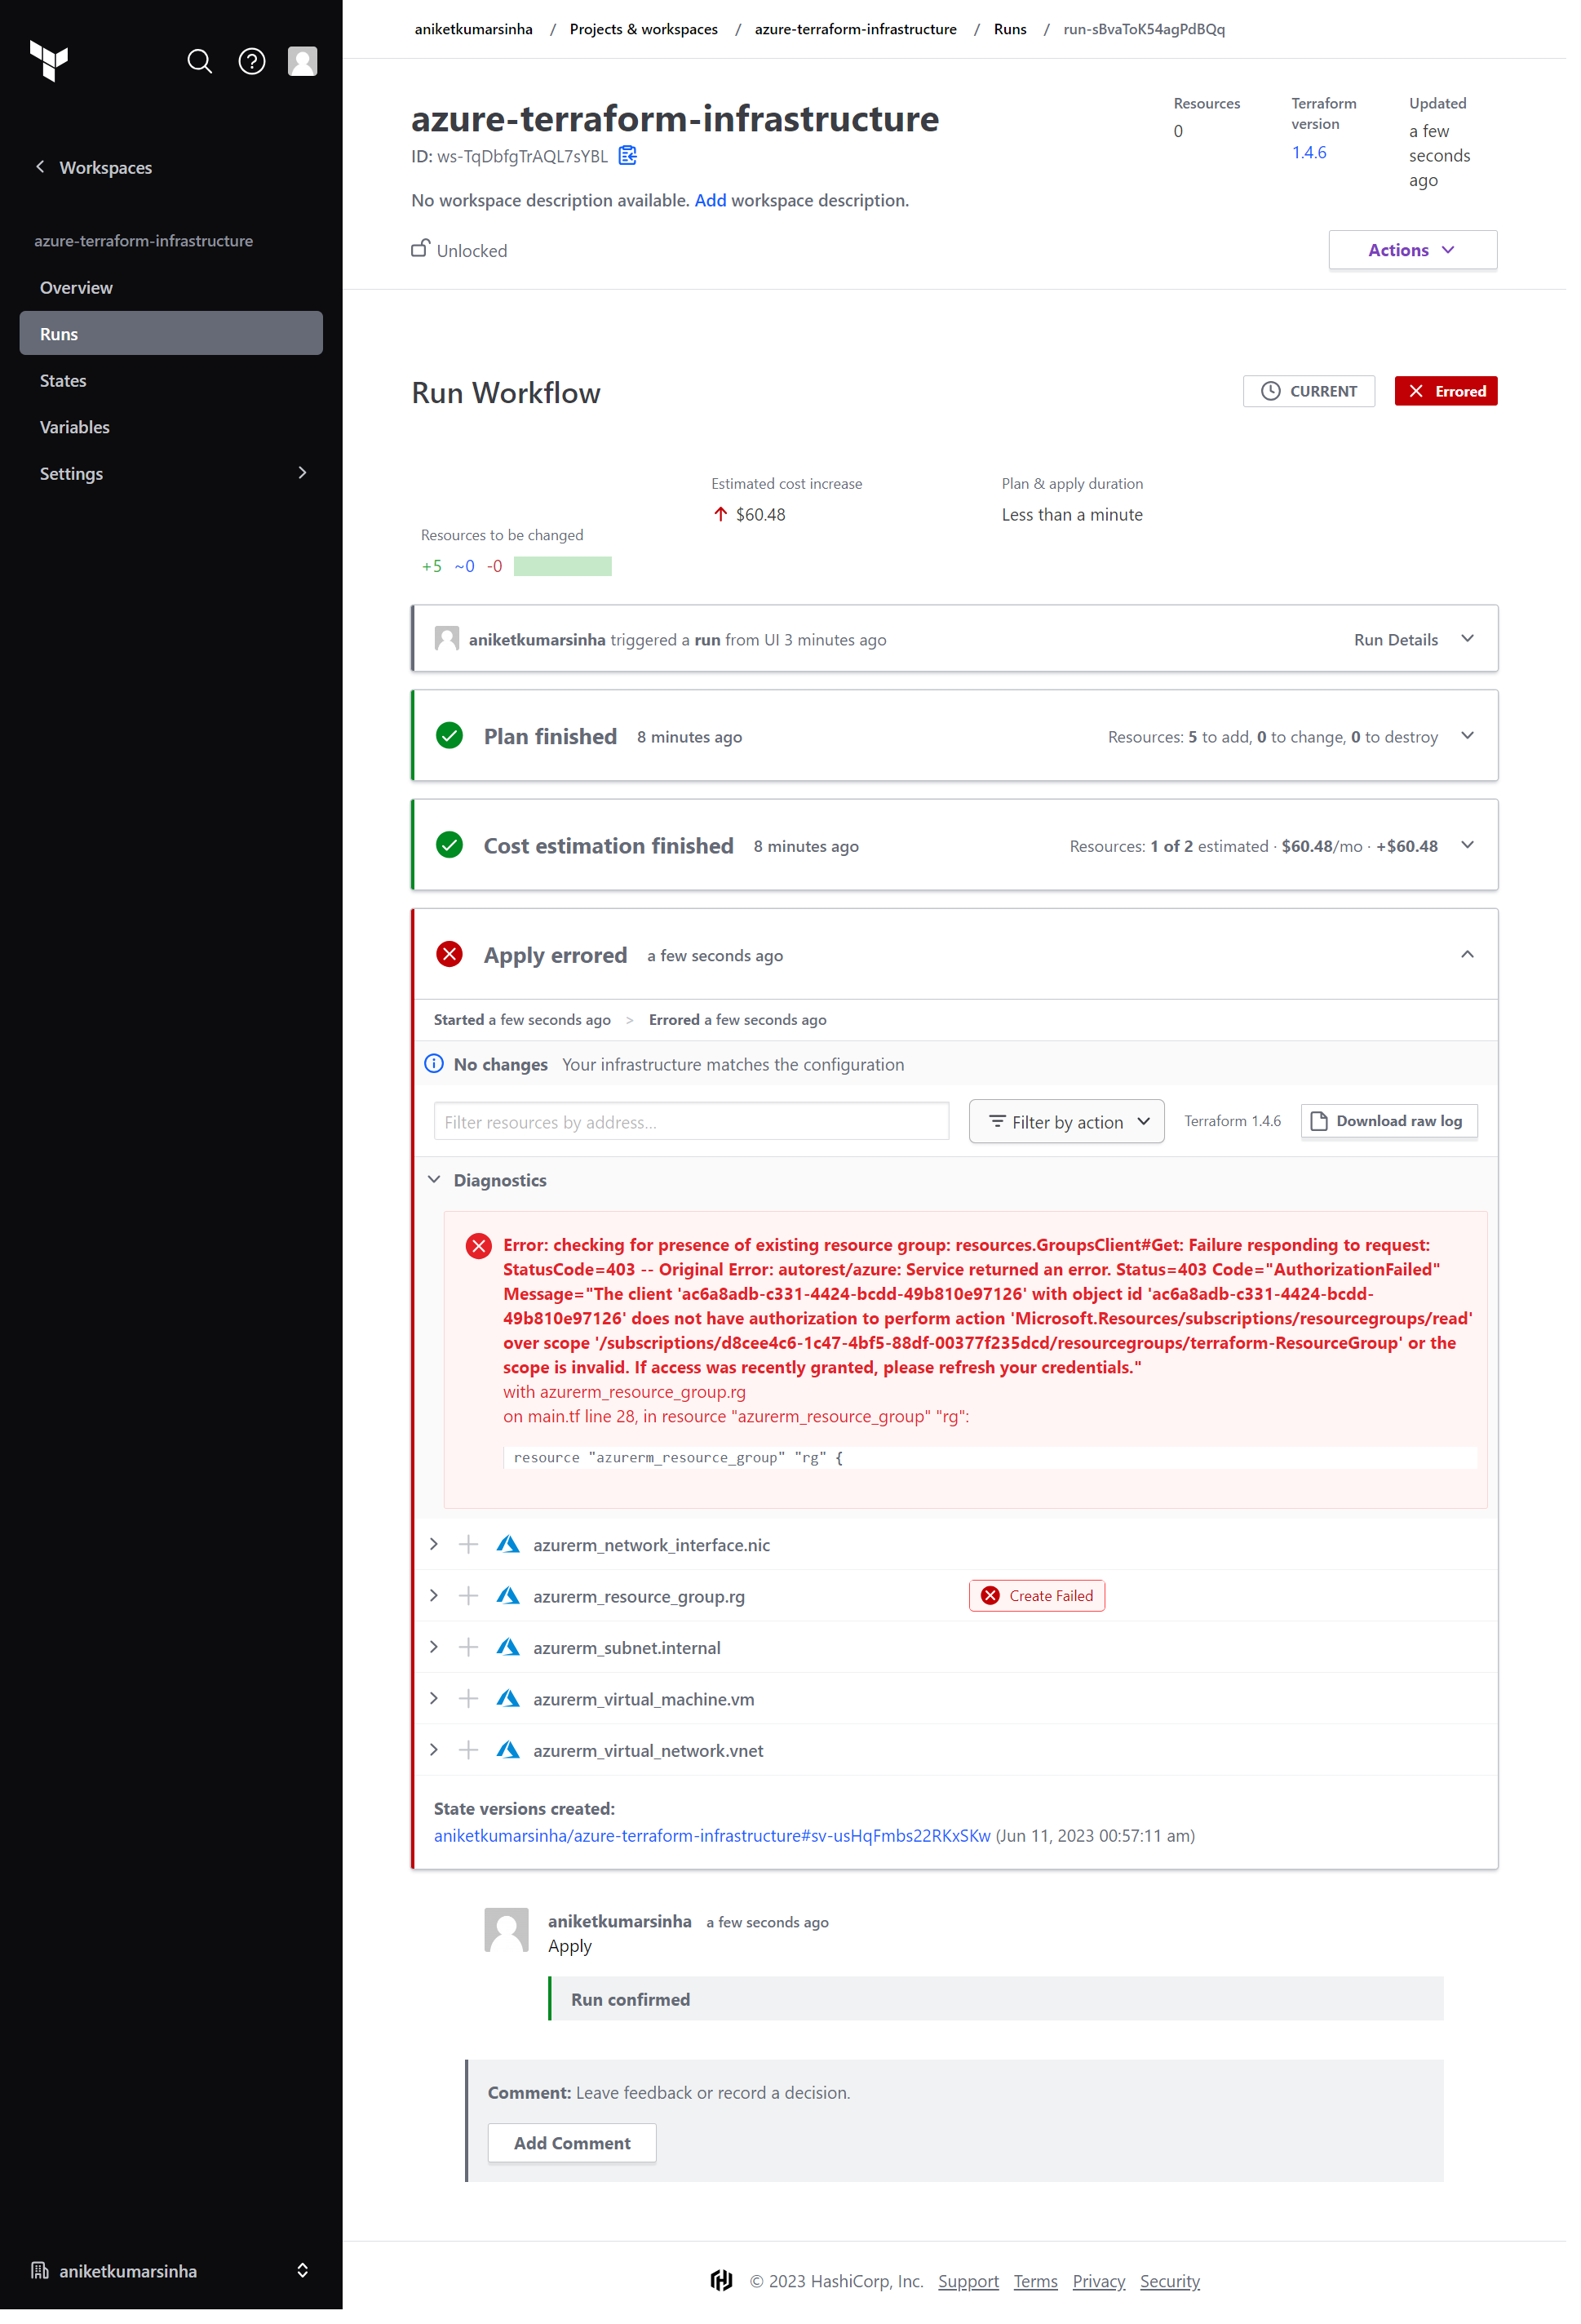
Confirm & Applybutton at the end of phase. So by default the Apply phase does not run automatically, we need manual approval, this is to make sure that someone checks the Plan output and verifies everything and then accordingly approve for Apply or reject. - Error again 🫠
- It seems our Azure app don't have permission to add anything. Let's provide the contributor role to our app.
- Under Subscription, got to Access Control (IAM) and Add a role there.
- Add a
Contributorrole under Privileged administrator roles. - Under Members tab, select our app as member.
- And then tap on Review+Assign. So now our App has contributor role and can make changes over Azure subscription.
- Rerun the pipeline. And wollaahh!!
Everything ran successfully!
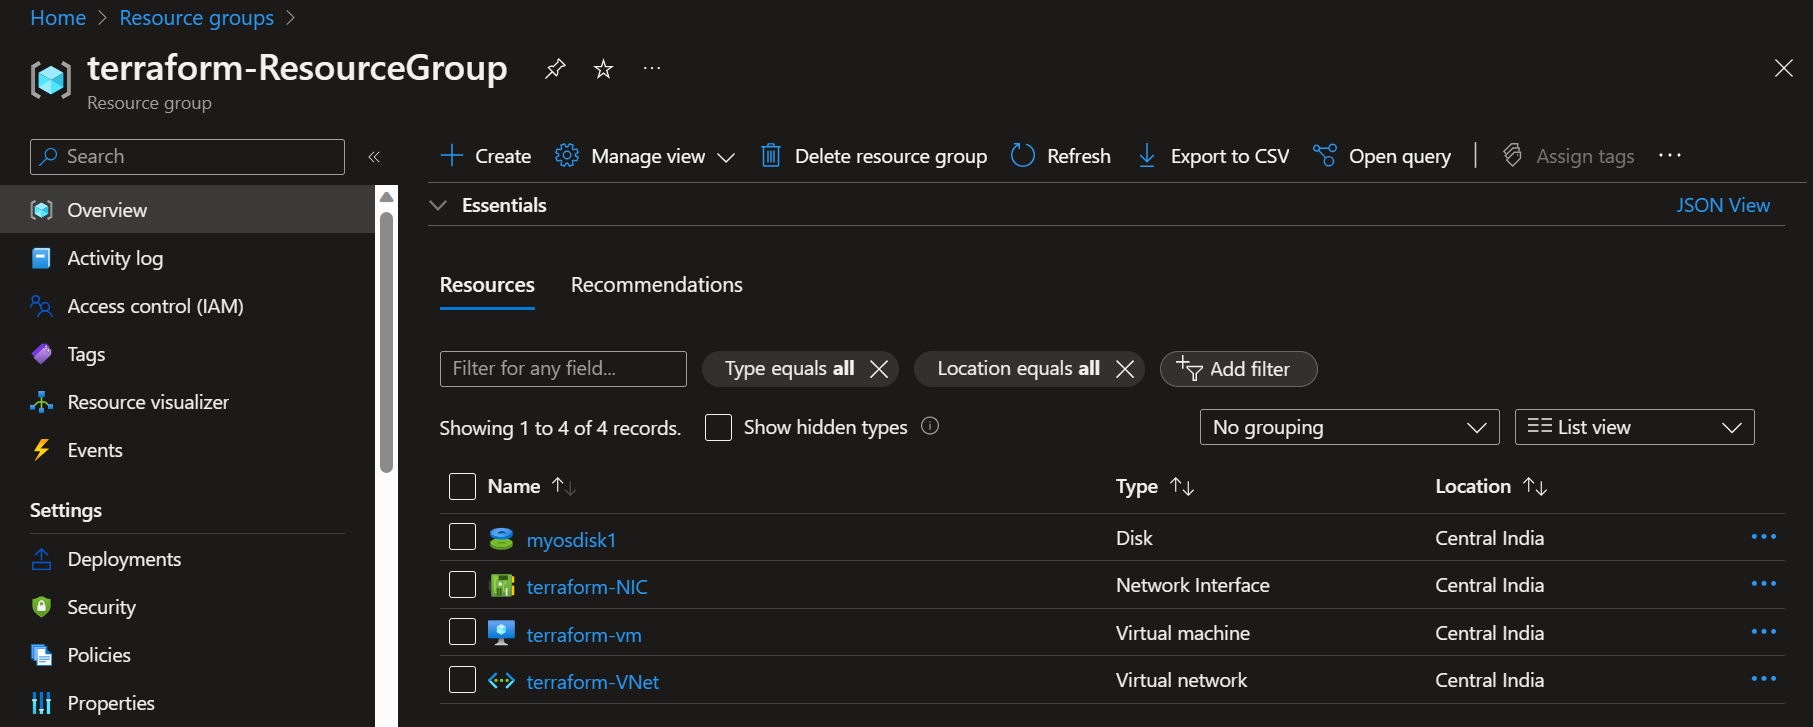
Let's confirm over our Azure Portal too.
Yes we can see all our resources present under our subscription.


