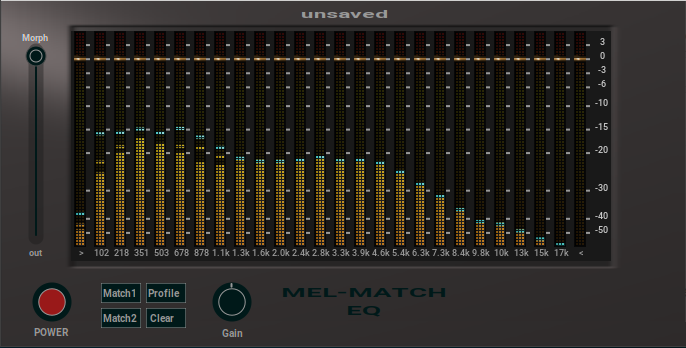
Matching Equalizer to apply EQ curve from on source to a other source.
MelMatchEQ is a profiling EQ using a 26 step Mel Frequency Band.
You could analyze the spectral profile of a sound source by press 'Match1'. Press 'Match1' again when done.
Now you could (optional) save the profile by press 'Profile' and select 'save', enter a name for it in up popping text input field and press 'ok'. This way you could later reuse it to compare it with other sound sources.
After that (or after loading a profile from the menu), you could profiling the second sound source, the one you want to match the spectrum of the first source by press 'Match2'. Press 'Match2' again when done. MelMatchEQ will calculate and apply the needed EQ settings to match the spectrum of the first profile. Those EQ settings you could save as preset (host side).
That's it. You could save/load/delete up to 15 profiles and unlimited presets. Surely you could set the EQ settings by hand (mouse or keyboard) at any time, to match the result even more to your taste.
To clear the EQ settings, press 'Clear'. That will clear the EQ parameters, but keep the loaded profile in use.
If a profile is loaded, you could see it as little blue bar's in the EQ screen, and the profile name is displayed above.
| Command | Action | |
|---|---|---|
| TAB | == | make next controller active |
| SHIFT+TAB | == | make previous controller active |
| UP or RIGHT | == | increase controller value |
| DOWN or LEFT | == | decrease controller value |
| HOME (pos1) | == | set min controller value |
| END | == | set max controller value |
| INSERT | == | set standard value |
| Command | Action | |
|---|---|---|
| + | == | make next controller active |
| - | == | make previous controller active |
| UP or RIGHT | == | increase controller value |
| DOWN or LEFT | == | decrease controller value |
| HOME (pos1) | == | set min controller value |
| END | == | set max controller value |
| INSERT | == | set standard value |
the following packages are needed to build MelMatchEQ:
- libc6-dev
- libcairo2-dev
- libx11-dev
- x11proto-dev
- lv2-dev
note that those packages could have different, but similar names on different distributions. There is no configure script, make will simply fail when one of those packages isn't found.
$ make install
will install into ~/.lv2
$ sudo make install
will install into /usr/lib/lv2
