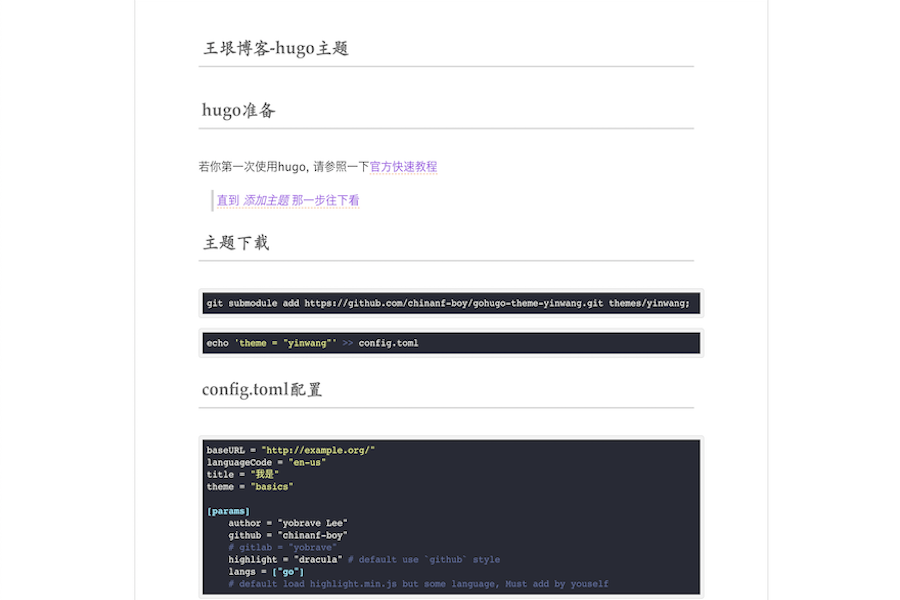
若你第一次使用 hugo, 请参照一下官方快速教程
- 0. 记得初始化
git init- 1. 加入子模块
git submodule add https://github.com/chinanf-boy/gohugo-theme-yinwang.git themes/yinwang;
- 2. 主题设置
echo 'theme = "yinwang"' >> config.toml
- 2.1 加个文章
hugo new post/hello.md
注意
⚠️ :是post目录,最好再加个hugo new about.md
- 3. 服务器启动
hugo server -D
baseURL = "http://example.org/"
languageCode = "zh-CN"
title = "我是"
theme = "yinwang"
#pygmentsCodeFences = true
#pygmentsCodefencesGuessSyntax = false
#pygmentsStyle = "dracula"
#pygmentsOptions = ['linenos']
# 代码高亮/chroma,hugo默认自带(可选)

[params]
    author = "yobrave Lee"
    github = "chinanf-boy"
    # gitlab = "yobrave"
    googleAnalytics = "UA-128555056-1" # 谷歌统计gtag
    highlight = "atom-one-dark" # 默认样式 `github`
    langs = ["go"]
    # 默认加载 highlight.min.js,但 一些不支持的语言, 你自己添加,
    # 其实也可以使用hugo自带的语法高亮器设置,不过我有点懒
    # single = false # 单页面的Home 按钮去除
    # menus = true # 想加更多目录,具体请看常见问题中的更多配置
    backgroundColor = "#fbf6ec" # 加点黄黄的背景色
    githubRepo = "https://github.com/chinanf-boy/html-css-list"
    editBtn = true # 两个字段一起,才能搞好编辑按钮
    anchorLink = "¶" # 瞄点链接
    copyCode = true # 代码复制按钮
    imageZoom = true # 图片点击 zoom 一下
labels = true # 添加标签链接现在,单页面,可覆盖config.toml的 4 个 配置。
title: 'Water.css 为简单而生的 css 框架'
date: 2019-04-29T21:50:59+08:00
categories: ['css']
tags: ['simple']
description: '为简单文章而生的 css 框架'
css:
  [
    'https://watercss.netlify.com/dist/light.css',
  ]
draft: false
editBtn: false # 关闭
anchorLink: false # 关闭
copyCode: false # 关闭
imageZoom: false # 关闭
labels: false # 关闭注意,只需要一个
<rawhtml>,同时注意换行不要接-多个空格。(这个 Hugo 功能我也没怎么搞懂,写法不对请指出)
<rawhtml>
  <style>
    div.inner {
      margin: 0 4%;
    }
    tr td:nth-child(2n) {
      background-color: #ffdfac;
    }
    tr td:not(:first-child) code {
      background-color: #ffdfac;
      font-size: 14px;
      margin: 1px;
      display: block;
      padding: 5px;
      text-align: center;
    }
    tr th:not(:first-child) {
      width: 14%;
    }
    th {
      position: static;
    }
  </style></rawhtml
>具体例子:llever.com | 源文件
{{< rawcss >}}.blog-post > h2:first-child {display:none}{{< /rawcss >}}
具体例子: llever.com | 源文件
可通过css来完成,点击以下例子
title: 'NES.css 任天堂风格css框架 Yummy'
date: 2018-12-06T12:23:36+08:00
categories: ['css']
tags: ['NES']
description: 'NES.css 任天堂风格css框架'
css: # 当你输入这个字段,会覆盖掉默认css文件
  [
    '/css/main.css', # 这个就是默认,只在博文页面 css文件
    '/css/stylesheet.css'  # 这个用来存有主页与博文,相同的css格式的文件
    'https://unpkg.com/nes.css@0.0.2/css/nes.min.css',
]注意
⚠️ :若你的baseURL不是根目录,留心'/css/main.css'的前路径。看看具体操作
series: "我是系列博文哦"
具体操作可看llever.com,与 js 脚本
    githubRepo = "https://github.com/chinanf-boy/html-css-list"
    editBtn = true
githubRepo与editBtn要一起使用,才能发挥作用。
copyCode = true anchorLink = "¶" # 可以自己改为喜欢的字符关于百度的统计工具,因为我很少用,若有需要可添加到footer.html,再加个配置config.toml可控私人 ID,就好,等你 PR 噢
[params]
    menus = true

[[menu.main]]
name = "分类"
url = "/categories/"

[[menu.main]]
name = "标签"
url = "/tags"

[[menu.main]]
  name = "Home"
  url = "/"
  # weight = 10
# 这个权重,是衡量顺序的
提示:main 的 html 顺序是相反的, 若想自定义顺序,添加 权重值
[params]
single = false答:那么你就有两个命令
- 一是
hugo -b "/",构建静态文件(输入-b选项,换网址)命令; - 二是
hugo server -D开发服务器命令
警告
⚠️ :baseURL一定要有/结尾。
是由basics hugo 主题, 拿来改的

