Once you've trained your model and it's stored on Ceph, you can start to work on an inference application to make your model accessible. In this tutorial, we will make a minimal Flask + gunicorn that we can deploy on OpenShift to serve model inferences. We will also use ArgoCD for continuous deployment of our application as we make changes.
For the purpose of the tutorial you can reuse this application script created with Flask+gunicorn. This app exposes critical endpoints for serving and monitoring our model, such as /predict for generating model predictions from user provided inputs and /metrics to measure usage and model performance.
When you make any changes to your model, typically through retraining, and add a new one to Ceph, you will need to create a new release and build the image again. This is because you have made new changes to the model that are not reflected in the current image. Once the new tag is created, the pipeline will automatically update the tag where ArgoCD is looking for changes, and your new image will be rebuilt to include your new model and will be seamlessly redeployed.
-
Image Name:
quay.io/thoth-station/elyra-aidevsecops-tutorial:v0.5.0 -
DeploymentConfig: Deployment configs are templates for running applications on OpenShift. This will give the cluster the necessary information to deploy your Flask application.
-
Service: A service manifest allows for an application running on a set of OpenShift pods to be exposed as a network service.
-
Route: Routes are used to expose services. This route will give your model deployment a reachable hostname to interact with.
-
Image Name:
quay.io/thoth-station/elyra-aidevsecops-pytorch-inference:v0.13.0 -
DeploymentConfig: Deployment configs are templates for running applications on OpenShift. This will give the cluster the necessary information to deploy your Flask application.
-
Service: A service manifest allows for an application running on a set of OpenShift pods to be exposed as a network service.
-
Route: Routes are used to expose services. This route will give your model deployment a reachable hostname to interact with.
NOTE: Deepsparse deployment at the moment works only with CPU that supports avx2, avx512 flags (even better if avx512_vnni with VNNI is available: neuralmagic/deepsparse#186). Please check your environment running cat /proc/cpuinfo to identify flags and verify if your machine supports the deployment. In the deployment manifests in nm-inference overlay you need to set the env variable NM_ARCH=avx2|avx512.
NOTE: Operate First has a Grafana dashboard showing what hardware and flags are available across all managed instances. In this way, we can identify the best place to deploy the model.
-
Image Name:
quay.io/thoth-station/neural-magic-deepsparse:v0.13.0 -
DeploymentConfig: Deployment configs are templates for running applications on OpenShift. This will give the cluster the necessary information to deploy your Flask application.
-
Service: A service manifest allows for an application running on a set of OpenShift pods to be exposed as a network service.
-
Route: Routes are used to expose services. This route will give your model deployment a reachable hostname to interact with.
Once all manifests for your project (e.g. deployment, service, routes, workflows, pipelines) are created and placed in your repo under /manifests folder, you can make a request to the Operate First team to use ArgoCD for your application.
This way ArgoCD will be used to maintain your application and keep it in sync with all of your current changes. Once you create a new release of your application (e.g. you change your model, you add a new metric, you add a new feature, etc.) and a new image is available, all you need to do is update the imagestreamtag so that ArgoCD can deploy new version.
Note: An AICoE Pipeline can also automatically update the imagestreamtag once a new release is created.
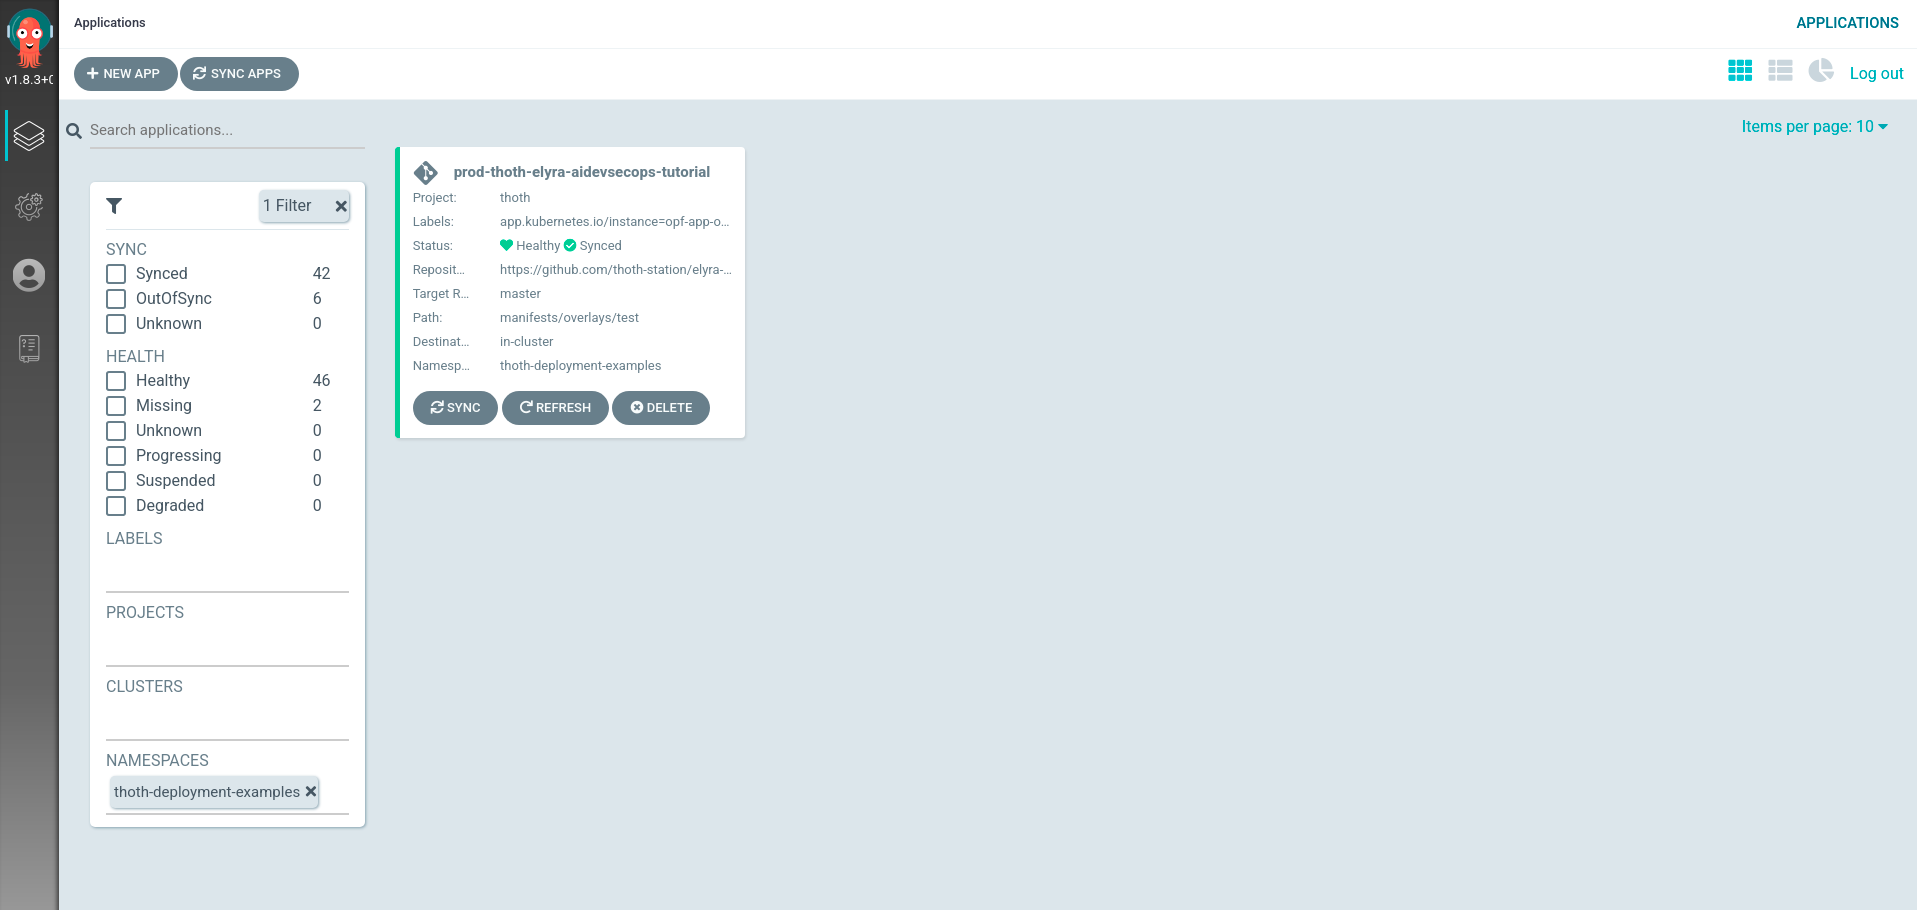
Once everything is synced to the cluster, you can monitor your application from the ArgoCD UI using this link as shown in the image below:
There are two steps you need to follow in order to have a new application deployed on Operate First and maintained by ArgoCD.
-
Fork workshop-apps and clone it from the terminal of your image.
-
Run ./devconf-us-2021.sh script with your GitHub username as parameter:
$ ./devconf-us-2021.sh USERNAME
Generating 'apps/devconf-us-2021/USERNAME.yaml'
- Commit, push to your fork of workshop-apps and create a PR against orginal repo.
Submit an issue to operate-first/support to request deployment of your application.
Alternatively, you can also deploy your app manually to a cluster using the following OpenShift CLI commands.
-
Open a terminal in Jupyterlab
-
Login from the terminal:
oc login $CLUSTER_URL. -
Insert your credentials
USERNAMEandPASSWORD. -
Make sure you are in
elyra-aidevsecops-tutorialdirectory (you can runpwdcommand in the terminal to check your current path). -
cdto the overlay you want to deploy. (e.g.cd manifests/overlays/{inference|pytorch-inference|nm-inference}) -
Create the Service using:
oc apply -f ./manifests/overlays/{inference|pytorch-inference|nm-inference}/service.yaml. -
Create the Route using:
oc apply -f ./manifests/overlays/{inference|pytorch-inference|nm-inference}/route.yaml. -
Create the DeploymentConfig using:
oc apply -f ./manifests/overlays/{inference|pytorch-inference|nm-inference}/deploymentconfig.yaml.
Once your pods deploy, your Flask app should be ready to serve inference requests from the exposed Route.
