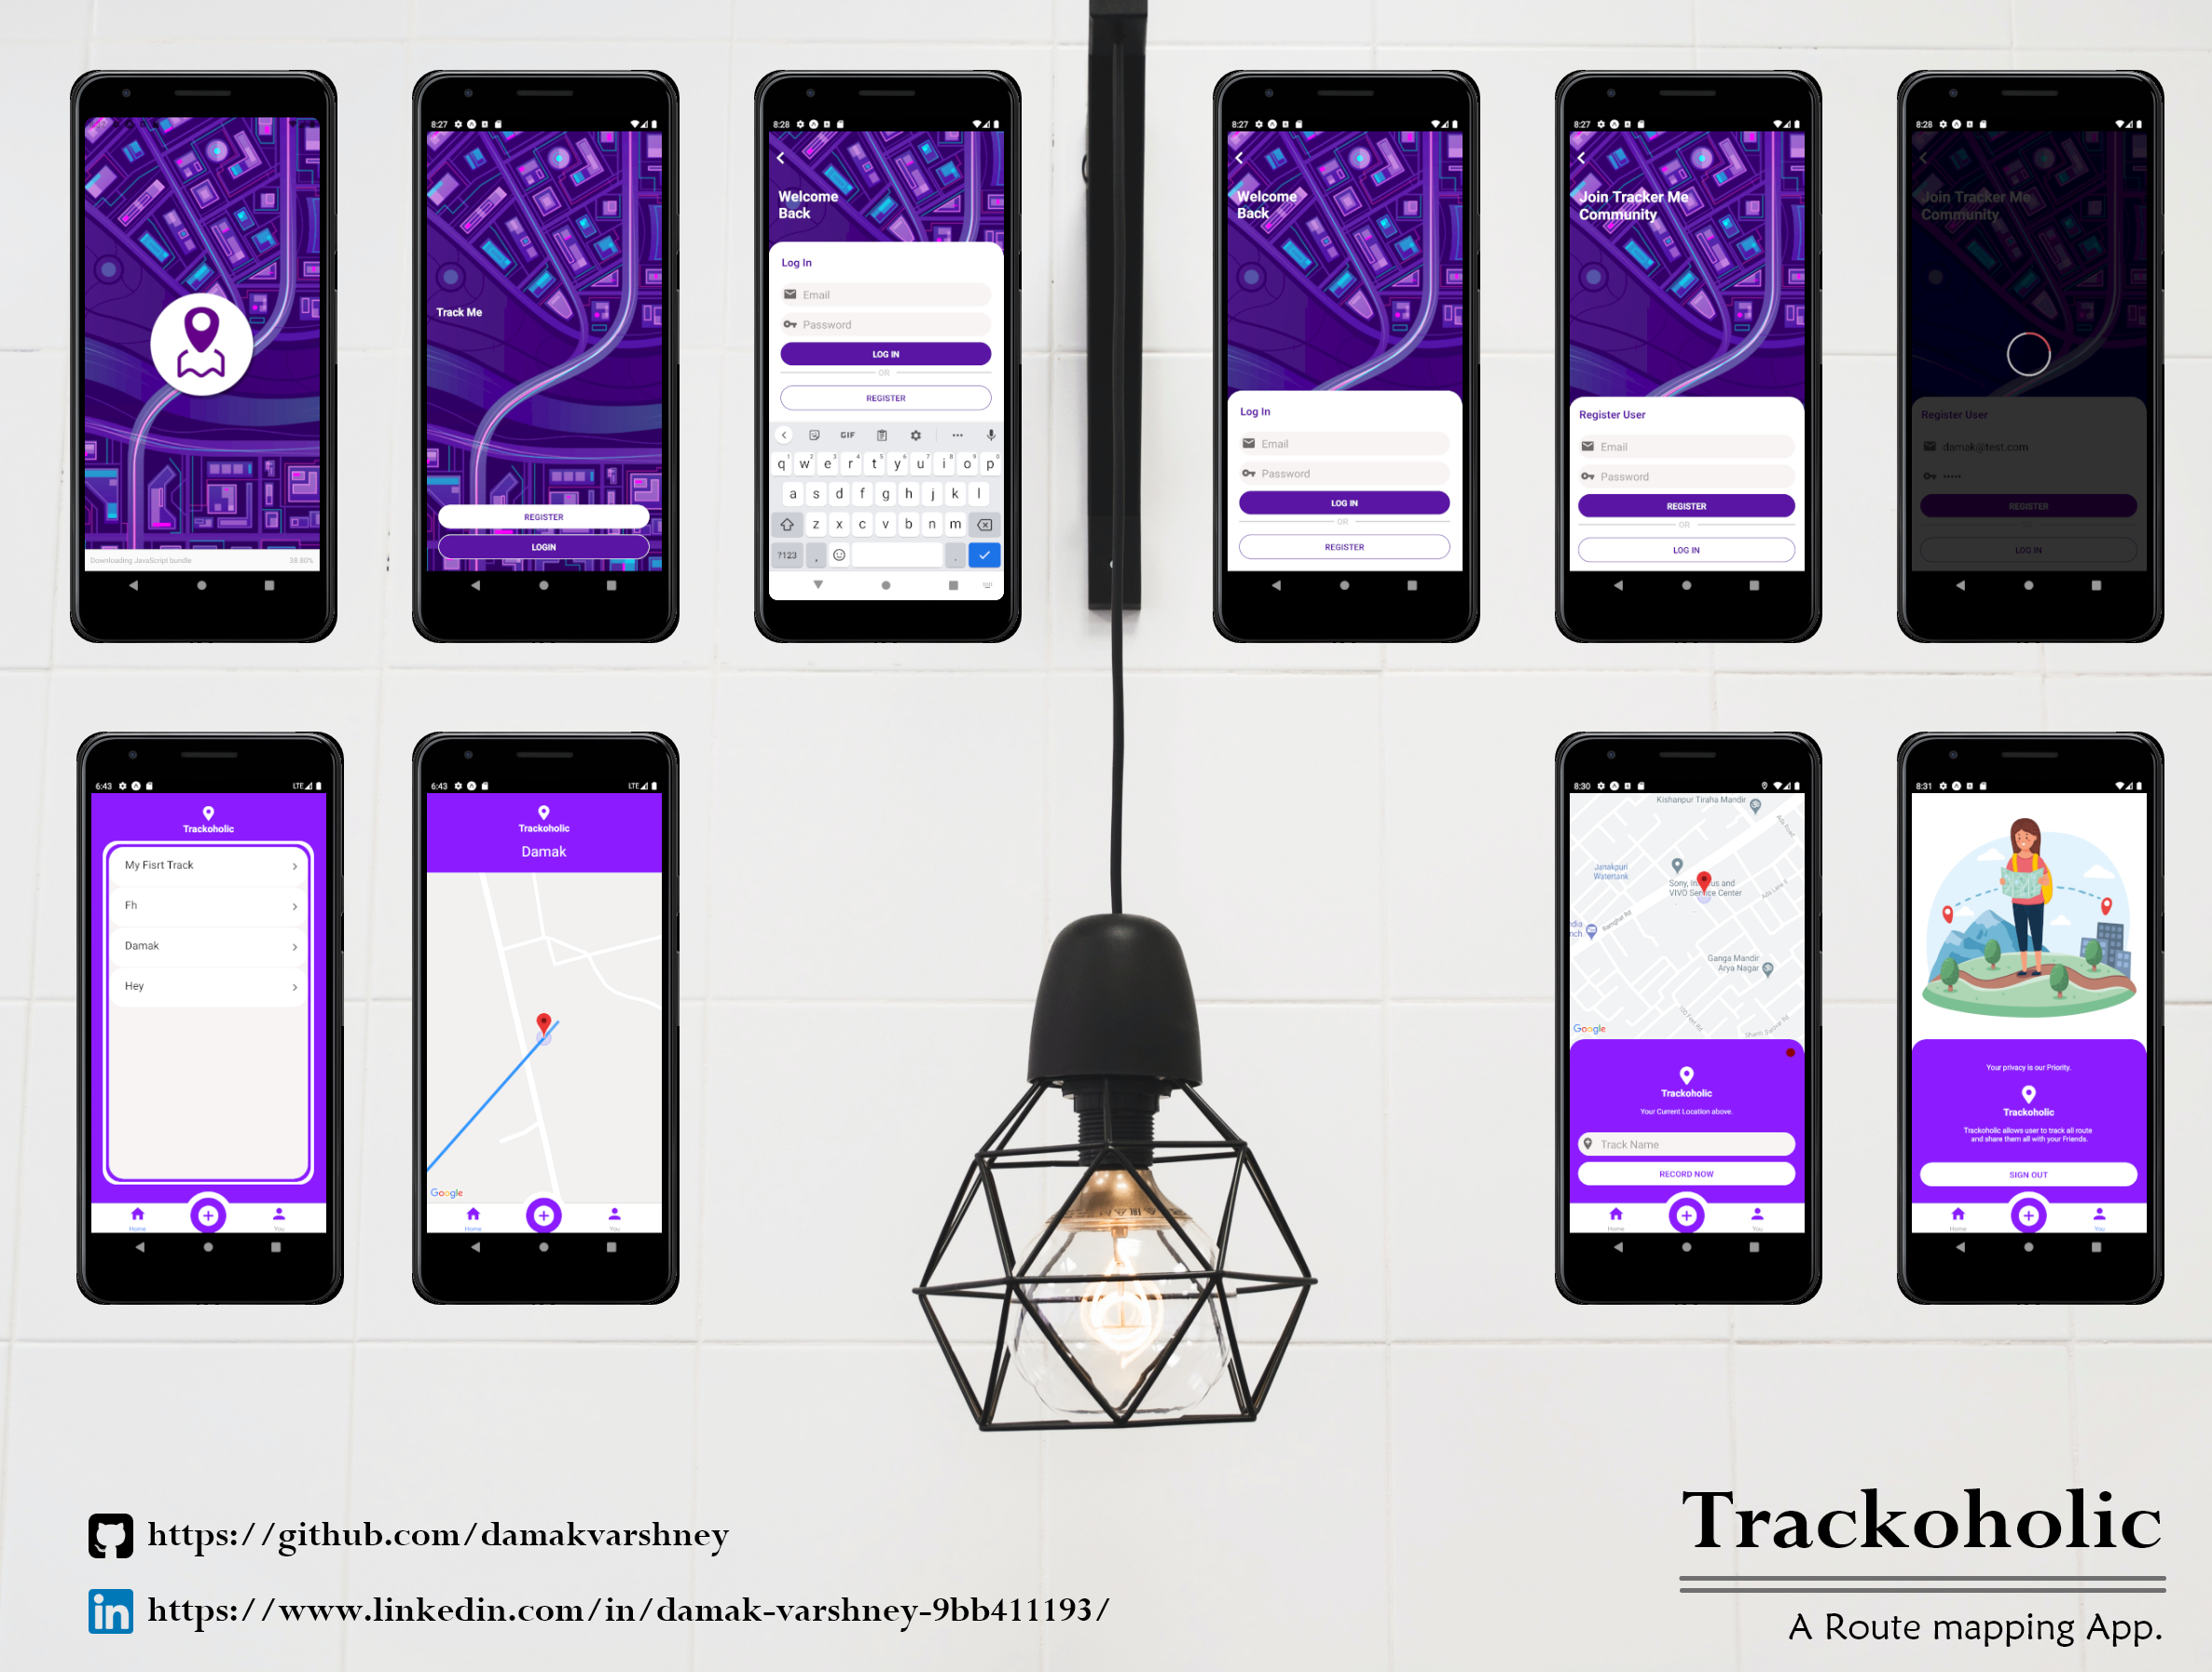
A tracking app with the following features:
- Authentication with Signin / Signup screens
- Allows user to track their position and plots the route on map
- Allows users to save a track to their account
- Lists all saved tracks
- See more details on a saved track
- Account Screen / Signout
The backend is using mongoDB to help provide a set of CRUD services which the APP uses.
Within both the /app & /server directory install the npm packages with:
npm install
Within /app
Run the following command to start the application. This will use expo.io to build the application ready to be tested on iOS or Android. You can use the Expo app on either the iOS or Google Play store. Alternatively you can run the application using the simulator.
npm start
The backend is being powered with mongoDB. You will need to create an account at cloud.mongodb.com. Then create a new cluster and follow the instructions along with 'Connect the Cluster' to 'your application'.
Once you have the connection string. E.g mongodb+srv://**<user_name>**:**<password>**@cluster0.qr24r.mongodb.net/**<dbname>**?retryWrites=true&w=majority
Within /server/src/index.js, Add your connection string to line 16.
Then run the following command to start the server which connects to mongoDB: npm run db
If your testing on a real device and having issue connecting to the local json-server, then you may want to run ngrok. This will give you a real URL that points to the local version of json-server running on post 3000.
Run:
npm run tunnel
Then within /app/src/api/tracker.js. Update http://localhost:3000 with the "Forwarding" address that ngrok provided.
These all are the screenshots related to Trackoholic, ranging from SplashScreen to Account Screen. All Screens are designed in @AdobeXD.
