howto devonfw ide CobiGen PoC E2E
This article helps to create a sample application using CobiGen.
Download and install devonfw IDE by this tutorial.
The HOW_TO is divided in 2 parts:
-
BE-Backend generator (DB+DAO+ services) -
FE-Frontend generator (Web App Angular + Ionic App)

So, ready to go! We’re going to start with the BE part.
1.Under your path installation of devonfw, you can find the eclipse-main.bat script. To run it, execute installation_path\eclipse-main.bat.This will open eclipse.
2.Create a project: Navigate in the folder containing the devonfw installation and then to workspaces/main. Right-click and choose "Open devonfw CMD shell here". Next, launch this command in the shell:
devon java create com.example.domain.myapp3.In eclipse, import the project as a maven project as specified in the image below:
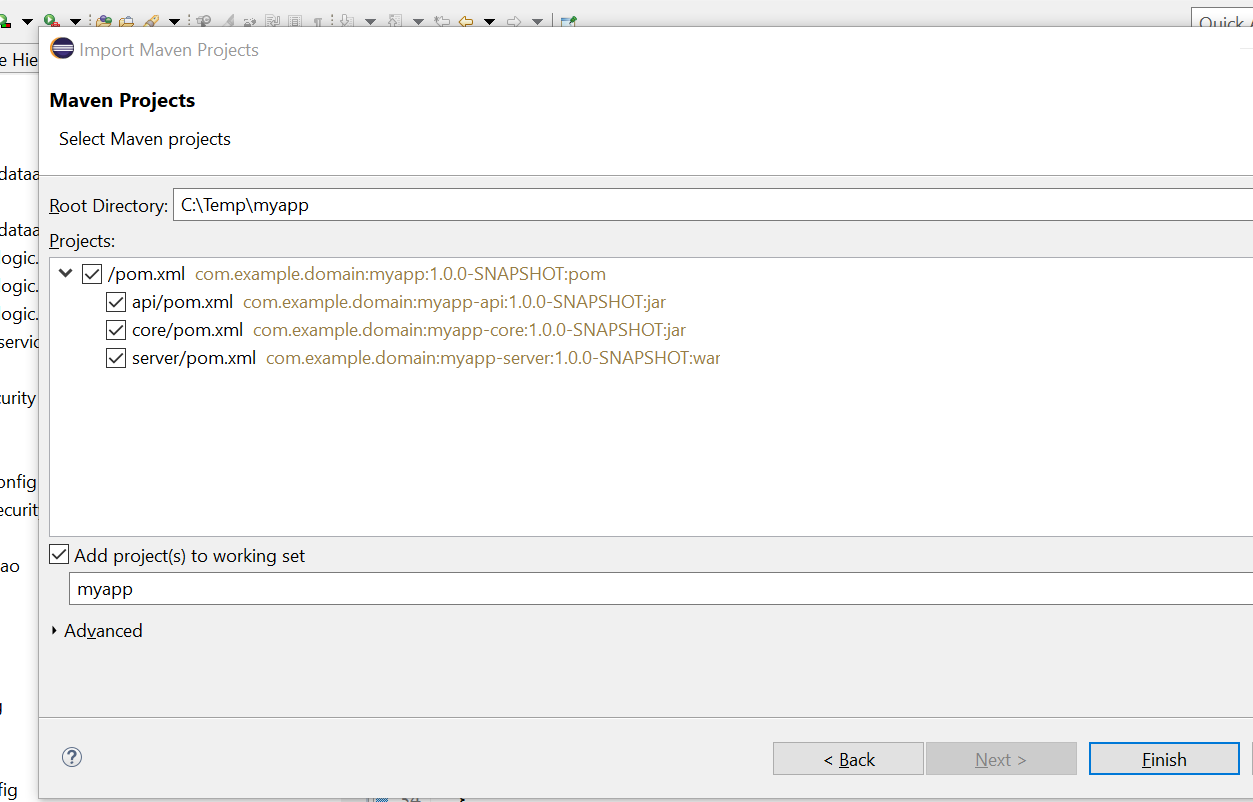
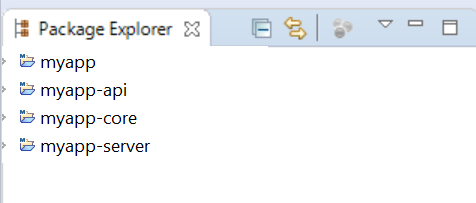
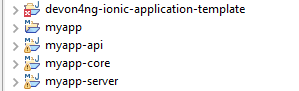
4.Click FINISH. Now you should have the following 4 projects:
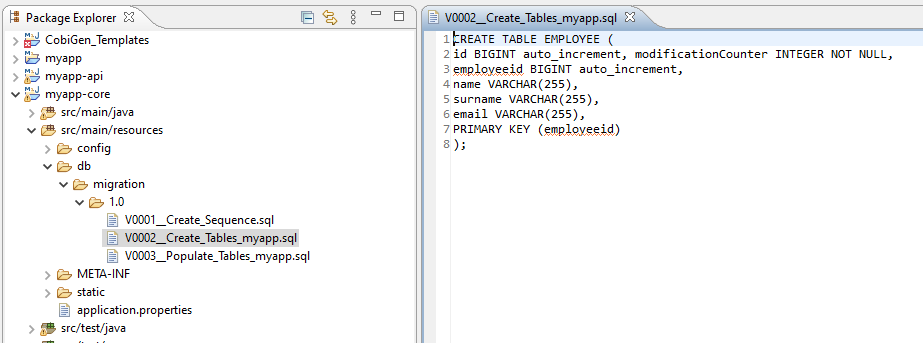
5.Create a new SQL file V0002__CreateTables_myapp.sql inside `myapp-core` , under the folder path `/myapp-core/src/main/resources/db/migration/1.0` and insert the following script:
CREATE TABLE EMPLOYEE (
id BIGINT auto_increment, modificationCounter INTEGER NOT NULL,
employeeid BIGINT auto_increment,
name VARCHAR(255),
surname VARCHAR(255),
email VARCHAR(255),
PRIMARY KEY (employeeid)
);
WARNING 1: In this folder there is only one file (0001). You have to add the other files in progressive number order (i.e. 0002)!
WARNING 2: There are 2 underscores in the name!
6.Create another SQL file analogously named V0003__PopulateTables-myapp.sql in the same folder and add following script about the INSERT to populate the table created before. Please note the warnings from the previous step here, as well.
INSERT INTO EMPLOYEE (id, modificationCounter, employeeid, name, surname,email) VALUES (1, 1, 1, 'John', 'Doe', 'john.doe@example.com');
INSERT INTO EMPLOYEE (id, modificationCounter, employeeid, name, surname,email) VALUES (2, 2, 2, 'Tom', 'Smith', 'tom.smith@example.com');
INSERT INTO EMPLOYEE (id, modificationCounter, employeeid, name, surname,email) VALUES (3, 3, 3, 'Joe', 'Schmoe', 'joe.schmoe@example.com');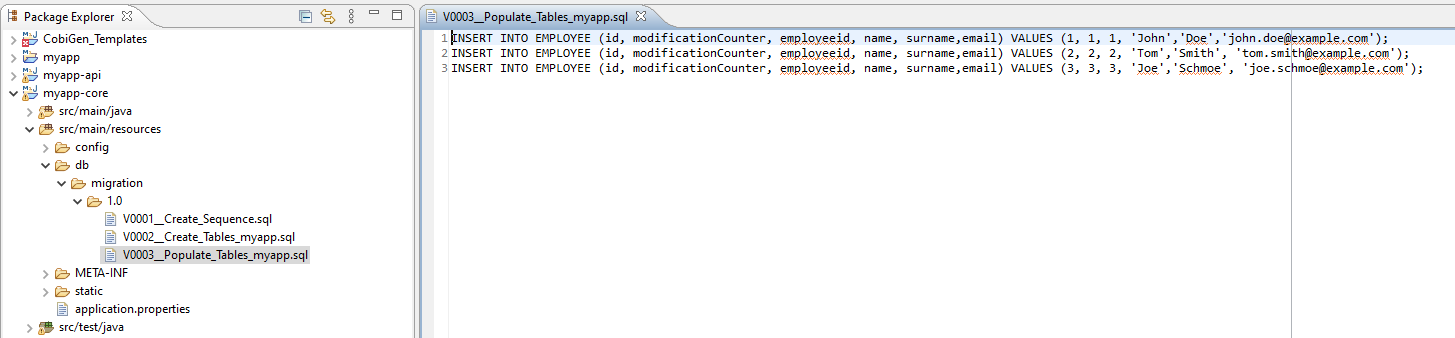
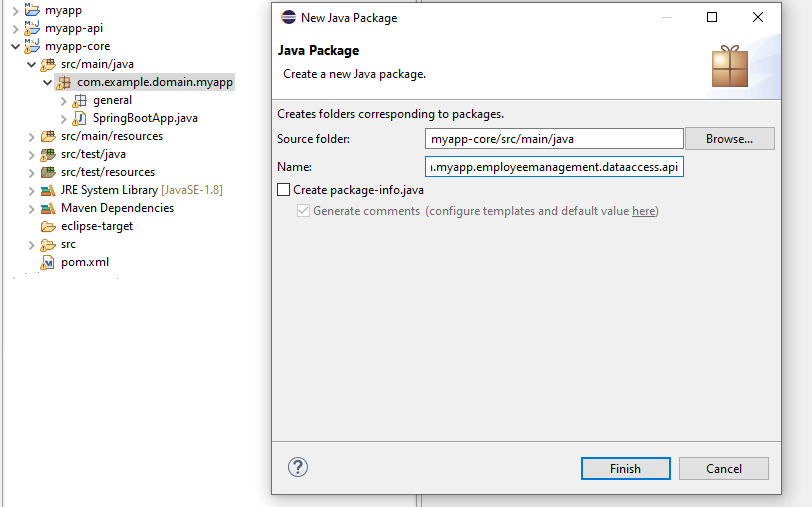
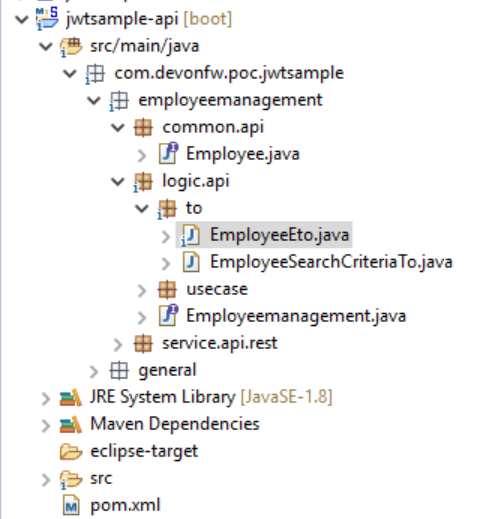
7.We will now create the Entity Class for the code generation. For this, create a package named com.example.domain.myapp.employeemanagement.dataaccess.api in the folder `myapp-core/src/main/java`.
WARNING: It’s important to follow this naming convention to ensure CobiGen is working properly.
Now create a new class named EmployeeEntity in this package and paste the code below to turn it into a JPA Entity.
package com.example.domain.myapp.employeemanagement.dataaccess.api;

import javax.persistence.Entity;
import javax.persistence.GeneratedValue;
import javax.persistence.GenerationType;
import javax.persistence.Column;
@Entity
@javax.persistence.Table(name = "EMPLOYEE")
public class EmployeeEntity {
  @Column(name = "EMPLOYEEID")
  @GeneratedValue(strategy = GenerationType.IDENTITY)
  private Long employeeId;
  @Column(name = "NAME")
  private String name;
  @Column(name = "SURNAME")
  private String surname;
  @Column(name = "EMAIL")
  private String email;
}
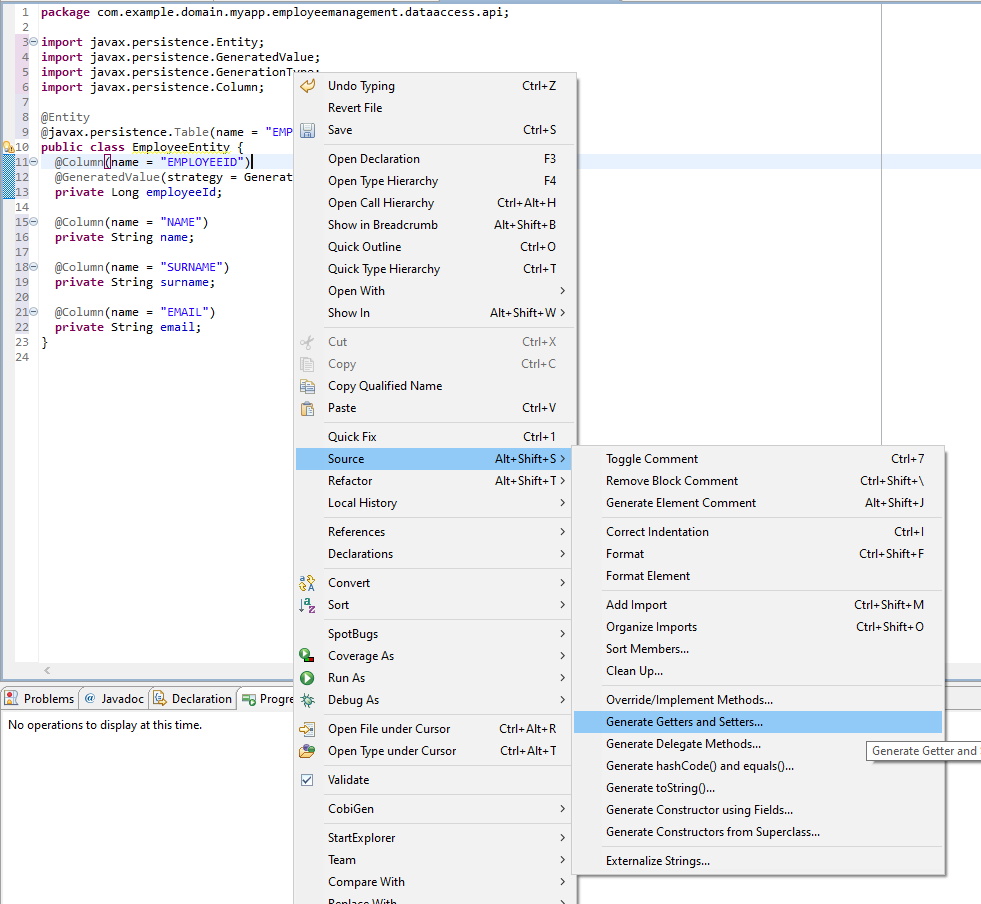
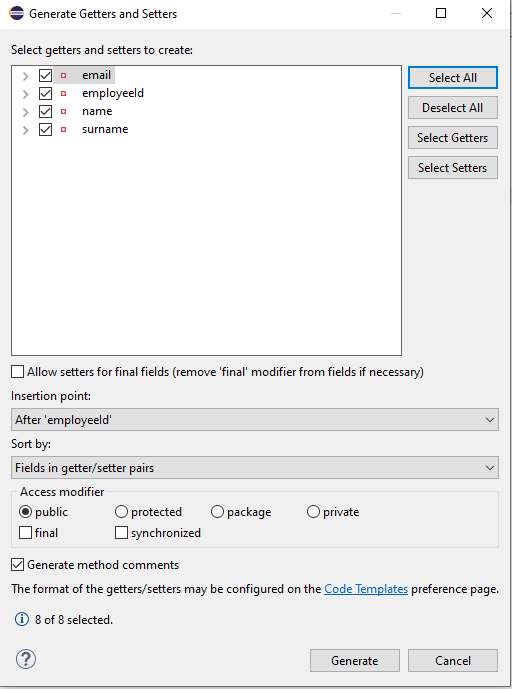
8.Generate getters and setters for all attributes, as you can see in the image below:
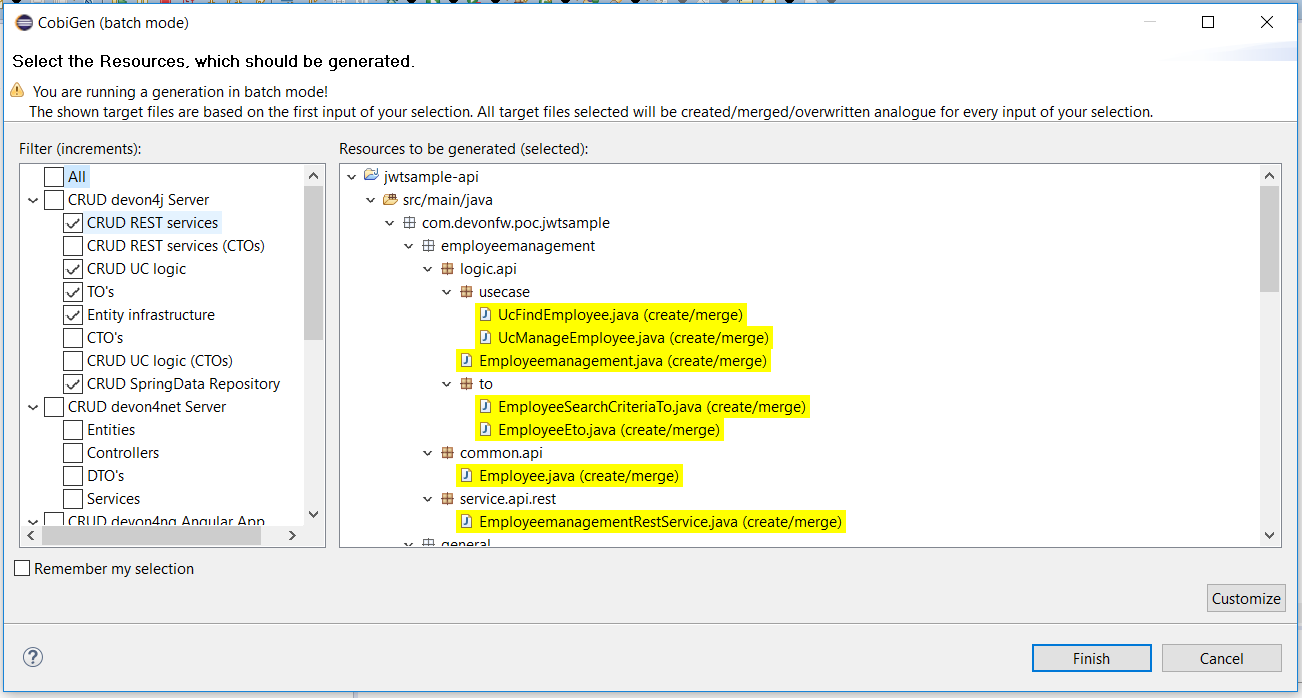
9.Now we can use CobiGen to generate code! First, right-click in the package explorer on EmployeeEntity.java → CobiGen and select Update Template. Next, right-click on EmployeeEntity.java → CobiGen → Generate and tick the boxes as can be seen in the picture:
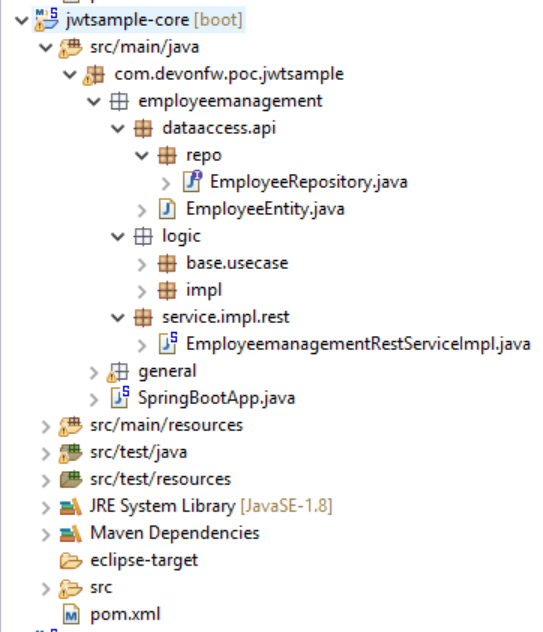
10.Click on Finish to complete the process. The entire BE layer structure including CRUD operation methods was auto generated.
Some classes are generated in the API part (`myapp-api`), e.g. interfaces, as shown below:
Other classes are generated in the core part (`myapp-core`), like implementations, as shown below:
11.The last step is to add the cross-domain process, as we are developing the JavaScript client and the server application separately. For this, we need to prepare the server side to accept requests from other domains, covering the following points:
-
Accept request from other domains.
-
Accept devonfw used headers like
X-CSRF-TOKENorcorrelationId. -
Be prepared to receive secured request (cookies).
Add these two kind of dependencies in the pom.xml of the `myapp-core` folder, at the end of the list of dependencies:
    <dependency>
      <groupId>com.devonfw.java.starters</groupId>
      <artifactId>devon4j-starter-security-cors</artifactId>
    </dependency>
    <dependency>
      <groupId>com.devonfw.java.starters</groupId>
      <artifactId>devon4j-starter-security-csrf</artifactId>
    </dependency>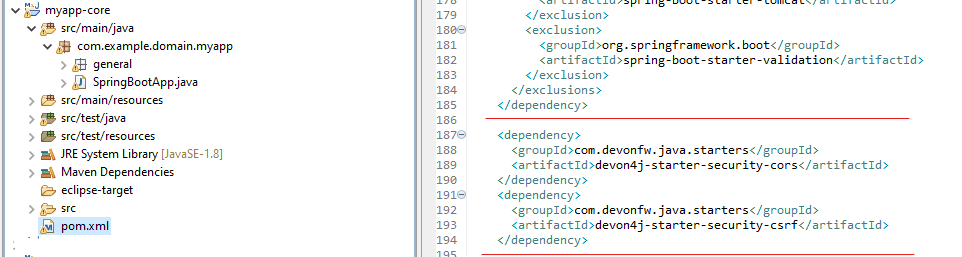
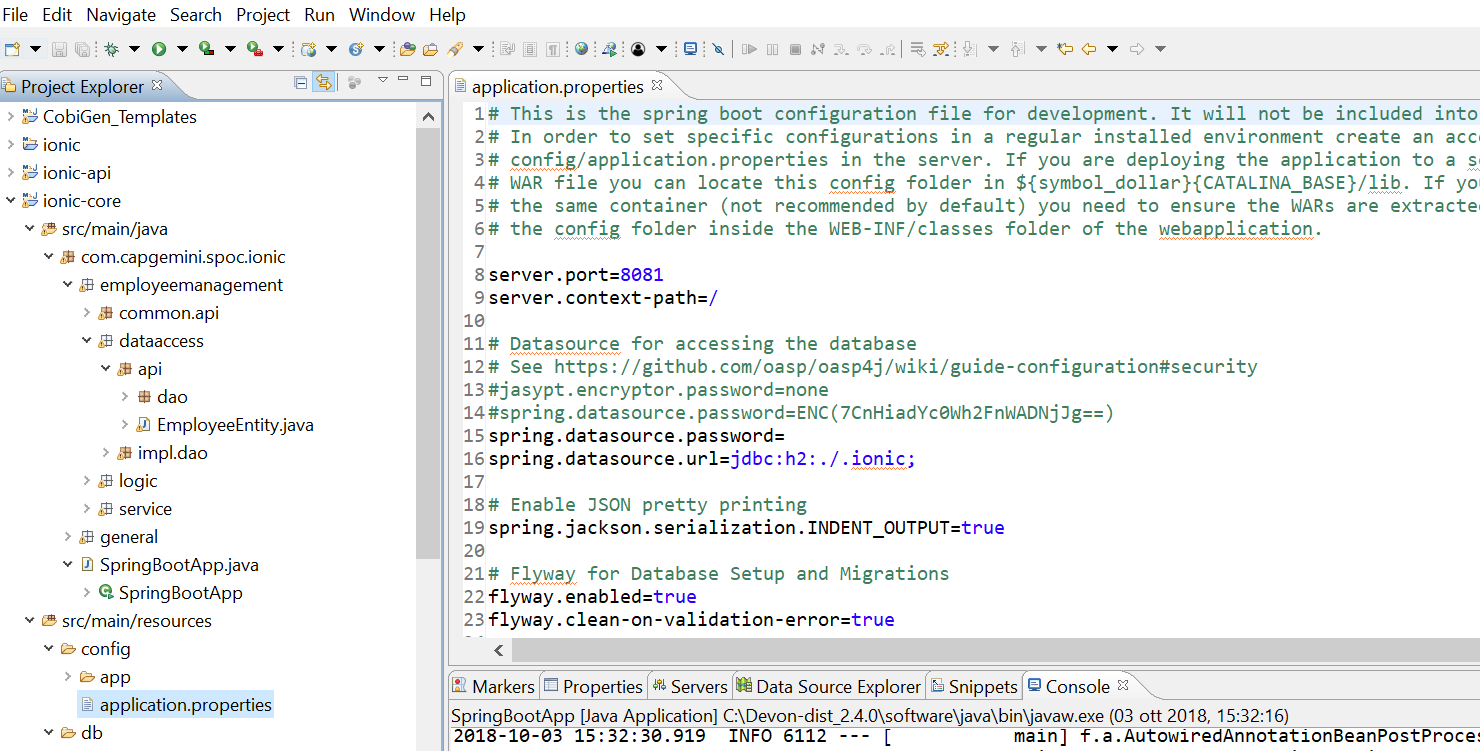
12.Add these properties in your application.properties file, in the myapp-core folder in the resources/config:
security.cors.spring.allowCredentials=true
security.cors.spring.allowedOriginPatterns=*
security.cors.spring.allowedHeaders=*
security.cors.spring.allowedMethods=OPTIONS,HEAD,GET,PUT,POST,DELETE,PATCH
security.cors.pathPattern=/**
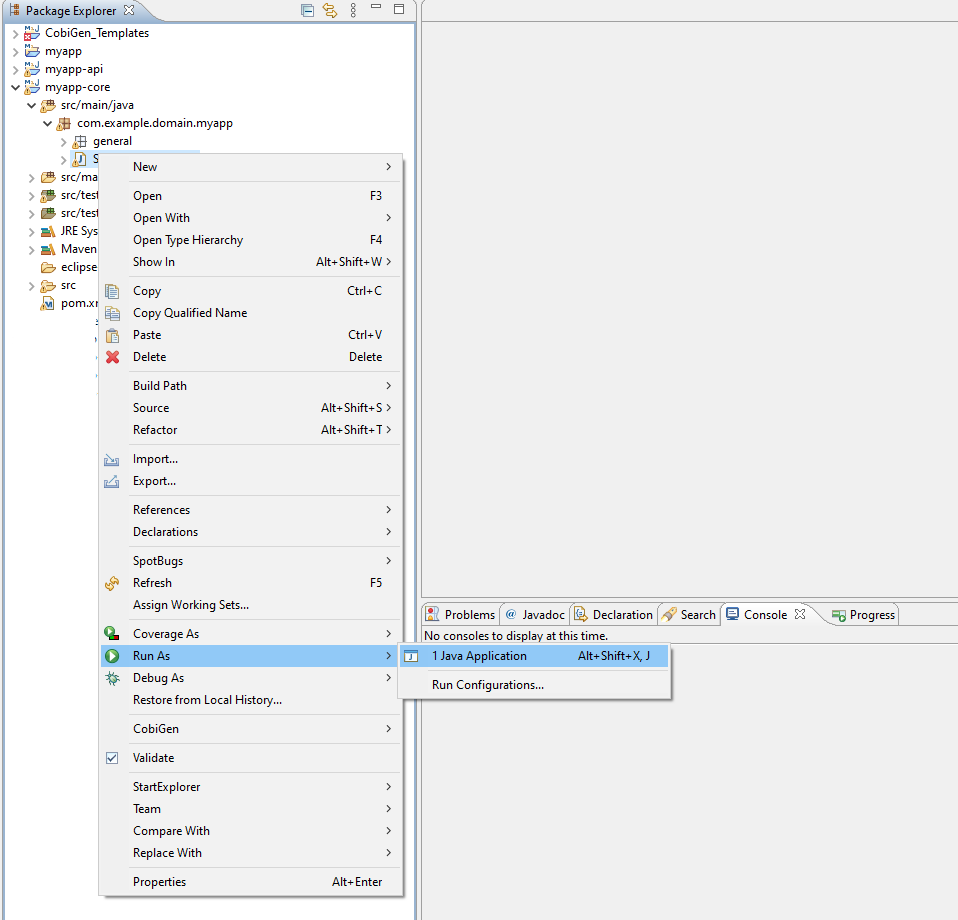
13.To check if the BE layer has been generated properly, start the server by right-clicking on `SpringBootApp.java` → run as → Java Application. If it looks like the image below, the BE part is done!

Optional step:
14.To test if the Backend works properly, we perform a REST service test! For this, we use Postman. You can download it here.
First send a POST request for the body with the URL [source, URL].
http://localhost:8081/services/rest/employeemanagement/v1/employee/1
Under Body, insert the JSON containing
{
  "j_username":"admin",
  "j_password":"admin"
}
Click on send. "Status:200 OK" means it worked.
Next, we create a new request, this time GET type with the URL
http://localhost:8081/services/rest/employeemanagement/v1/employee/1Click on send. If you get "Status:200 OK" again and see employee "John Doe" as you can see in the image below, the Backend works fine!

Let’s start with the Frontend! We want to create an Angular Web App:
1.To generate angular structure, download or clone devon4ng-application-template from
https://github.com/devonfw/devon4ng-application-template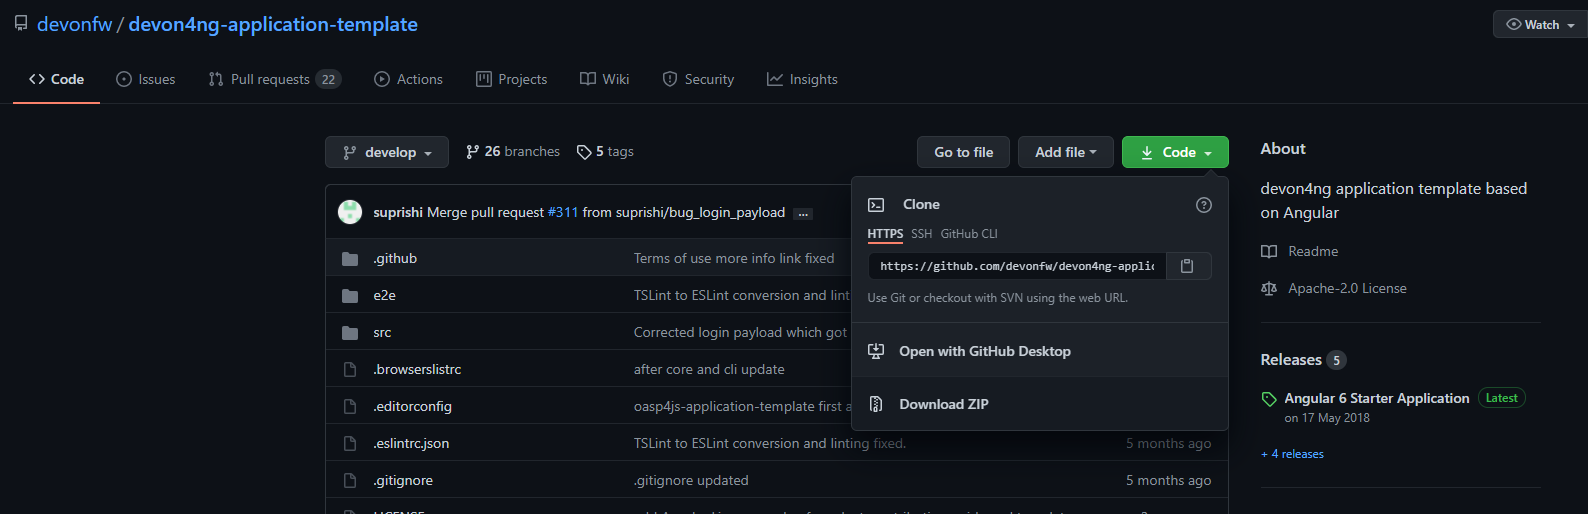
IMPORTANT if you download the zip of the source code, the name of the app MUST BE devon4ng-application-template. Extract it into your devonfw folder, under workspaces/main.
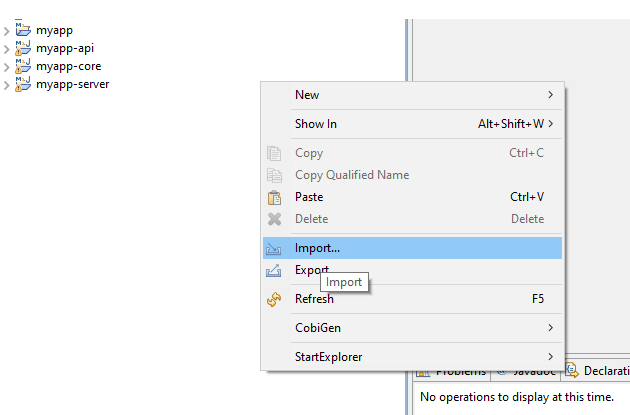
2.After downloading the APP, open the application in Eclipse. For this, right click on the left part of Eclipse and click "Import"
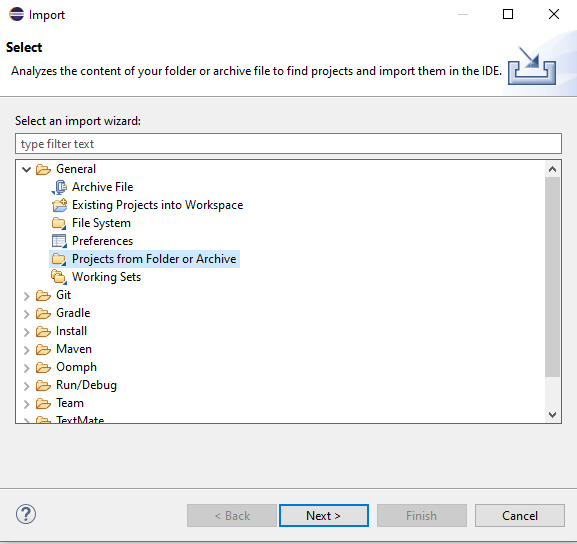
 Then choose "Projects from Folder or Archive":
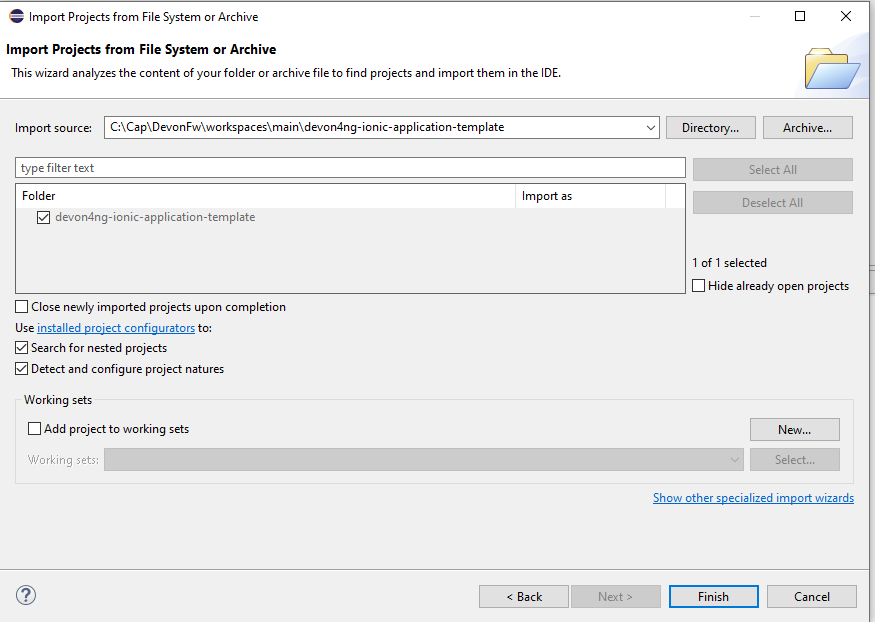
 Select the folder containing the Angular
 FE Application, under workspaces/main.Click on Finish after all dependencies have been loaded.
 Now, you should have a structure like this:
3.Right click on EmployeeEto.java file in the package com.example.domain.myapp.employeemanagement.logic.api.to, in the BE part (`myapp-api module`). Choose Cobigen → Generate and select the options as seen in the screenshot and click on Finish:

4.The entire ANGULAR structure has been auto generated and the generated code was merged into already existing code.
The app-routing.module.ts file (in src/app) should correspond to the code below, so copy the code and replace the existing content in your file with this:
import { NgModule } from '@angular/core';
import { RouterModule, Routes } from '@angular/router';
import { AuthGuard } from './core/security/auth-guard.service';
import { NavBarComponent } from './layout/nav-bar/nav-bar.component';
const routes: Routes = [{
        path: '',
        redirectTo: '/login',
        pathMatch: 'full'
    },
    {
        path: 'login',
        loadChildren: () =>
            import('./auth/auth.module').then(m => m.AuthDataModule)
    },
    {
        path: 'home',
        component: NavBarComponent,
        canActivateChild: [
            AuthGuard
        ],
        children: [{
                path: 'initial',
                loadChildren: () =>
                    import('./home/initial-page/initial-page.module').then(
                        m => m.InitialPageModule,
                    )
            },
            {
                path: 'employee',
                loadChildren: () =>
                    import('./employee/employee.module').then(
                        m => m.EmployeeModule,
                    )
            }
        ]
    },
    {
       path: '**',
       redirectTo: '/login'
    },
];
@NgModule({
    imports: [
        RouterModule.forRoot(routes)
    ],
    exports: [
        RouterModule
    ]
})
export class AppRoutingModule {
}
5.To make the Employee Grid in you FE application visible, you have to replace the code in nav-bar.component.html with the code below:
<div class="home-container-outer">
<div class="home-container-inner">
<mat-toolbar class="app-header-container" color="primary">
<app-header (toggle)="onToggle($event)" [sideNavOpened]="sideNavOpened"></app-header>
</mat-toolbar>
<div class="sidenav-container-outer">
<div class="sidenav-container-inner">
<mat-sidenav-container>
<mat-sidenav [disableClose]="false" [mode]="isMobile ? 'over' : 'side'" [opened]="!isMobile || sideNavOpened"
#sidenav>
<mat-nav-list>
<!-- Sidenav links -->
<a id="home" mat-list-item [routerLink]="['./initial']" (click)="close()">
<mat-icon matListAvatar>
home
</mat-icon>
<h3 matLine>{{ 'home' | transloco }}</h3>
<p matLine class="desc">{{ 'description' | transloco }}</p></a>
<a id="employee" mat-list-item [routerLink]="['./employee']" (click)="close()">
<mat-icon matListAvatar>
grid_on
</mat-icon>
<h3 matLine> {{ 'employeemanagement.Employee.navData' | transloco }} </h3>
<p matLine class="desc"> {{ 'employeemanagement.Employee.navDataSub' | transloco }} </p></a>
</mat-nav-list>
</mat-sidenav>
<mat-sidenav-content>
<div class="content-container-outer">
<div class="content-container-inner">
<router-outlet></router-outlet>
</div>
<mat-toolbar class="public-footer">
<span>devonfw Application</span>
<span>devonfw</span>
</mat-toolbar>
</div>
</mat-sidenav-content>
</mat-sidenav-container>
</div>
</div>
</div>
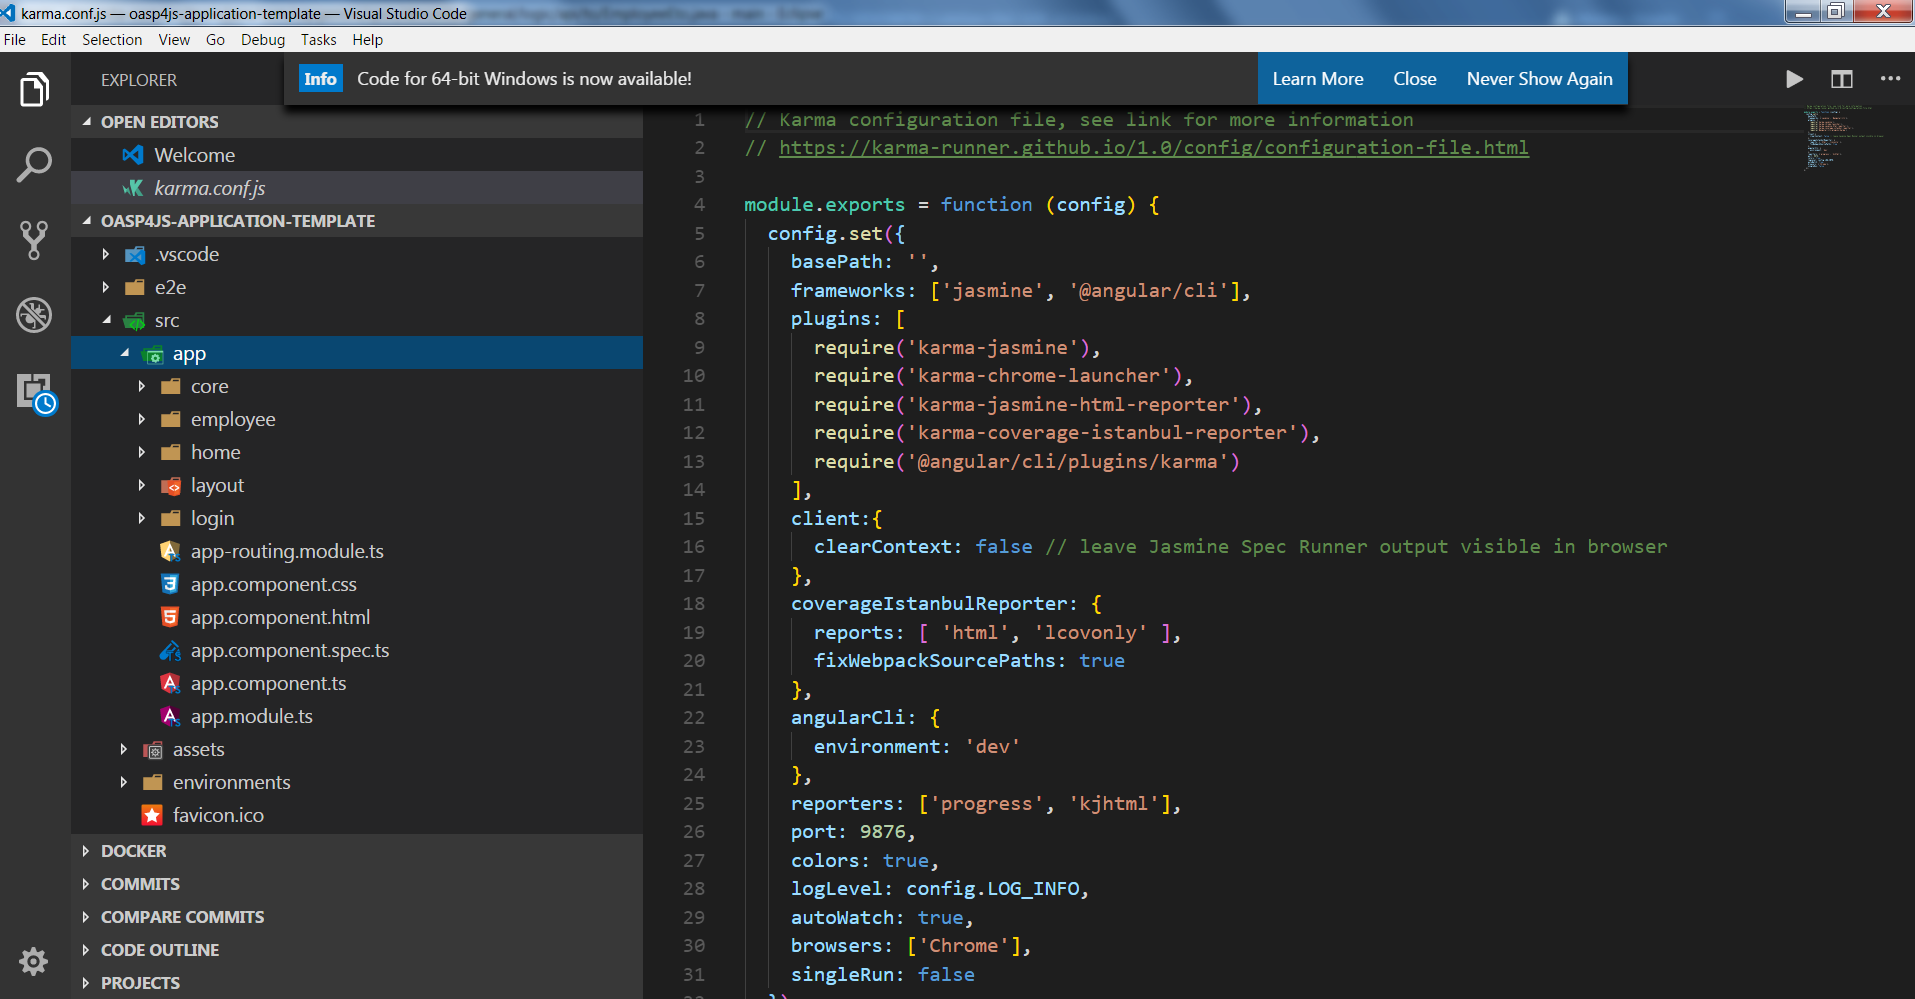
</div>6.Open the devon CMD shell and execute devon npm install in workspaces/main/devon4ng-application-template, which will download all the required libraries.
7.Check in the file environment.ts (in src/app/environments) if the server path is correct.
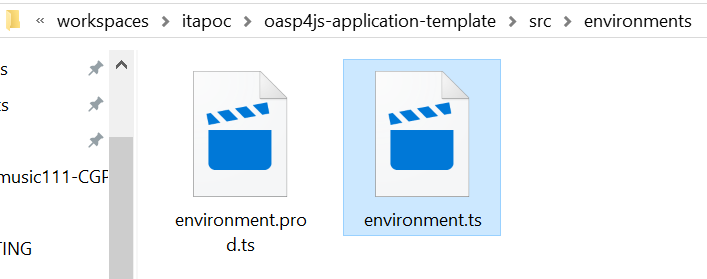
The values PATH, TCP port etc. in application.properties should match the image below. Set the security field to CSRF , if it is not configured this way already
export const environment = {
    production: false,
    restPathRoot: 'http://localhost:8081/',
    restServiceRoot: 'http://localhost:8081/services/rest/',
    security: 'csrf'
};
8.For the last steps, the BE server should be running. Then run devon ng and then devon ng serve -o to start the Angular Application, in a CMD shell in your application folder (workspaces/main/devon4ng-application-template).
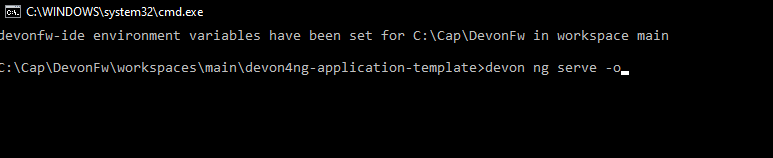
9.If the command execution is successful, the screen shown below will appear and you would be automatically redirected to the URL:
http://localhost:4200/login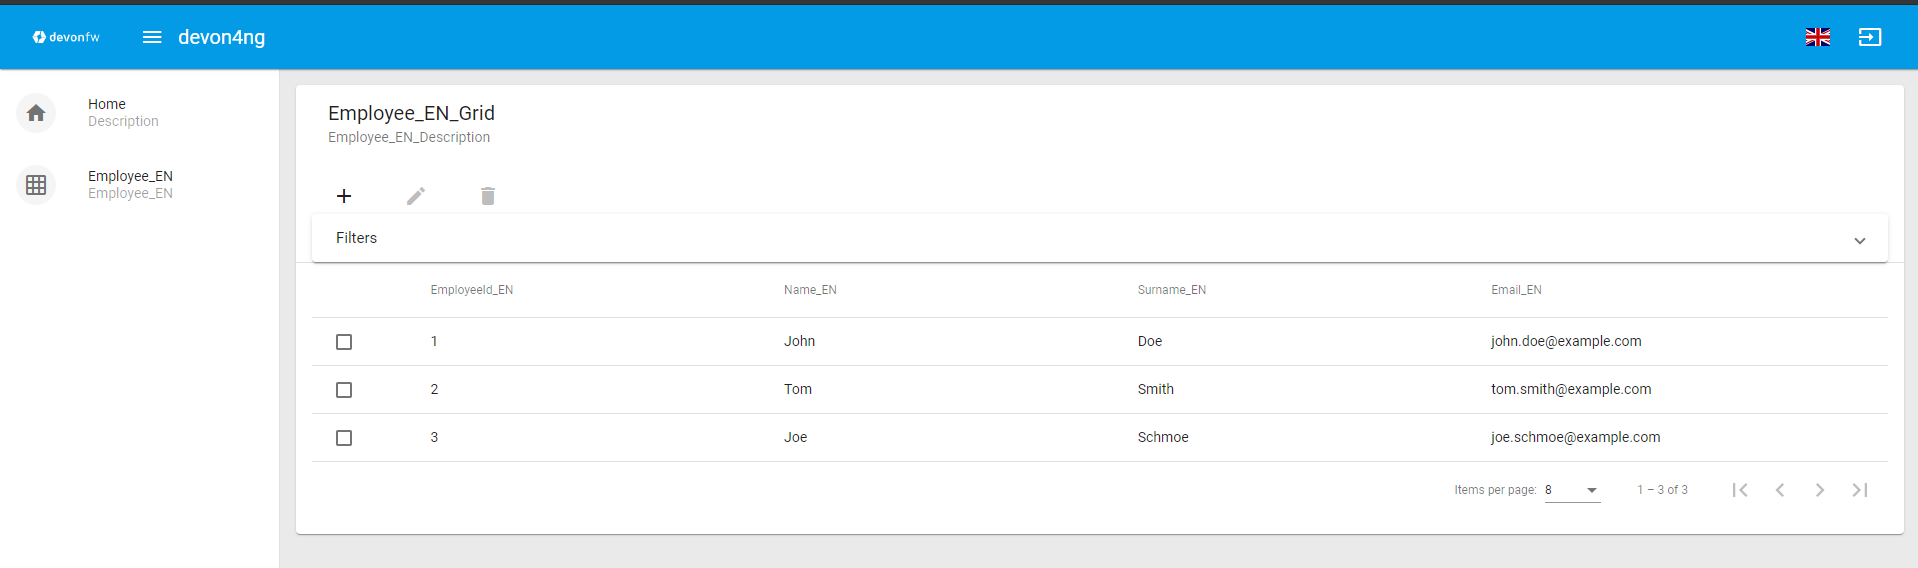
To log into the web application, you can use the credentials admin for user and for password.
Now the ANGULAR WebApp is done!
Disclaimer
If you discover any documentation bugs or would like to request new content, please raise them as an issue or create a pull request. Contributions to this wiki are done through the main repo under the folder documentation.
License

This documentation is licensed under the Creative Commons License (Attribution-NoDerivatives 4.0 International)