-
Notifications
You must be signed in to change notification settings - Fork 166
Installing BugNET
There are three ways you can install BugNET:
- Install it using the Web Deployment Package (Recommended)
- Download the BugNET .zip file and install it as described in Manually Installing BugNET Using a zip file.
- Download the BugNET source code and build BugNET from the command line or in Visual Studio.
This topic shows how to install BugNET using the Install and Web Deploy packages.
The minimum requirements for running BugNET are the following:
- ASP.NET 4.5
- A web server such as IIS Express 8, 7.5 or IIS 7.x.
- Microsoft SQL Server 2008 Express or greater.
When installing IIS, make sure you enable the ASP.NET IIS modules. Also make sure that you run BugNET in an integrated pipeline ASP.NET 4 application pool.
To install BugNET via the web deployment package please refer to the following instructions on how to Import a Package through IIS Manager
Download the BugNET .zip file from CodePlex. Select the X.X.XXX Install.zip file for the latest build of BugNET as shown in the following illustration:
- Extract the contents of the install package to a folder on your computer.
- Create a directory in the c:\inetpub\wwwroot\ folder called bugnet (c:\inetpub\wwwroot\bugnet)
- Copy the contents of the BugNET folder in the install package to the c:\inetpub\wwwroot\bugnet\ folder
- Go to the properties of the following folders / files and click on the Security tab, be sure to add the permissions for the appropriate user (WinXp/2000 uses the local ASPNET account, Win2003/Vista/2008/7 use the local Network Service account). Give this account modify permissions of the following folders (if necessary):
- Uploads - if using file system based uploads
- App_Data - This folder is where BugNET stores its database.
- Create a virtual directory in IIS for the bugnet folder.
- Open up the the web server IIS Console, Start-> Run-> INETMGR
- Expand the websites node
- Expand the default websites node
- Right click on the BugNET folder under the default website, click on Convert to Application, if you don't have that option, choose properties and then add the application.
- If you are using IIS 7, configure it to run in integrated mode, and configure the application pool to run the .NET Framework version 4.
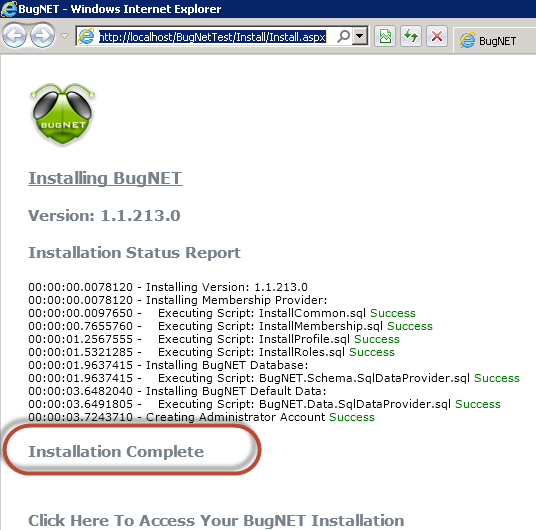
- Browse to the website using http://localhost/BugNet/Install/Install.aspx. The installation process will now start.
When the installation is complete, you may log in with the admin user account.
Username: admin Password: password
- Extract the contents of the install package to a folder on your computer.
- Create a directory in the c:\inetpub\wwwroot\ folder called bugnet (c:\inetpub\wwwroot\bugnet)
- Copy the contents of the BugNET folder in the install package to the c:\inetpub\wwwroot\bugnet\ folder
- Go to the properties of the c:\inetpub\wwwroot\bugnet\ folder, click on the Security tab, be sure to add the permissions for the appropriate user (WinXp/2000 uses the local ASPNET account, Win2003/Vista/2008/7 use the local Network Service account). Give this account modify permissions on (if necessary):
- Uploads - if using file system based uploads
- Create a virtual directory in IIS for the bugnet folder.
- Open up the the web server IIS Console, start-> run-> INETMGR
- Expand the websites node
- Expand the default websites node
- Right click on the BugNET folder under the default website, click on Convert to Application, if you don't have that option, choose properties and then add the application.
- Configure the database server.
- Load the SQL Server Management tool
- Expand the Server/Security node
- Create a blank SQL Database (e.g db name 'BugNet') on your sql server using a case insensitive collation.
- Configure the SQL User Security/Account to allow IIS and ASP.NET access to the database in SQL.
- Verify that NT Authority\Network Service is listed, if not add a new account and search for the local NETWORK SERVICE user (if using Windows XP/2000 use the local ASPNET account)
- Right click on the NT Authority\Network Service account and choose properties.
- Choose the User Mapping section on the left. Select your database on the right, and then down below choose the db_owner option, click OK
- Edit the Web.config file with a text editor of your choice. Find the BugNET connection string setting and change the connectionString.
<connectionStrings>
     <clear/>
     <add name="BugNET" connectionString="server=MyServer;database=BugNet;Trusted_Connection=True" providerName="System.Data.SqlClient" />
</connectionStrings>- Right click on Server/Security and choose New Login
- Define new SQL Server authentication login information, username/password.
- From the User Mapping section choose the new BugNET database and configure the db_owner role membership. Click OK.
- Edit the Web.config file with a text editor of your choice. Find the BugNET connection string setting and change the connectionString.
<connectionStrings>
<clear/>
<add name="BugNET" connectionString="server=MyServer;database=BugNet;uid=BugNet;pwd=BugNet" providerName="System.Data.SqlClient" />
</connectionStrings>
Browse to the website using http://localhost/BugNet/Install/Install.aspx. The installation process will now start.

When completed, you may log in with the admin user account.
Username: admin Password: password
Verify that your application pool in IIS is running under .NET 4.5.
- Backup live database & files
- Put App_Offline.htm in live BugNET directory. (optional) See [url:http://stackoverflow.com/a/1153545] for more information on using the App_Offline.htm feature of asp.net
- Download new distribution to local machine
- Use WinMerge or equivalent to compare new and old web.configs. Copy across the connection string to the new one.
- Start BugNET, hit the home page to verify that it compiles
The database is automatically upgraded when you hit the home page. You should see a log of what's been done plus a "success" message after a few minutes.
http://www.dotnetcamp.com/post/2012/10/20/How-to-install-BugNet.aspx