A chapter of featherless' digital creative history.
The Script-and-Go scripting language was built to allow people to build OpenGL applications without a compiler.
/*  Script-and-Go code by Jeff Verkoeyen,
	created 2003	*/

VARIABLES;
	@int integer;
	@float integer2;
	@char testing;

	testing="hey";

	integer2=34;

BEGIN;
	integer+234;
	DrawMode("front","lines");
	Reset;							// Equivalent to LoadIdentity
	DisableTextures;				// Disables the textures
	Move(0,0,-100);					// Moves the line back on the z-plane
	SetColor(1.0f,0.5f,0.25f,0.0f);	// Sets the color to orange
	DrawLine(0,0,0,38,20,0);		// Draws the line
	DrawLine(30,20,0,-10,-30,40);	// Draws another line, but closer

	Reset;
	Move(0,0,-100);
	SetColor(1.0f,1.0f,0.0f,0.5f);
	Rotate(integer,1.0f,0.0f,0.0f);
	Move(10,20,0);
	Box(-10,10,0,10,10,0,10,-10,0,-10,-10,0);
END;
Welcome to the Script-and-Go Help file. This help file will hopefully teach you how to use Script-and-Go as fluently as the current language you speak.
The purpose of Script-and-Go is to allow anyone who either doesn't have a compiler or doesn't know how to program (or both) to program basic programs in OpenGL.
If you have never programmed before, and are interested in trying out a language, this might be just right for you. Scripting is not technically programming as a language, however, because it usually involves creating code that will run through an "interpreter", which is the Script-and-Go EXE file that you should have (if you don't have it, it can be found on the IVGDA site here: IVGDA Link
If you are a person who does not have a compiler, this program will allow you to get the sense of programming, without ever needing to buy a compiler! Because this program is merely an interpreter, you get the advantage of precompiled exes, and you don't have to worry about creating windows or any of the other Win32 stuff.
However, the main draw-back to scripting is that the language is not easily changeable. For instance, if you were to want to create your own command, you would not be able to do so without contacting me about it. Even though this is an annoying draw-back, there are plenty more plusses than minuses about scripting.
Scripting is not only aimed at beginners, but by allowing scripting in programs, you allow the programmers themselves to test out little things very quickly, without ever having to recompile a program. And with S-a-G's error-testing and debugging features, you will be bug-free from all of your programs!
You only need a couple things to be able to start working with S-a-G:
First, you will need the most updated version of S-a-G, which can be found on the contact page . Second, you will want to have the newest version of this help file: if you go to the site and you see that the version of the help file on the site is higher than this one, redownload the new one. Third, you will need a Windows computer. The Exe was designed for Windows, and will only work IN Windows, unless the program has been edited, in which case the program should be destroyed/deleted.
Aaah, the infamous Hello World program. No language is ever complete without having at least one tutorial which includes a Hello World example.
Thing is, however, that in the current version of S-a-G, there is no way to output text :), so we have to make do with an intro to the comments.
Let's start off with the most essential part about S-a-G, the BEGIN and END structure.
BEGIN and END go hand in hand, you mustn't forget that, wherever there is a BEGIN, there is an END (even though you should only have one of each......)
Let's start off by making a simple program.
What you will need is to open up a text-editing program like Notepad, (NOT WORD, Word will generate creepy stuff all over the place), then, type in the following code:
BEGIN;

END;
As you can see, we started the program with a BEGIN statement, and ended with an END statement. That should make logical sense to you. Now, if you're new to programming, you probably don't understand why there has to be a semicolon at the end of each line. Well, the reason for that is so the interpreter can know when the end of a command is, and then be able to read up to that point and not have to read the whole file at once and just guess-and-check all over the place.
So remember, when programming in S-a-G, ALWAYS END EACH COMMAND WITH A SEMICOLON, do NOT forget to do this, or you will most likely get errors.
Now that you have typed those lines of code in to notepad or whatever you are using, save the file as "script.spt" without the quotes, and save it to the SAME folder as the one that the exe is in for the interpreter. The exe should be called "Script and Go.exe".
Once you have saved it to the folder, open up windows explorer or whatever you use to navigate your computer, find the exe and run it. If all goes well, your screen should go black and then just sit there.....
However, assuming that you messed up somewhere, check out the Errors page to learn about what might be happening.
Now that everyone should be on the same track, let's add our Hello World comments!
Right before the BEGIN; command, enter these lines of code:
/* Hello World, this program was made by <your name here>
   I made it on <date> and it is COOL
*/
That is what I like to call a "multi-line comment", because it will go across an infinite number of lines, untill it reaches a */, at which point it will stop.
Now, replace the BEGIN; code with this line of code:
BEGIN; // This is where the program begins
Then, replace the END; code with this:
END; // This is where the program stops
Now your program should look roughly similar to this:
/* Hello World, this program was made by <your name here>
   I made it on <date> and it is COOL
*/
BEGIN;   // This is where the program begins

END;    // This is where the program stops
The // comment is another type of comment that comments out everything from that point on in the line, regardless of where it IS in the line. This comment is usually best used right after a command so that others (or yourself) will be able to tell what you are doing on that particular command.
Save the program, and run the interpreter again. Notice any change? Well, if you did, you did something wrong here, because nothing should have changed at all :). Again, look at the Errors page if you don't understand what's going on.
The Basics of S-a-G include all of the basic commands and knowledge needed to operate the S-a-G language.
First off, let's get in to some basic drawing of shapes.
We'll build off of our Hello World application, and I'll try and explain as much about this code as I can, without confusing the beginners.
Let's start off with the Reset; command. I first want to explain the difference between the two different types of commands, however. First, there are the commands that are just like BEGIN; and END; and Reset; These commands are basic commands, and usually involving flipping a variable or starting something happening. Then, however, there are slightly more complicated commands which use parenthesis to mark off certain parameters inside of the command. For example: Move(0,0,-2); is a command that moves the current draw position. In this case, it will move the draw position 2 units back on the z-plane, and stay in the same spot on the x and y planes.
Now, on to Reset;
This command will get to be your best friend after only a few programs. By calling Reset; you reset the current drawing coordinates back to 0,0,0 (x,y,z). If you don't understand how this works, imagine this:
0,0,0 will be a spot directly on your monitor, place your finger smack-dab in the middle of your monitor, and that is 0,0,0. Now, 10,0,0 is a different story, since the first parameter is x, 10,0,0 will be about 10 units to the RIGHT. Move your finger 10 of whatever "units" you would like to the right, and that is 10,0,0. Now, Y is almost the same as moving on x, except UP. So if you wanted to be at 10,10,0, then you would move your finger over to the right 10, and up 10. Now, Z is the more complicated one, and if you don't have any idea about 3d, here is another example. To move on the z-plane, you have to move either forwards or backwards. For instance, put your finger in the middle of the monitor again, and start moving your finger towards your head......this is POSITIVE z. Now, imagine that you can move your finger THROUGH the monitor and out the other side, that is NEGATIVE z. You understand what I'm saying now? Here's a little quiz just to make sure:
Move your finger to the coordinate -10,10,0........
OK, you should have your finger there now, it SHOULD be in the top left corner of your monitor, correct? If you don't understand, going to the right on the x-plane is positive, so logically, going to the left would be negative, and with 0,0,0 being right in the middle of your monitor, moving 10 to the left and 10 up will put your finger in the top left corner of your monitor.
Now for some code:
Place this command directly after your BEGIN; command:
Reset; // This moves the draw position to 0,0,0
You can save and run the interpreter again, but nothing will happen still. All this command is doing is moving the draw position right back to the center of everything, called the Origin (0,0,0)
Another useful command that will help you a lot is the Move command. This is one of the more complicated commands for some people. To use the Move command, you have to use parenthesis after it and fill it in with parameters for it to work.
Right after the Reset; command, place the following code:
Move(10,10,-80); // Moves 10 units right, 10 up, and 80 in to the screen
Now, you're probably wondering why we are moving IN to the screen 80 units, and that is only because, if you were to have it set to anything greater than 0, nothing would be drawn, because it would be "in front" of the screen.
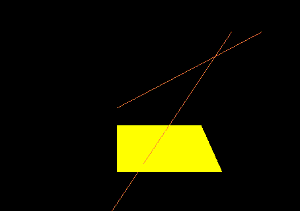
Drawing lines in S-a-G is relatively easy. It involves using just one line of code to draw it, but 6 parameters, also.
This time, we won't get in to any of the theory of the lines, we'll just go straight to the code.
Right after you placed the Move command in the last section, place the following code:
DrawLine(0,0,0,20,20,0); // Draw a line going from the origin to the top left of the screen
This will draw the line on to the screen, after you put this command in your program, save the file and run the interpreter: you should see a white line going from the middle to the top right of the screen. Remember, too, that you don't have to draw the line starting from the origin, but you could have it be drawn at some other obscure point and it would still work.
Coloring is a great skill to be able to do, and in S-a-G, it's an even greater one. In this short little clip, we're going to learn how to set a color mode for our scene. The below code should be placed right after the Move and right before the DrawLine commands:
SetColor(1.0f,0.5f,0.25f,0.0f);
And that code will turn your current color state to orange, and make everything that is drawn from that point on be drawn Orange. Remember, the color will stay the same until otherwise changed. Therefor, you could draw hundreds more lines, and they'd all still be orange, unless you changed their color midway between them all.
Multiple BEGINs
  Two BEGIN commands found.

This error makes logical sense, if you ever see this, then that means that you have two BEGIN; statements somewhere in your program.

End in wrong spot
  Error, found END, but not BEGIN. Make sure BEGIN is before END
	This error can happen for a few reasons.  Sometimes, your code might be missing a semi-colon somewhere, some case people will actually HAVE END before BEGIN, and other cases might be that you just plain forgot to put BEGIN; in your code.


Couldn't find operand
  Couldn't find operand
	This error only occurs when you are assigning a new value to a variable and you are not using one of the known operands:  +   -   *   =   /   ++   --.

Command doesn't exist
  Error, <command>, does not exist
  Line: <line number>
	This error will occur when you have a command that is not a predefined command found in the current version.

Too few numerical parameters
  Too few numerical parameters for <command>

  Requires <number required>
  Line: <line number>
	This error appears when you do not have enough numerical parameters for that command.

Too many numerical parameters
  Too many numerical parameters for <command>
  Requires (only <number required>)/none
  Line: <line number>
	Appears when you have too many numerical parameters for that command.

Too few character parameters
  Too few character parameters for <command>
  Requires <number required>

  Line: <line number>
	This error appears when you do not have enough character parameters for that command.

Too many character parameters
  Too many character parameters for <command>
  Requires (only <number required>)/none
  Line: <line number>
	Appears when you have too many character parameters for that command.

Contains
  Contains:
  <num of character parameters> character parameters
  <num of numerical parameters> numerical parameters

This usually appears after one of the above four commands has appeared.  It gives you stats on how much of each typ of parameter there is inside the command.

Illegal character
  Command <command> only takes either "back" or "front", <error string> will not work.
  Line: <line>
	Appears for a command that only accepts a certain type of string, in this case, it only accepts either back or front.

Missing END
  Cannot find END command!
	Another command that means what it says.  This should only appear if you forgot to put an END at the bottom of your script.

Missing File
  Couldn't Find script.spt
	Make sure that the exe and script.spt are in the same folder as each other.
@Variables
@Variables are a fundamental part about S-a-G programming.  With variables, you can move something, rotate it, or change the colors of everything.  There are many different ways to use the @Variables.  @Variables can be used in place of any type of numerical parameter.
Example:
@35=10;	// Assign 10 the the variable 35
@35++;	// Increment variable 35 by 1
@35-3;	// Subtract 3
@35*2;	// Multiply by 2
@35/8;	// Divide by 8
@35--;	// Decrement by 1

@35+8;	// Add 8
Rotate(@35,1.0,0.0,0.0);	//Rotate @35 number of degrees
Move(@35,0,0);	// Move along the x-plane with variable 35

BEGIN;
This command always starts the code of your script, don't ever forget it!
Example:
BEGIN;

Box(x1,y1,z1,x2,y2,z2,x3,y3,z3,x4,y4,z4);
Draws a box with each coord# being a point on the box, going from top right, to top left, to bottom left, to bottom right.
Example:
Box(-10,10,0,10,10,0,10,-10,0,-10,-10,0);

Comments
Comments are used to allow people to show text inside of the source so other people will be able to understand the code better.
Example:
/*  This is a long comment,
   it can go on, until I put a
  */
//  and this comment only goes for one line

CullFace(face);
Selects the face to cull (not draw).  Accepts only "front" and "back".
Example:
CullFace("front");

DisableCulling;
Disables Culling, aka, drawing the selected face.

Example:
DisableCulling;

DisableTextures;
Disables the drawing of textures.
Example:
DisableTextures;

DrawLine(x1,y1,z1,x2,y2,z2);
Draws a line from coord1 to coord 2.
Example:
DrawLine(0,10,0,30,14,-10);

DrawMode("face","mode");
Sets the drawing mode of "face" to "mode".  Where "face" must be "front" or "back" and mode must be "fill", "lines", or "points".
Example:
DrawMode("front","lines");

EnableCulling;

Enables Culling, aka, not drawing the selected face.
Example:
EnableCulling;

EnableTextures;
Enables the drawing of textures.
Example:
EnableTextures;

END;
Used to end all of your scripts, don't forget this either.
Example:
END;

Move(x,y,z);
Move moves the current drawing position by the x, y, and z values passed to it.
Example:
Move(10,10,-80);

Reset;
Reset is used to set the current drawing position back to default settings, the Origin, at 0,0,0.

Example:
Reset;

Rotate(degree,x,y,z);
Rotates the object #degrees around each axis.  With 1 being the most, and 0 being nothing.
Example:
Rotate(45,1.0,0.0,0.0);

SetColor(red,green,blue,alpha);
SetColor changes the current color to the colors passed to it, where alpha is the transparency value of the colors.  Where 1 is full, and 0 is empty, 1,0,0 would be red, 0,1,0 would be green, and so on.
Example:
SetColor(1.0,0.0,0.0.1.0);
All source code is licensed Apache 2.0.
A chapter of featherless' digital creative history.