SDK for Gerencianet Pagamentos' API. For more informations about parameters and values, please refer to Gerencianet documentation.
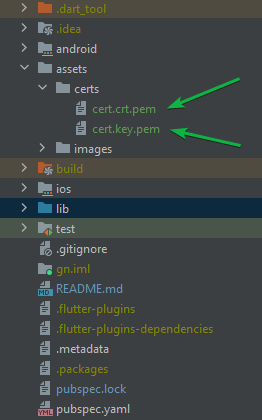
Add the PIX certificate and its key in assets/certs.
After adding, run the flutter pub get command.
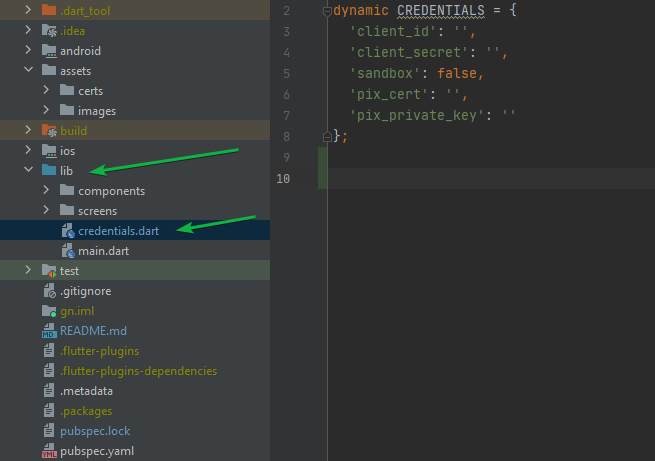
The credentials of your application (client_id and client_secret) must be informed in the credentials.dart file
dynamic CREDENTIALS = {
  'client_id': '',        # Enter your client id
  'client_secret': '',    # Enter your client secret
  'sandbox': false,       # Enable or disable sandbox mode
  'pix_cert': 'assets/certs/cert.crt.pem',         # Enter the certificate directory
  'pix_private_key': 'assets/certs/cert.key.pem'   # Enter the certificate key directory
};
To generate your certificate: Access the menu API (1)-> Meus Certificados (2) and choose the environment you want the certificate: Produção or Homologação -> click in Novo Certificado (3).
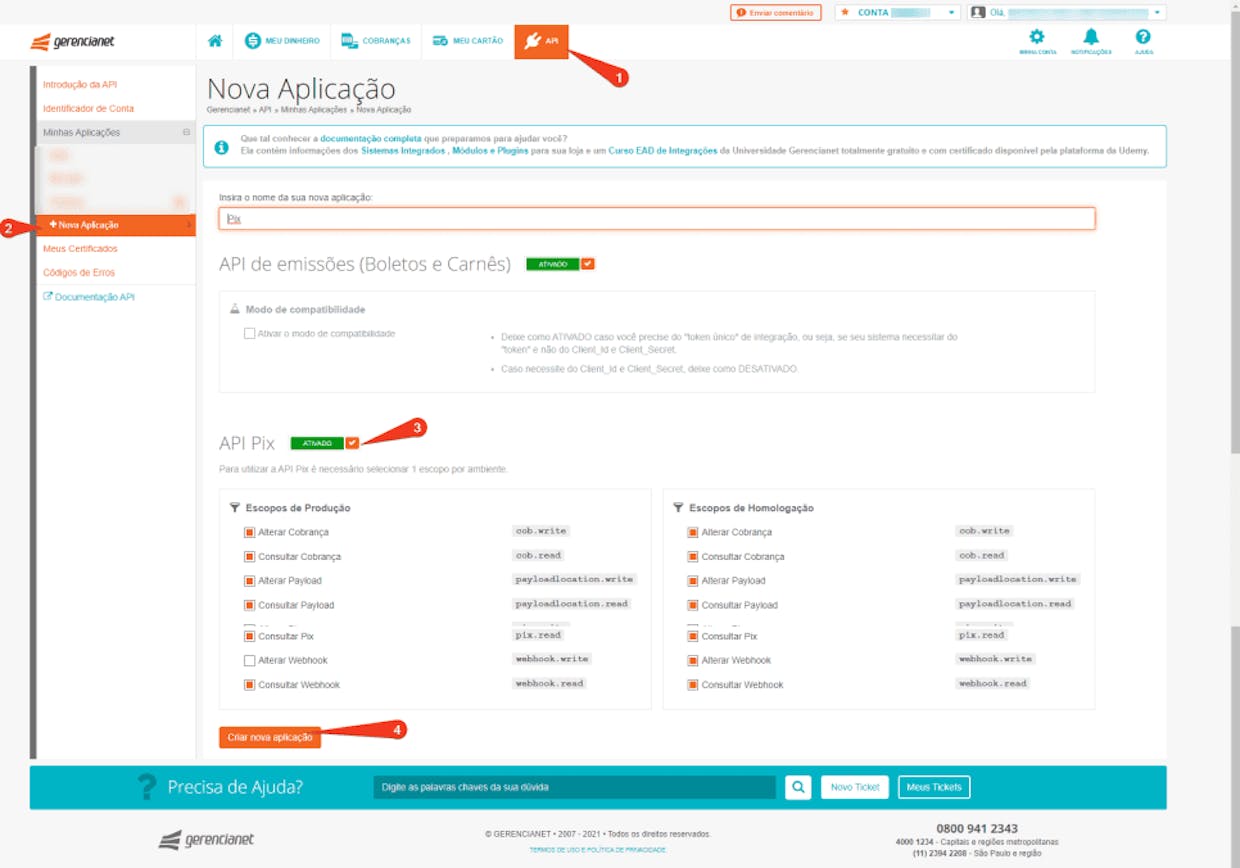
Create a new application to use the Pix API: Access the menu API (1)-> Minhas Aplicações -> Nova Aplicação(2) -> Ative API Pix (3) and choose the scopes you want to release in Produção e/ou Homologação (remembering that these can be changed later). -> click in Criar Nova aplicação(4).
Change an existing application to use the Pix API: Access the menu API (1)-> Minhas Aplicações e escolha a sua aplicação (2) -> Editar(Botão laranja) -> Ative API Pix (3) and choose the scopes you want to release in Produção e/ou Homologação. -> click in Atualizar aplicação (4).
For use in Dart, the certificate must be converted to .pem. Below you will find example using the OpenSSL command for conversion.
// Gerar certificado e chave separadas
openssl pkcs12 -in path.p12 -out newfile.crt.pem -clcerts -nokeys //certificado
openssl pkcs12 -in path.p12 -out newfile.key.pem -nocerts -nodes //chave privada
The registration of Pix keys can be done through the application. If you don't already have our app installed, click on Android or iOS, according to your smartphone's operating system, to download it.
To register your Pix keys through the application:
- Access your account through app Gerencianet.
- In the side menu, touch Pix to start your registration.
- Read the information that appears on the screen and click Registrar Chave. If this is no longer your first contact, tap Minhas Chaves and then the icon (➕).
- Select the data you are going to register as a Pix Key and tap avançar - you must choose at least 1 of the 4 available key options (cell, e-mail, CPF e/ou random key).
- After registering the desired Pix keys, click on concluir.
- Ready! Your keys are already registered with us.
The full documentation with all available endpoints is in https://dev.gerencianet.com.br/.
If you don't have a digital account atnetnet, open yours now!


