Check http://consandstuff.github.io/ for full instructions.
CODE INSTRUCTIONS:
Folder iidxsdvx/IIDX 9+1e+9leds/Arduino Leonardo/ contains 2 folders.
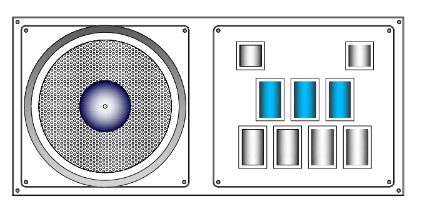
This folder contains the code for IIDX layout. (9 buttons, 1 encoder, 9 LEDs)
-
leovx: for low quality encoders (24ppr)
-
leovxhq: for high quality encoders (600ppr)
If you have encoders with ppr different than 24ppr or 600ppr, you have to change some values inside the code.
Things usde to make this controller. You can find links here: http://consandstuff.github.io/rhythmcons/beatmania-iidx/iidx-small/pics/pic003.png
- Arduino Leonardo
- 1 High quality encoder (600ppr)
- 9 50x33 beatmania buttons
- 2 33x33 square buttons
- 9 Omron D2MV-01-1C3 (50gr.) microswitch
- Crimp connectors
- 14 moles 2.54 4pin wires with male and female connectors
- 1 perfboard
Most of these parts should be CNC cut or laser cut (which is expensive). You can also use a cardboard box or wood MDF planks. I used clear acrylic because it's cheaper, also using only one thickness will make it even less expensive.
Main mounting plate
- 3 or 5mm Black/Clear Acrylic with holes for button pad and disc encoder, also screw holes. I used 5mm clear acrylic, but I found out it's better to use 3mm black acrylic for the DJDAO FPS look.
Button pads
- 5mm Clear acrylic with holes for buttons and encoders. Black looks way better, I used clear.
Turntable mounting plate
- 5mm Clear acrylic with holes for encoder and screws.
Turntable base
- 2x5mm round discs with holes for encoder and mounting screws. Use this base to bring your turntable to your desirable height.
Turntable disc
- 5mm round disc with hole to fit the encoder. You can also cover this with a rubber skin for maximum gripness. The acrylic itself is really slippery.
Mounting Box
- I used 9-12mm MDF for the box walls, 5,5mm MDF for the base and 3mm MDF for the back door. Every cut and hole was made by me with a saw and some sandpaper. Using an electric saw and a sandpaper machine is a lot easier.
PIN DIAGRAM
The pins are assigned to every button and encoder. You'll see that the PCB has many pins from A0 to A5, and from 0 to 13, so you'll have 19 pins in total. Remember that buttons use one pin, but encoders will use 2 pins. The PCB also has 3 grounds (GND) to choose from, and a 5v output for the 600ppr encoder.
Beatmania IIDX Layout
Tested working. See code included.
| Button | Pin # | Button # | LED Pin # |
|---|---|---|---|
| Start | 11 | Button 8 | 2 |
| VFX | 12 | Button 9 | 3 |
| Button 1 | 13 | Button 1 | 4 |
| Button 2 | A0 | Button 2 | 5 |
| Button 3 | A1 | Button 3 | 6 |
| Button 4 | A2 | Button 4 | 7 |
| Button 5 | A3 | Button 5 | 8 |
| Button 6 | A4 | Button 6 | 9 |
| Button 7 | A5 | Button 7 | 10 |
| ENCODERS | DATA 1 | DATA 2 |
|---|---|---|
| Encoder Tuntable | 0 | 1 |
That leaves pins 2 to 10 for LEDS (9 LEDS, enough for each button)
- Take the keypad of your choose. In this case I'll be using the IIDX&SDVX hybrid keypad
- Prepare buttons with the ammount of pressure you like (button + spring + led + microswitch)
- Insert every button where it belongs and screw the plastic nut from bellow
- Insert both cheap encoders and screw the nut from above.
- Mount the disc mounting plate on the Main mounting plate with the screws.
- Mount the disc base on top of the Disc mounting plate with screws.
- Mount th ehigh quality encoder in it's place with 3 screws.
- Turn around the main mounting plate and mount the Leonardo and Protoboard/Breadboard
- Wire every pin on the Leonardo PCB with a pin on the Breadboard using jumper wires.
- Also wire one Ground to the PCB.
- Mount the keypad plate on the Main plate with screws.
- Wire every button and LED with the breadboard using jumper wires.
- Connect the PCB to the computer using a USB cable, and using Arduino IDE load the code into the Arduino Leonardo.
- Finally mount the plate onto the mounting box and mount the disc on the high quality encoder.
