-
Notifications
You must be signed in to change notification settings - Fork 0
Home
- Create a directory at your system where you store you coding samples
- Initialize npm (see the command in the code sample below)
- Start your editor
# somewhere in your system
mkdir typescript-workshop
cd typescript-workshop

# inside typescript-workshop/
npm init -y

# create a directory where all exercise will be saved
mkdir src

# Start VS Code
code .- Create a
tsconfig.jsonin the root of the folder you created initially for your workshop. - Add the following content to it
{
  "compilerOptions": {
    "module": "commonjs",
    "target": "es5"
  }
}- Create a directory
srcthat will contain all your samples - Inside
src/create another directory1-welcomecontaining anindex.tsfile - Add the following code
// src/1-welcome/index.ts

const greeting = 'Hello TypeScript';

console.log(greeting);- Afterwards compile and run the code with
node
# Transpile TypeScript to JavaScript
tsc ./src/1-welcome/index.ts

# Execute transpiled JavaScript-Source
node ./src/1-welcome/index.js- Create a directory
task-board/ - Inside the directory
task-board/, create a fileindex.ts - Add the following properties to the
index.tsand initialise them with some default values- const tasks: any[]
- const id: string
- const title: string
- const text: string
- const priority : number
- const isDone: boolean
- Implement a method that takes all parameters above except of tasks.
- Create an object from the passed arguments and adds it to the list tasks.
addTaskToList(id, title, text, ...) {
  const task = { ... };
  tasks.push(task);
}- Create a directory
enum/ - Inside the directory
enum/, create a fileindex.ts - Create an enum and log it’s values
- 👓 Have a look at the compiled code
- Try to log the names of the enum entries to the console
enum Priority {
  Low,
  Medium,
  High
}

console.log(Priority.Low);
// TODO: Log the names of all enum entries- Instead of passing a
numberintroduce an Enum calledTaskPriorityhaving the valuesLow,Medium,High - You may expect that the method
addTaskToListbreaks now, but it is not. Think about why your code still works. - Write a method
getSortedDescByPrioritythat takes the task array. * It should sort the task in descendant order by the priority property meaning that the highest priority comes first.
- Turn your number enum into a string enum
- Adjust
getSortedDescByPriorityto work with the new enum values. * Hint: The string methodlocaleComparehelps sorting
// task-board/index.ts
enum TaskPriority {
  Low = 'Low',
  Medium = 'Medium',
  High = 'High'
}- Add a function that returns due dates based on the priority of each task. _ Low => ’Sometimes` _ Medium => ’Today’ * High => ‘Now’
- Implement the needed logic using a switch-case-statement
- Add the exhaustiveness to the
defaultpath of the switch-case-statement - Afterwards add a new priority “VeryHigh” to the enum TaskPriority.
Note that your program will not compile until you add the missing priority to the switch-case statement.
Think How does TypeScript achieve that?
function assertNever(value: never): never {
  throw new Error(`Expected never to be called but got ${value}`);
}

// ...
function dueDates(tasks: any[]) {
  return tasks.map(task => {
    switch (task.priority) {
      case TaskPriority.Low:
        return 'Sometimes';
      // ...
      default:
        assertNever(task.priority);
    }
  });
}- Add an interface
Task - Add all known properties to it
- Use that interface everywhere in the code
_
addTaskToList_getSortedDescByPriority*dueDates
- Create the file
task-list.tsinsidetask-board/modelsand add a class calledTaskList. - Add the method
addTaskToListto that class. - Add the method
dueDatesto that class. - Add the method
getSortedDescByPriorityto that class. - Make tasks a member of
TaskList. - Now
task-board/index.tsshould just use the API ofTaskListand may do someconsole.logs.
- Create an
index.tsFile intask-board/models. - Export all the files from
models/using your barrel. - Simplify the import statements in your
task-board/index.ts
// task-board/models/index.ts
export * from './your-model.ts';
export * from './your-other-model.ts';
// task-board/index.ts
import { TaskList, Task } from './models';
// Use TaskList API...- Specify the
outDirparameter in yourtsconfig.json - Compile the task-board source
tsc --project ./src/task-board/tsconfig.json
- Run the compiled code to see if everything still works fine.
node ./src/task-board/dist
- Finally, add
dist/to your.gitconfig- You never want to commit and push the compilation result.
-
Configure the TypeScript Compiler to emit
SourceMaps. -
Recompile your app!
-
Start the debugger with the following command
node --inspect-brk ./src/task-board/dist
-
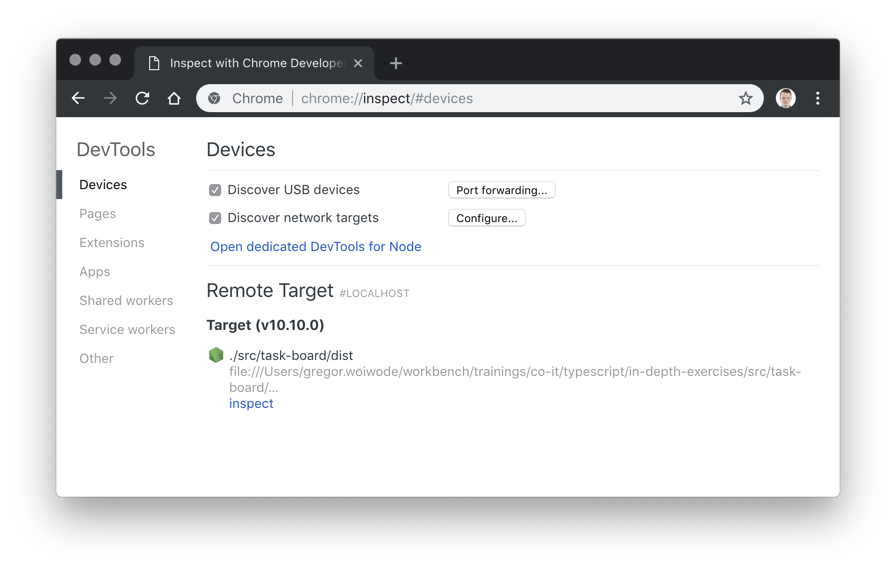
Open your Chrome Browser and enter
chrome://inspect/#devicesaddress field -
Open the displayed remote target by clicking the link inspect.
-
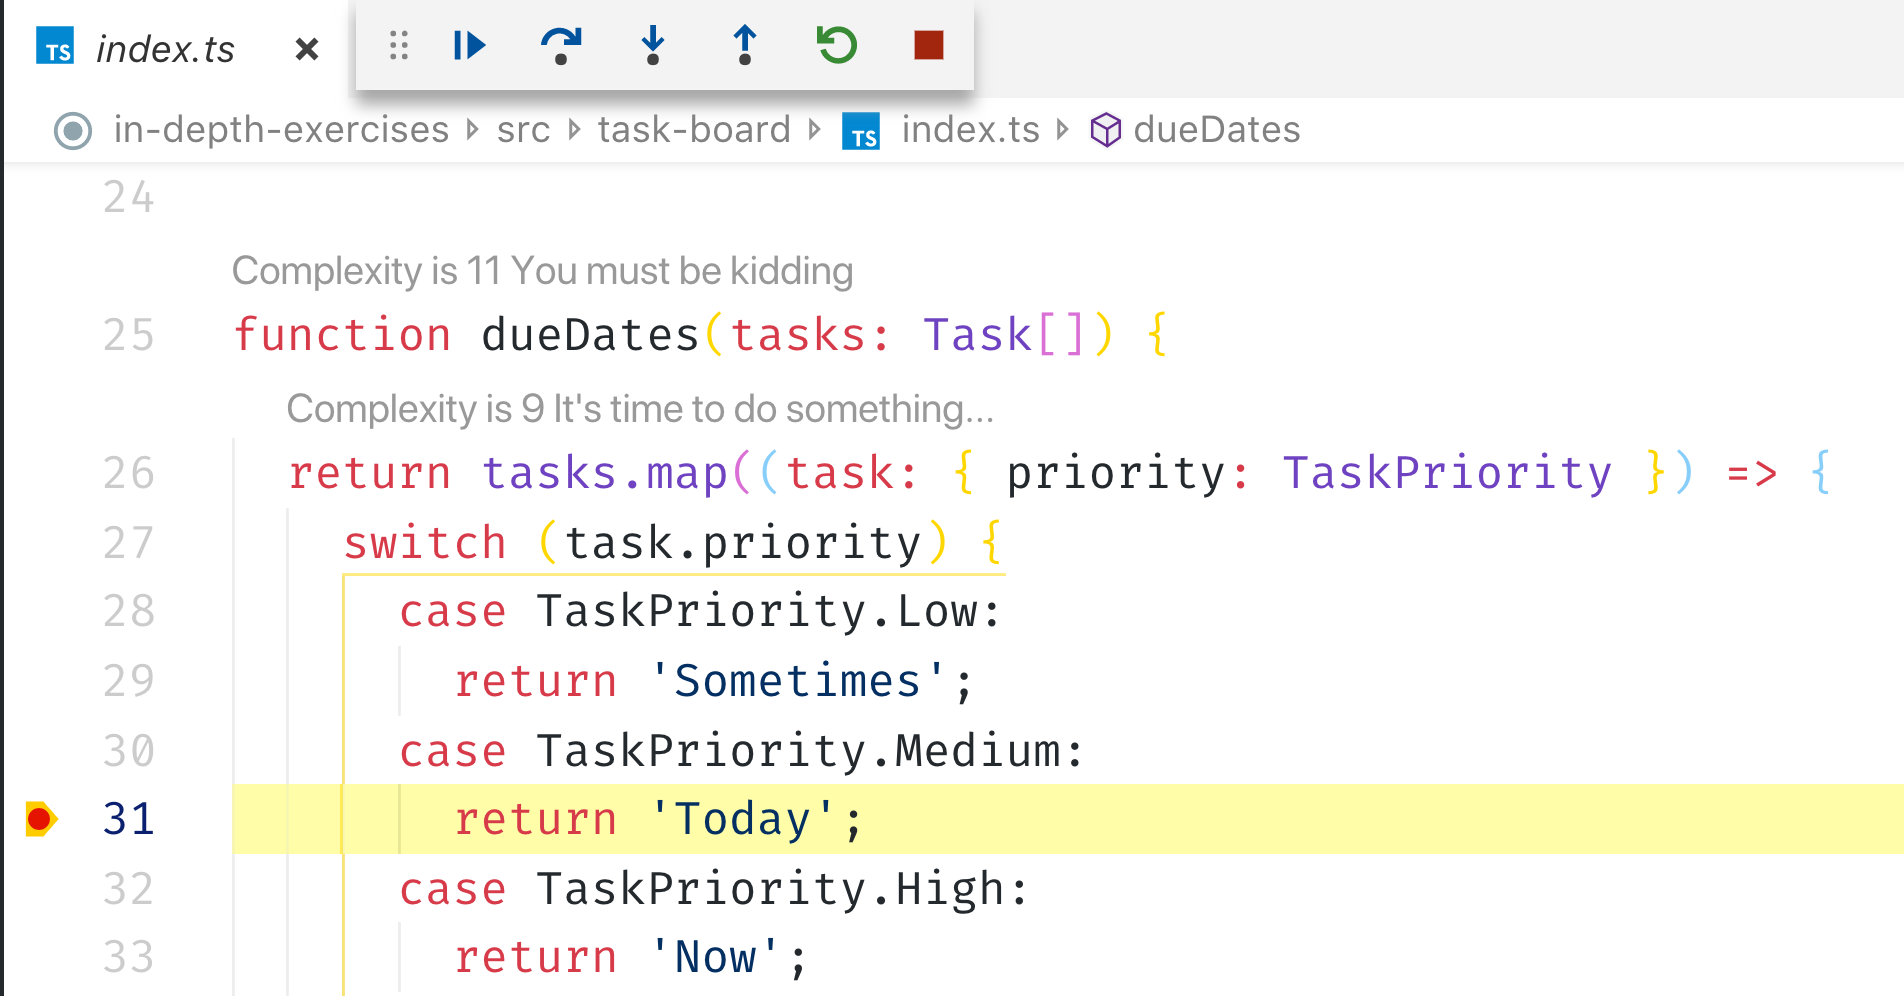
Set a few break points by clicking on the line numbers in editor view of the developer tools.

{
  "compilerOptions": {
    // ...
    "inlineSourceMap": true
  }
}- Create the directory
.vscodeinside your root folder - Create
launch.jsoninside.vscode/ - Apply the following settings to launch.json.
- Switch to VS-Codes Debug View (
CTRL+SHIFT+D) - Select the Configuration Taskboard from the select box and press the green arrow button to execute your code.
- Set at least one breakpoint inside
index.tsand try to debug that file.
{
  "version": "0.2.0",
  "configurations": [
    {
      "type": "node",
      "request": "launch",
      "name": "Taskboard",
      "program": "${workspaceFolder}/src/task-board/dist/index.js"
    }
  ]
}
- Create two union types to build two categories of tasks
UrgentTaskMandatoryTask
- When a task has the priority
HighorVeryHighit is anUrgentTask - When a task has the priority
LoworMediumit is aMandatoryTask. - Add a new method to the
TaskListcalledaddUrgentTaskthat accepts a Task and UrgentTask as a priority
class TaskList {
  // ...
  addUrgentTask(task: Task, priority: UrgentTask) {
    const urgentTask = { ...task, priority };
    // add urgentTask to List
  }
}- Introduce a
privatemethod toTaskListcalledisUrgent() - Check whether a task is urgent or mandatory by checking it's priority property
- After that, have a look how TypeScript infers the type using your Type Guard
- Write another method
getUrgentthat yields a filtered list of tasks that must have an urgent priority- Use the Type Guard to filter the tasks.
class TaskList {
  // ...

  private isUrgent(priority: TaskPriority): priority is UrgentTask {
    // yield true if an urgent priority is detected.
  }
}- Provide a property
tasksinTaskList -
tasksshould be a dictionary where all properties of each tasks are readonly.- [key: string]: /* readonly type for task */
You want that tasks can be read from outside but you want to prevent changes to your dictionary.
- Create a mapped type that transforms each property of Task to a readonly property.
-
Hint Use the
readonlykeyword
-
Hint Use the
// Lookup type of a property
type taskId = Task['id']; // string

// iterate through properties
type taskProps = { [prop in keyof Task]:  };

// transform property types
type optionalTaskProperties = { [prop in keyof Task]?: Task[prop] };- Add a path alias to your project
task-board - Afterwards, refactor the import path in
index.tsto use the alias instead of the relative path. - Check if everything still works by compiling and running your source code.
{
  "compilerOptions": {
    // ...

    "baseUrl": ".",
    "paths": {
      "@models/*": ["./models/*"]
    }
  }
}- Introduce a generic method
create<T> - This method takes one argument that is the token of the type which should be created.
- Use this function to create an instance of
TaskList
type Constructor<T = {}> = new (...args: any[]) => T;

function create<T>(construct: Constructor<T>): T {
  return new construct();
}

const list = create(TaskList);
console.log(list instanceof TaskList);- Inside
task-board/, create a file calledmodel-mutator.tsinsidelib/. - Unify the process mutating objects by providing a generic mutator
- Create a factory function (
createModelMutator<T>) that yields an object providing several mutation operations.
export interface Dictionary<T> {
  [id: string]: T;
}

export interface ModelMutator<T> {
  addOne(model: T, entities: Dictionary<T>): Dictionary<T>;
  addMany(model: T[], entities: Dictionary<T>): Dictionary<T>;
}

export function createMutator<T>(): ModelMutator<T>;-
Different models can have different property names and types for their keys.
interface Task {
  id: string;
  // ...
}

interface TaskComments {
  guid: string;
  // ...
}
-
Make the
ModelMutator<T>accepting options -
Specify a method that is used by the
ModelMutator<T>to access the desired key property
export interface ModelMutatorOptions<T> {
  getIdentifier: (entity: T) => string | number;
}

const options: ModelMutatorOptions<Task> = {
  // call getIdentifier inside the ModelMutator to access the id.
  getIdentifier: task => task.id
};

export function createMutator<T>(
  options: EntityMutatorOptions<T>
): ModelMutator<T>;- Install tslint & typescript as development dependency
npm install --save-dev tslint typescript
- Run
npx tslint --initto generate a tslint.json in your root directory - Configure tslint to prefer single quotes instead of double quotes
// tslint.json
"rules": {
  "quotemark": [true, "single"]
}
- Have a look at your ts files.
- If there are any errors analyze and fix them.
- You can fix issues automatically by running
npx tslint --project ./src/task-board/tsconfig.json --fix.
- Take 15 minutes to read through the TSLint core rules.
- Pick your favorite rule and explain it to the other attendees.
- Mention why you think that this rule adds a benefit to the coding guidelines of a project.
- Install tslint rule set form Airbnb
- Have a look at the JS style guide written by the Airbnb team: https://github.com/airbnb/javascript
npm install tslint-config-airbnb --save-dev- Configure your tslint.json to use the configuration of airbnb instead of the default one.
{
-   "extends": [ "tslint:recommended" ]
+   "extends": [ "tslint-config-airbnb" ]
}...
- Write a decorator called
Log - Enable Decorators by adding the needed configuration to
tsconfig.json{ compilerOptions: { // ... "experimentalDecorators": true, "emitDecoratorMetadata": true, } } -
Logshould accept a parametermessage -
Logshould call console.log to print the passedmessage -
Logshould attach a propertyadditionalDatato the annotated class and a assign some value. - Annotate the class
TaskListwith @Log. - Afterwards, create an instance of Tasklist
- It should log the message to the console
- The instance of TaskList should have an additional property
additionalData
function Log(message: string) {
  return function logFn(constructor: Function) {
    // log passed message
    // add property `additionalData` to constructor.prototype
  };
}

@Log('Your message here...')
class TaskList {
  // ...
}

console.log(new TaskList()['additionalData']);- Run the following command to install Jest and it's dependencies
npm i -D jest @types/jest ts-jest typescript
- Add the basic configuration for Jest to the package.json
{ // ... "jest": { "transform": { "^.+\\.tsx?$": "ts-jest" }, "testRegex": "(/__tests__/.*|(\\.|/)(test|spec))\\.(jsx?|tsx?)$", "moduleFileExtensions": [ "ts", "tsx", "js", "jsx", "json", "node" ] } } - Add the following scripts to your
package.jsonto be able to run test with Jest.{ scripts: { "test": "jest", "test:watch": "jest --watch" } }
- Create the file
model-mutator.spec.tsin the same directory where savedmodel-mutator.tsis saved - Implement the test cases below
Please have a look at Jest's Matchers to write test expectations.
describe('ModelMutator', () => {
  describe('addOne', () => {
    describe('When no id is given', () => {
      it('should raise an error', () => { /* add test*/ });
      it('should not run the mutation', () => { /* add test*/ });
    });

    describe('When the passed Dictionary is null', () => {
      it('should not raise an error', () => { /* add test*/ });
      it('should create and use an empty object', () => { /* add test*/ });
      it('should add the passed model to the dictionary', () => { /* add test*/ });
    });
  });
});