Follow the steps to help you easily configure your Apple Pay with PayTabs
-
Add Apple Pay capability to your ptoject
- Click on ➕ to add a new capability

- Choose Apple pay

- Add the new merchant id

- Click on ➕ to add a new capability
-
Generate CSR via PayTabs Portal
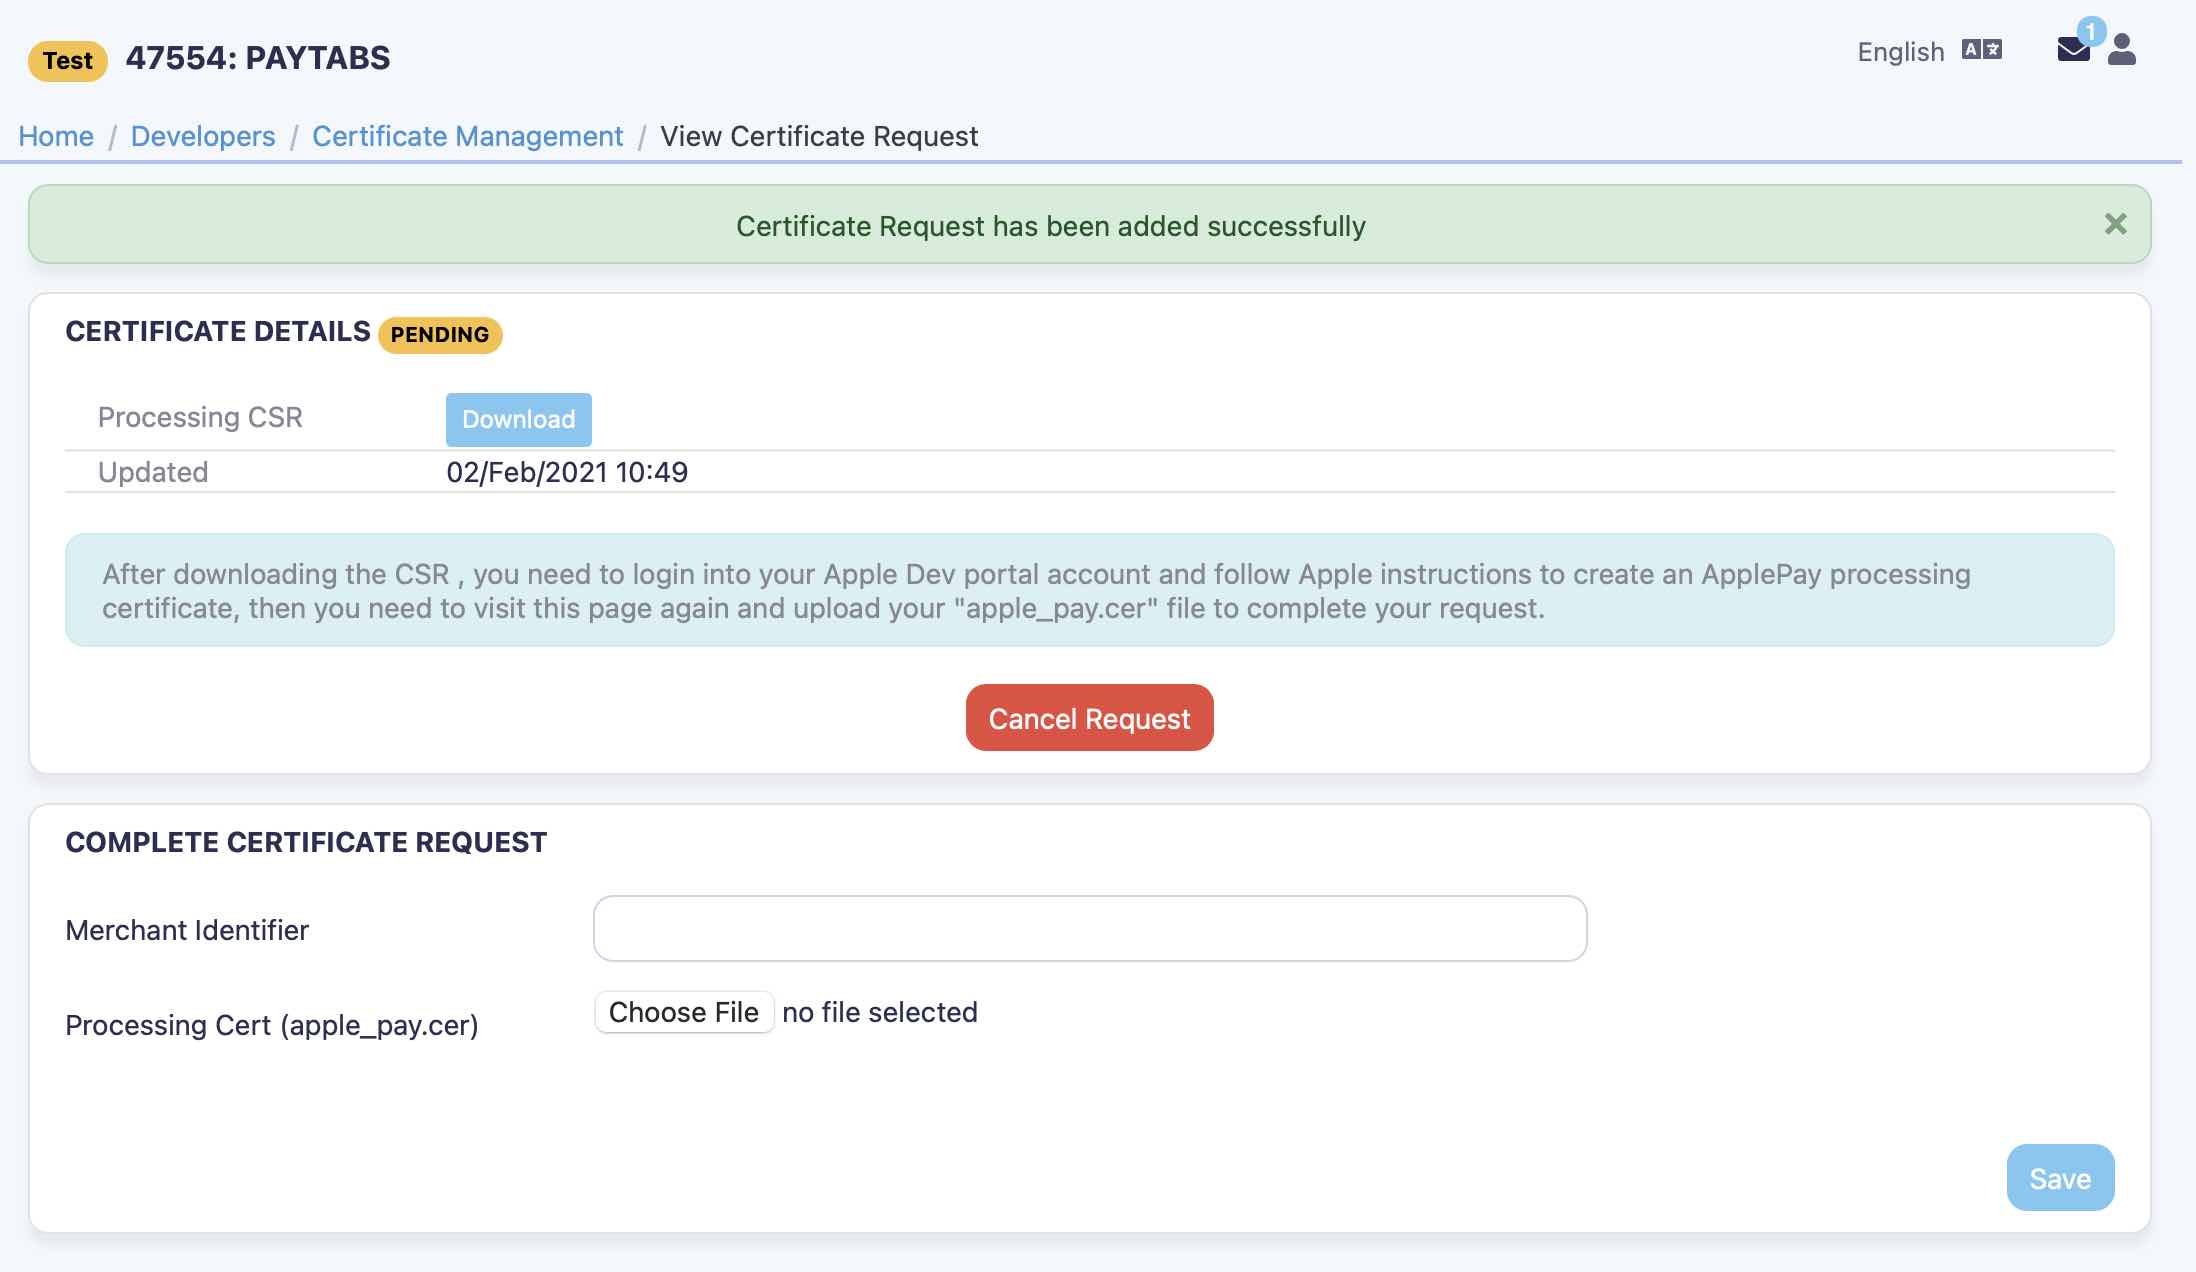
- Navigate to PayTabs Certificate Management.

- Click on ➕ to add a request for certificate.

- Wait the proccess to be finished, then download the certificate file.
- Navigate to PayTabs Certificate Management.
-
Create Apple Pay certificate via your account on Apple Developer
- Navigate to the Certificates, Identifiers & Profiles, then click on Add certificate button.

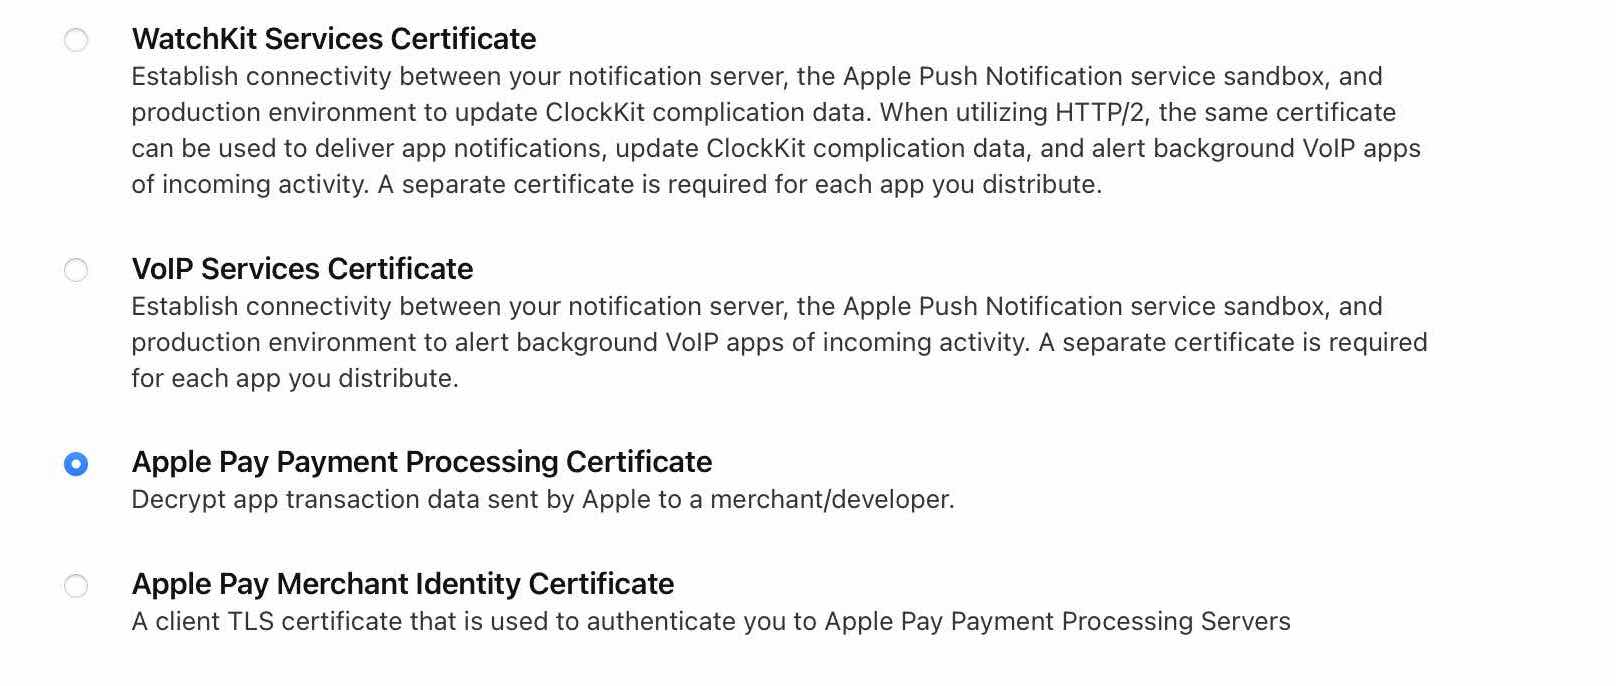
- Check the option Apple Pay Payment Processing Certificate under the section Services, then click on Continue button.
- Choose the Merchant ID from the dropdown list, then click on Continue button.

- Click on Create Certificate button under the section Apple Pay Payment Processing Certificate.

- Click on Choose File to select the certificate file you downloaded from PayTabs portal in step 1, then clikc on Continue button.

- Download your certificate to your Mac, then double click the .cer file to install in Keychain Access.

- Navigate to the Certificates, Identifiers & Profiles, then click on Add certificate button.
-
Upload your certificate to PayTabs portal.
-
Navigate to PayTabs Certificate Management.
-
Enter the Merchant ID under the section COMPLETE CERTIFICATE REQUEST, then choose the .cer file you downloaded in step 2 and click on Save button.

-
Congratulations, Your certificate request completed successfully, your PayTabs profile is now ready for doing payment using Apple Pay.

-