-
Notifications
You must be signed in to change notification settings - Fork 140
Submitting Examples: Setting up the Environment
The first thing you will need to do is create a new Github account.
- Go to GitHub main page.
- Pick a username and password and create your new user.
- Click on "sign up for free".
To manage your GitHub repositories we recommend you to use the GitHub application in your computer. You can download this application from GitHub desktop page:
If you are developing with Eclipse, you can use the GitHub addon If you are running on a different platform, you will have to use GitHub through the command line. To use GitHub through the command line, first install Git:
- Use the following instructions to install Git on Linux or Solaris
- Download Git for Mac from this website. Then install the DMG file.
Once you have installed Git, you can configure your settings. Open a terminal and:
-
Set the default name for Git to use when you commit (e.g., Fernando Garcia)
git config --global user.name "Your Name Here" -
Set your default email for Git to use when you commit. Use the email address you configure your GitHub account with.
git config --global user.email "your_email@example.com"Your email address for Git should be the same one associated with your GitHub account. If it is not, see this guide for help adding additional emails to your GitHub account. If you want to keep your email address hidden, this guide may be useful to you. [GitHub Installation Guide]
If you want to start collaborating adding or modifying examples of one of our GitHub repositories, you will need to "fork" the GitHub repository you want to collaborate on. Forking is not a native Git concept. It is the special name given by GitHub to server-side clones. This clone provides the user a place to push changes without affecting the original repository until the changes are ready to be merged.
To fork a repository, log in to GitHub and look for the repository you want to fork (e.g., rticonnextdds-examples). Once you are in the repository webpage, look for the "Fork" button (see Figure) and click on it.
Wait a few seconds and you will see the forked repository in your account.
Once you have forked the repository (once it has been placed in your GitHub account) you will need to clone the repository in your computer to get a local copy you can work with.
Open the GitHub application and login with the user you created. You should see all the repositories you have in your account, including the one you just forked. If you are not able to see the forked repository, click on the refresh icon.
Once you can see the repository, click on the "Clone to Computer Button" and select the directory where you want to download it.
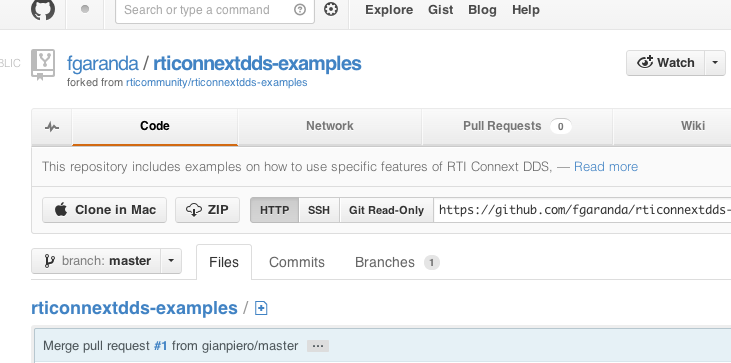
To clone the repository you just forked using the command line, go to your account on GitHub and look for the repository you just forked. If, for instance, your account is fgaranda and the repository you forked is rticonnextdds-examples, the repository should be located in fgaranda/rticonnextdds-examples.
Once you are in the forked repository website, click on HTTP and copy the repository URL (see Figure). This is the URL of the Git repository located in the GitHub servers that we are going to clone.
Open a terminal and change to the directory where you want to clone the repository. For instance:
cd /home/fgarcia/githubAnd then clone the repository using the URL you copied.
git clone https://github.com/fgaranda/rticonnextdds-examples.git
