- Model merge extention for AUTOMATIC1111's stable-diffusion-webui
- Merge models can be loaded directly for generation without saving
All updates can be found here
update 2023.07.07.2000(JST)
- add new feature:Random merge
- add new feature:Adjust detail/colors
- diffusers(0.10.2 to 0.14.0)
- sklearn is required to use some LoRA-related features
This extension allows merged models to be loaded as models for image generation without saving them. This extension can prevent the use of HDD and SSD.
Normal merge. Alpha is used. If MBW is enabled, MBW base is used as alpha.
Add difference, if MBW is enabled, MBW base is used as alpha
Merge 3 models at the same time. alpha and beta are used. I added this function because there were three model selection windows, but I am not sure if it works effectively.
Weight sum twice, alpha and beta are used.
If checked, block-by-block merging is enabled. Use the slider at the bottom of the screen to set the ratio of each block.
If you select "cosine", the comparison is performed using cosine similarity, centered on the set ratio, and the ratio is calculated to eliminate loss due to merging. See below for more details.
Thanks to recoilme for devising the idea and to SwiftIllusion for introducing this technique.
hako-mikan#33
https://github.com/recoilme/losslessmix
Enable "save metadata" to embed merge conditions as metadata, only in safetensor format. Embedded conditions can be viewed in the Metadata tab.
After merging, load as a model for generation. Note that a different model is loaded than the model information in the upper left corner. It will be reset when you re-select the model in the model selection screen on the top left.
Image generation is performed using the settings in the text2image tab.
Merge and Generate image after merging.
Read settings from merge log. The log is updated each time a merge is performed, and a sequential ID starting from 1 is assigned. Set on -1 will read the last merged configuration. The merge log is saved in extension/sd-webui-supermerger/mergehistory.csv. You can browse and search in the History tab. You can search and/or by separating with a half-width space.
Performs sequential merge image generation. Effective in all merge modes.
Change alpha and beta.
Change alpha and beta at the same time. Separate alpha and beta with a single space, and separate each element with a comma. If only one number is entered, the same value is entered for both alpha and beta.
Example: 0, 0.5 0.1, 0.3 0.4, 0.5
Performs a block-byblock merge. Enter ratios separated by newlines. Presets can be used, but be careful to separate on a new line.For Triple and Twice, enter two lines as a set. An odd number of lines will result in an error.
Changes the seed. Entering -1 will result in a fixed seed in the opposite axis direction.
Changes the model. The model selected in the model selection window is ignored.
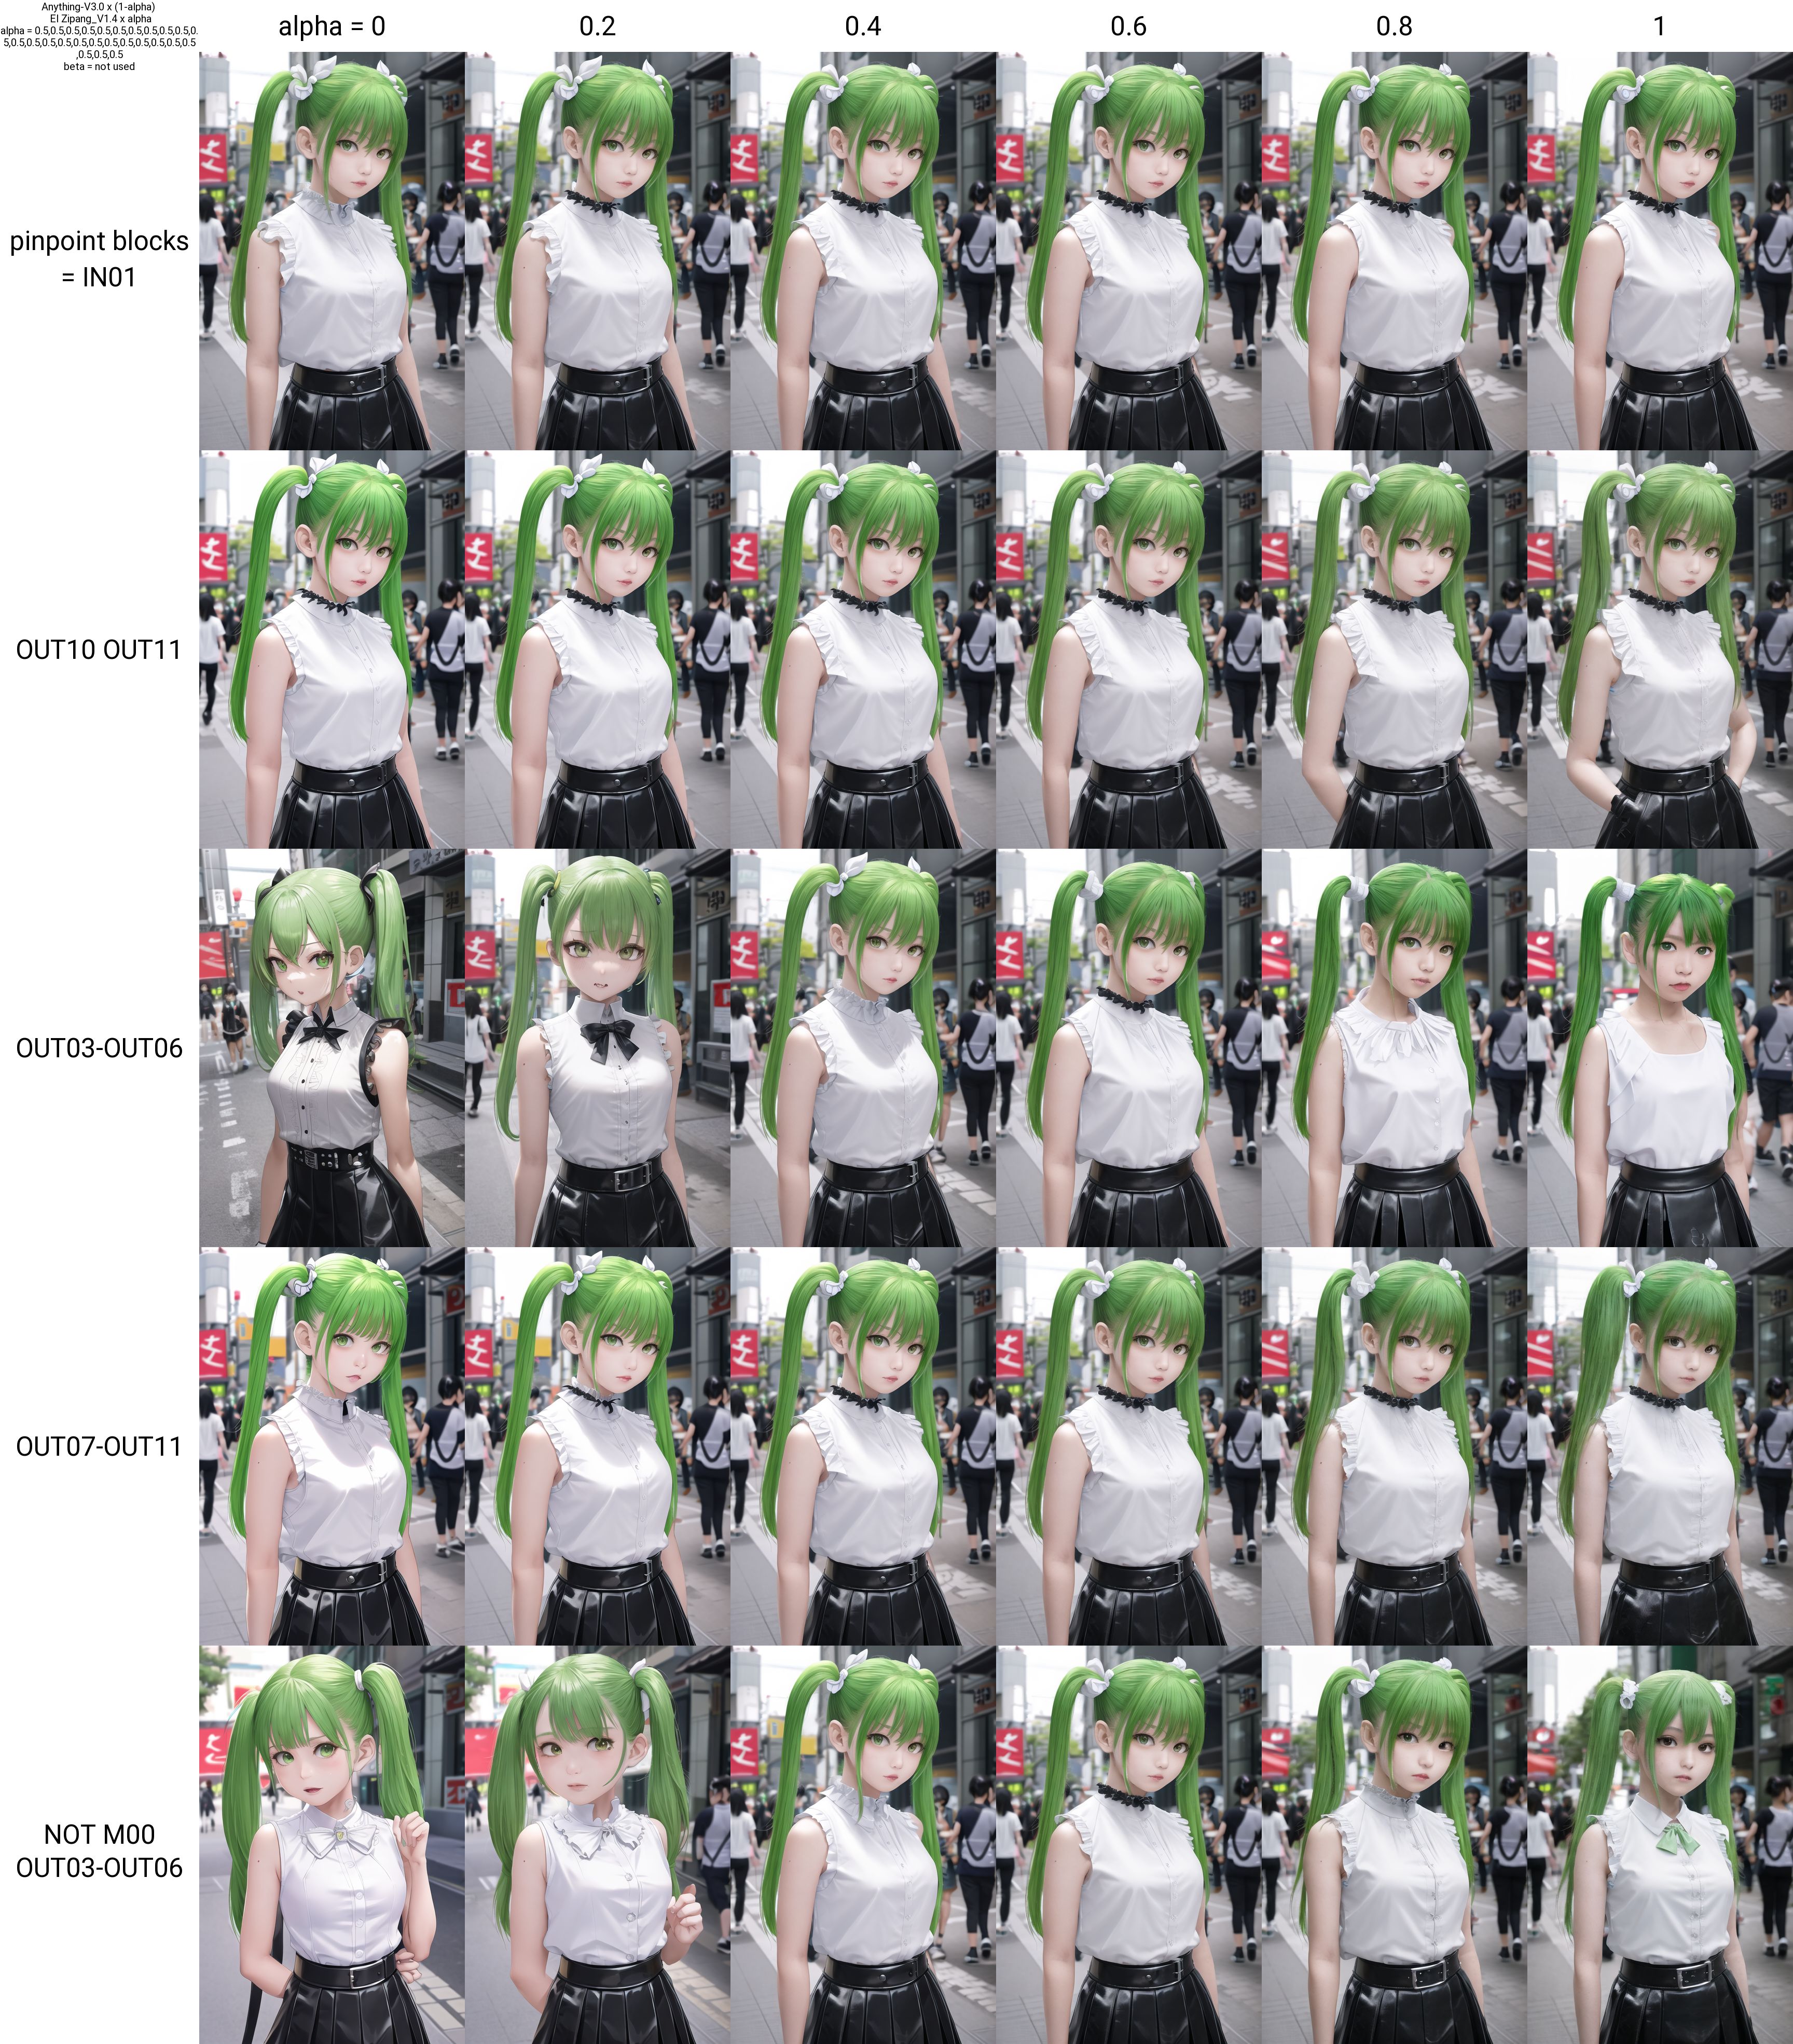
Changes only specific blocks in MBW. Choose alpha or beta for the opposite axis. If you enter a block ID, the alpha (beta) will change only for that block. As with the other types, use commas to separate them. Multiple blocks can be changed at the same time by separating them with a space or hyphen. NOT must be entered first to have any effect.
IN01, OUT10 OUT11, OUT03-OUT06, OUT07-OUT11, NOT M00 OUT03-OUT06
In this case:
- 1:Only IN01 changes
- 2:OUT10 and OUT11 change
- 3:OUT03 to OUT06 change
- 4:OUT07 to OUT11 change
- 5:All except for M00 and OUT03 to OUT06 are changed.
Please be careful not to forget to input "0".

Block ID (only upper case letters are valid) BASE,IN00,IN01,IN02,IN03,IN04,IN05,IN06,IN07,IN08,IN09,IN10,IN11,M00,OUT00,OUT01,OUT02,OUT03,OUT04,OUT05,OUT06,OUT07,OUT08,OUT09,OUT10,OUT11
change calclation mode.
Note the correspondence between calculation mode and merge mode.
You can change the prompt. The negative prompt does not change. Separate with a new line.
The Reserve XY plot button reserves the execution of an XY plot for the setting at the time the button is pressed, instead of immediately executing the plot. The reserved XY plot will be executed after the normal XY plot is completed or by pressing the Start XY plot button on the Reservation tab. Reservations can be made at any time during the execution or non-execution of an XY plot. The reservation list is not automatically updated, so use the Reload button. If an error occurs, the plot is discarded and the next reservation is executed. Images will not be displayed until all reservations are finished, but those that have been marked "Finished" have finished generating the grid and can be viewed in the Image Browser or other applications.
It is also possible to move to an appointment at any location by using "|".
Inputing "0.1,0.2,0.3,0.4,0.5|0.6,0.7,0.8,0.9,1.0"
0.1,0.2,0.3,0.4,0.5
0.6,0.7,0.8,0.9,1.0
The grid is divided into two reservations, "0.1,0.2,0.3,0.4,0.5" and "0.6,0.7,0.8,0.9,1.0" executed. This may be useful when there are too many elements and the grid becomes too large.
Determines the merge ratio randomly.
Select the Random Mode and press Run Rand to generate images with randomly set weights for the number of challenges specified by Num of challenge. The generation operates in XYZ mode, so the STOP button is effective. At that time, please set Seed for Random Ratio to -1. Using the same seed ensures reproducibility. If the number of generations exceeds 10, the grid will automatically become two-dimensional. Checking the alpha and beta in Settings will randomize them. For Elemental, beta will be disabled.
Random weights are set for all 26 blocks. The difference between R, U, and X is the range of random values. For X, specify lower limit to upper limit for each layer.
R: 0 ~ 1
U: -0.5 ~ 1.5
X: lower limit ~ upper limit
Random weights are set for all Elementals. The difference between ER, EU, and EX is the range of random values. For X, specify lower limit to upper limit for each layer.
Specifies the hierarchical level to be randomized. Specify it as custom.
You can use R, U, X, ER, EU, and EX.
Example:
U,0,0,0,0,0,0,0,0,0,0,0,0,R,R,R,R,R,R,R,R,R,R,R,R,R
U,0,0,0,0,0,0,0,0,0,0,0,0,ER,0,0,0,0,0,0,X,0,0,0,0,0
roundsets the decimal places for rounding. With the initial value of 3, it becomes 0.123.save E-listsaves the key and ratio of Elemental in csv format toscript/data/.
You can use the XYZ mode by setting the type to random. Enter the number of times you want to randomize, and the parameters will be set accordingly.
For example:
X type: seed, -1, -1, -1
Y type: random, 5
With this configuration, a 3x5 grid will be created, and the model will generate images using weights randomly set for 5 iterations. Please make sure to set the randomization option on the random panel. It will not function properly if it is set to off.
By storing models in memory, continuous merging and other operations can be sped up. Cache settings can be configured from web-ui's setting menu.
Deletes the currently loaded model. This is used to free up GPU memory when using kohya-ss GUI. Once the model is deleted, you will not be able to generate images. If you want to generate images, please re-select models.
LoRA related functions. It is basically the same as kohya-ss scripts, but it supports block-by-block merging. Currently, it does not support V2.X series merging.
Note: LyCORIS supports only single merge due to its special structure. Only ratios of 1,0 can be used for single merges. If any other value is used, the result will not match the Block weight LoRA result, even if the value is "SAME TO STRENGTH". LoCon will match reasonably well even with non-integers.
Merge LoRAs into a model. Multiple LoRAs can be merged at the same time.
Enter LoRA name1:ratio1:block1,LoRA name2:ratio2:block2,...
LoRA can also be used alone. The ":block" part can be omitted. The ratio can be any value, including negative values. There is no restriction that the total must sum to 1 (of course, if it greatly exceeds 1, it will break down).
To use ":block", use a block preset name from the bottom list of presets, or create your own. Ex: LoRaname1:ratio1:ALL
Generates a LoRA from the difference of two models. If you specify a demension, it will be created with the specified dimension. If no demension is specified, LoRAs are created with dim 128. The blend ratio can be adjusted by alpha and beta. (alpha x Model_A - beta x Model B) alpha, beta = 1 is the normal LoRA creation.
It has been reported that many errors occur when using with colab. This seems to be caused by multiple reasons. First is a memory problem. It is recommended that the fp16 model be used. If the full model is used, at least 8 GB of memory is required. This is the amount used by this script. Also, it seems that the error occurs if different versions of diffusers are installed. version 0.10.2 has been tested.
Merges one or more LoRAs. kohya-ss's latest script is used, so LoRAs with different dimensions can be merged, but note that the generated images may differ significantly because LoRAs are recalculated when dimensions are converted.
The calculate dimention button calculates the dimensions of each LoRA and activates the display and sorting functions. The calculation is rather time-consuming and takes several tens of seconds for a LoRA of about 50. Newly merged LoRAs will not appear in the list, so please press the reload button. Dimension recalculation only calculates the added LoRAs.
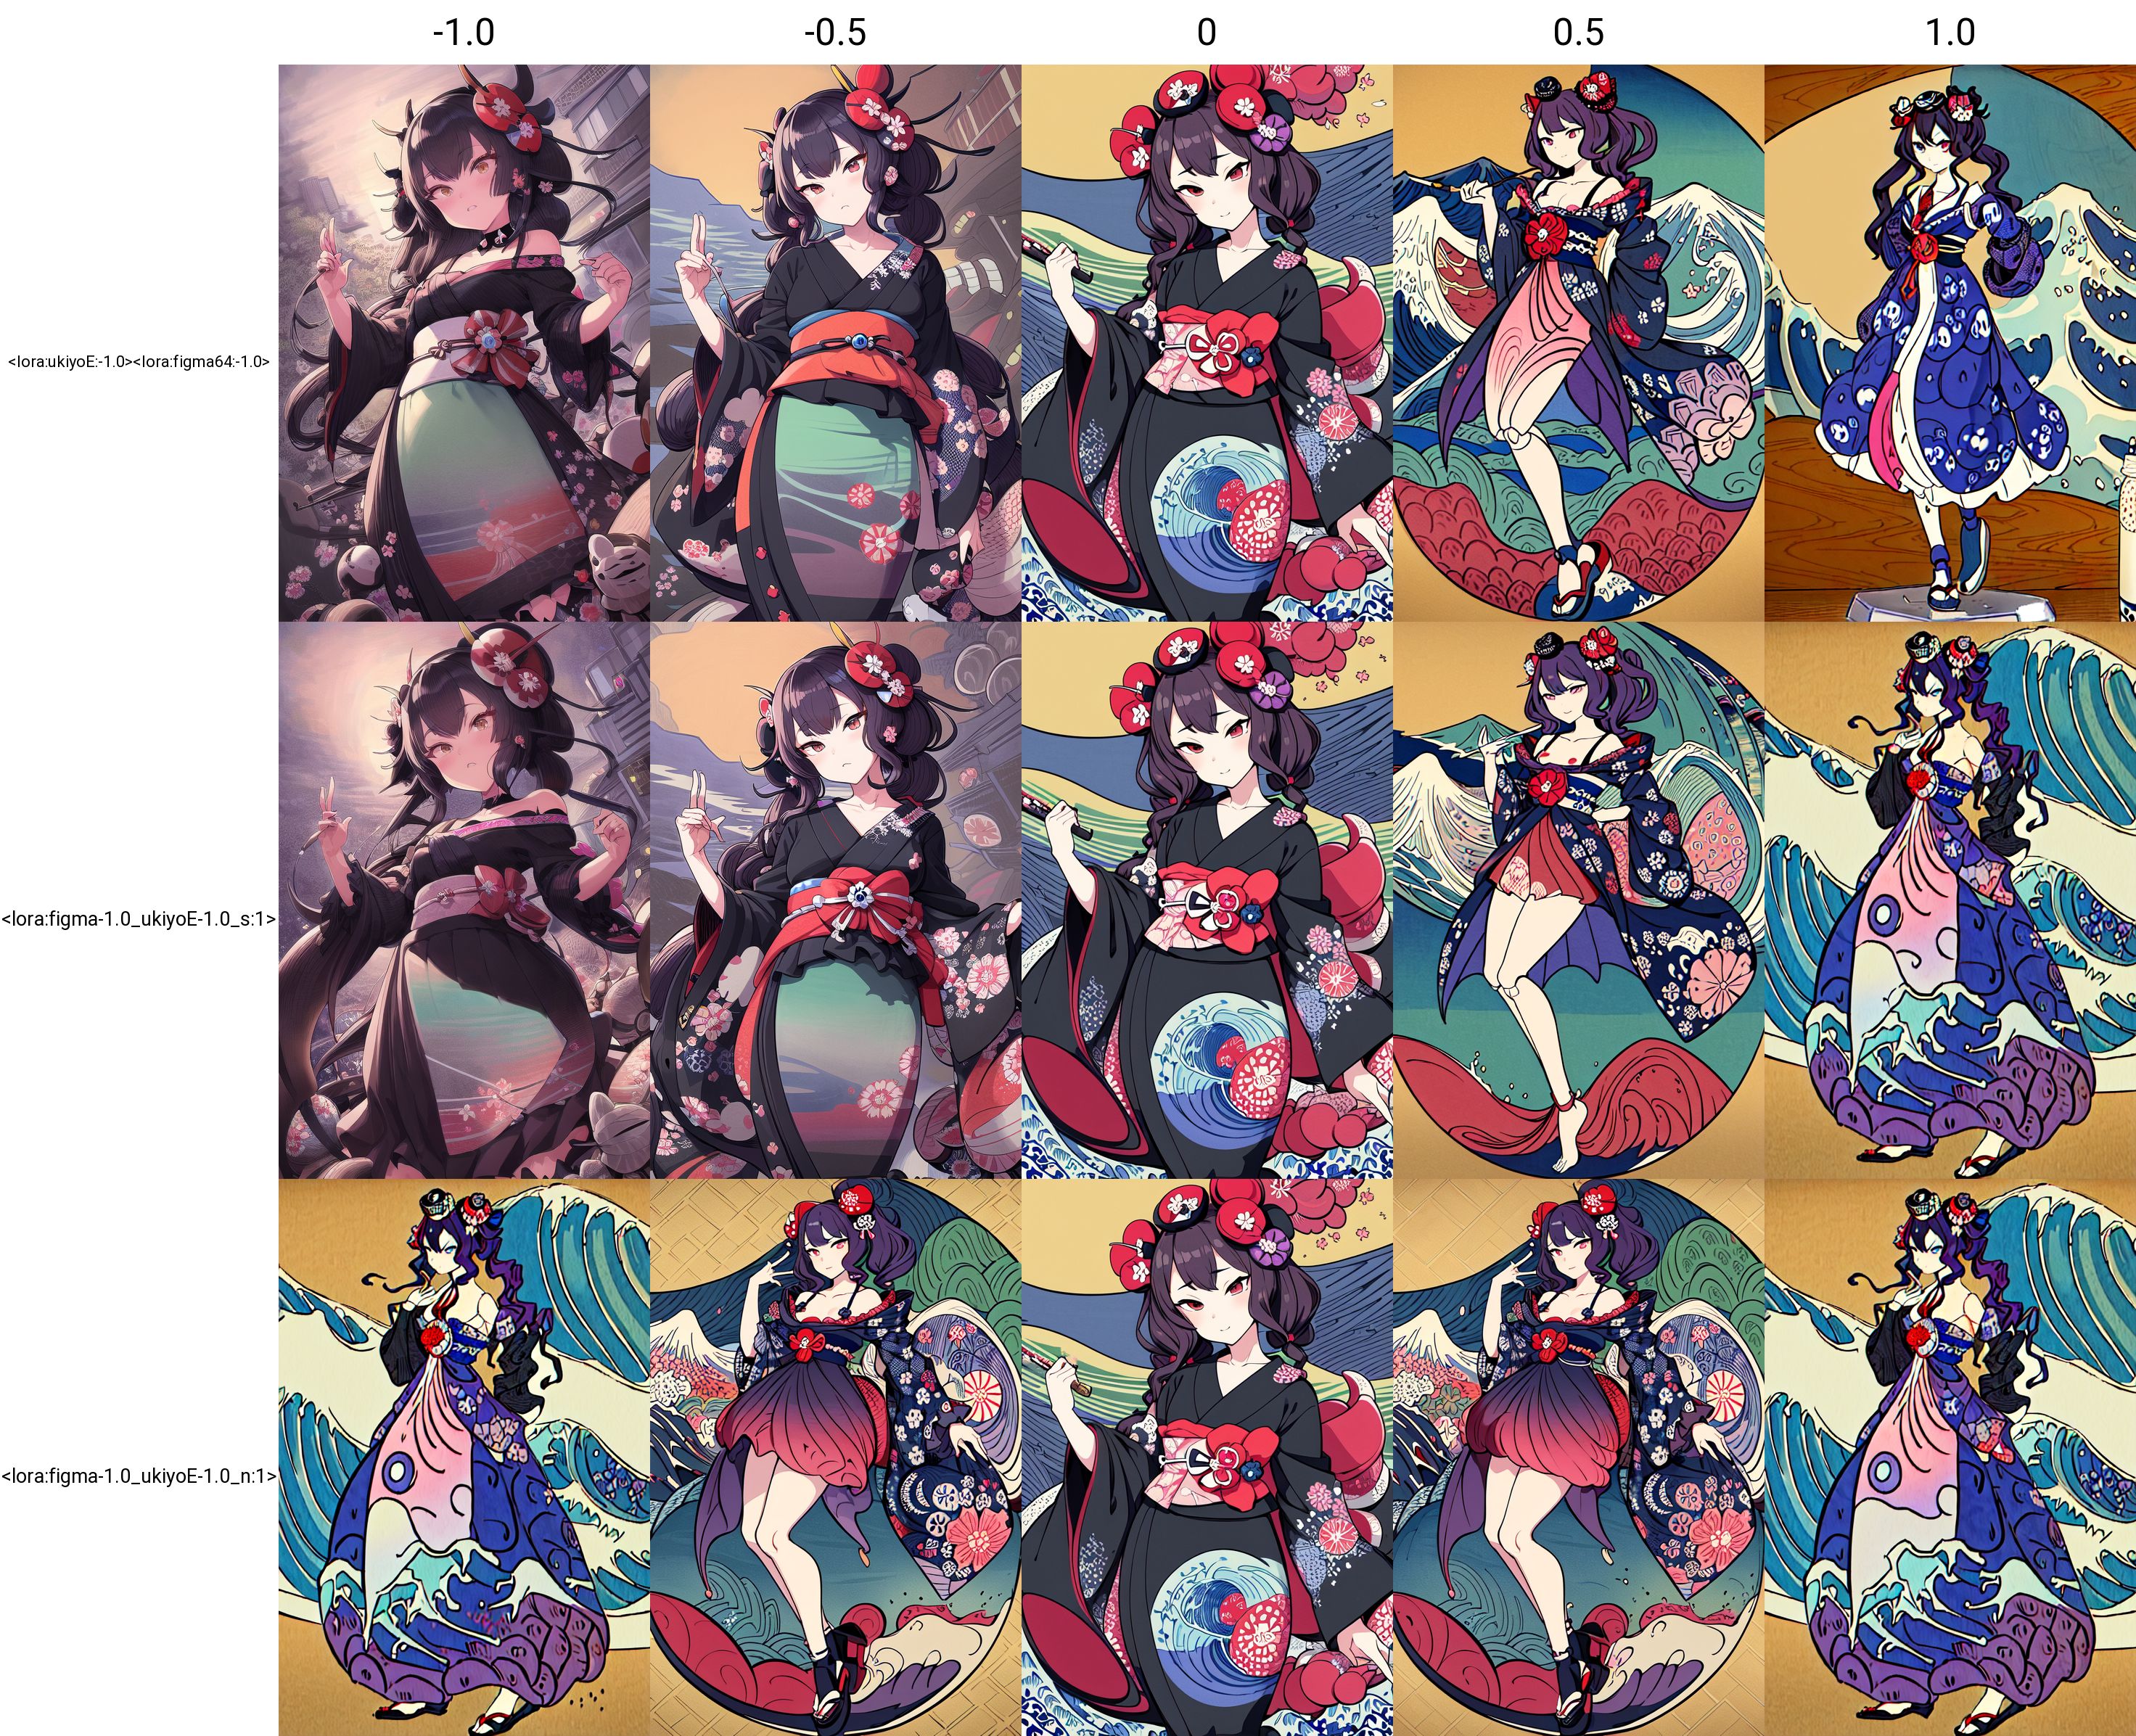
If the same to Strength option is not used, the result is the same as the merge in the script created by kohya-ss. In this case, the result is different from the case where LoRA is applied on Web-ui as shown in the figure below. The reason for this is related to the mathematical formula used to adopt LoRA into U-net. kohya-ss's script multiplies the ratio as it is, but the formula used to apply LoRA squares the ratio, so if the ratio is set to a number other than 1, or to a negative value, the result will differ from Strength (strength when applied). Using the SAME TO STRENGTH option, the square root of the ratio is driven at merge time, so that Strength and the ratio are calculated to have the same meaning at apply time. It is also calculated so that a negative value will have the same effect. If you are not doing additional learning, for example, you may be fine using the SAME TO STRENGTH option, but if you are doing additional learning on the merged LoRA, you may not want to use anyone else's option.
The following figures show the generated images for each case of normal image generation/same to Strength option/normal merge, using merged LoRAs of figmization and ukiyoE. You can see that in the case of normal merge, even in the negative direction, the image is squared and positive.

Analyze the differences between two models. Select the models you wish to compare, model A and model B.
The ASimilality mode compares tensors computed from qkv. Other modes calculates from the cosine similarity of each element. It seems that the calculated difference becomes smaller in modes other than ASimilality mode. Since the ASimilality mode gives a result that is closer to the difference in output images, you should generally use this one. This Asimilality analysis was created by extending the Asimilality script.
This is a method to calculate the ratio for each hierarchy in modes other than the ASimilality mode. Mean represents the average, min represents the minimum value, and attn2 outputs the value of attn2 as the calculation result of the block.
For block merges see
https://github.com/bbc-mc/sdweb-merge-block-weighted-gui
This script uses some scripts from web-ui, mbw-merge and kohya-ss
