🖼 Simple file-upload utility that shows a preview of the uploaded image. Written in TypeScript. No dependencies. Works well with or without a framework.
yarn add file-upload-with-previewOr, you can include it through the browser.
<link
  rel="stylesheet"
  type="text/css"
  href="https://unpkg.com/file-upload-with-preview/dist/file-upload-with-preview.min.css"
/>

<script src="https://unpkg.com/file-upload-with-preview/dist/file-upload-with-preview.iife.js"></script>This is a simple frontend utility meant to help the file-upload process on your website.
It is written in pure JavaScript and has no dependencies. You can check out the live demo here.
For the most part, browsers do a good job of handling image-uploads. That being said - I find the ability to show our users a preview of their upload can go a long way in increasing the confidence in their upload.
file-upload-with-preview aims to address the issue of showing a preview of a user's uploaded image in a simple to use package.
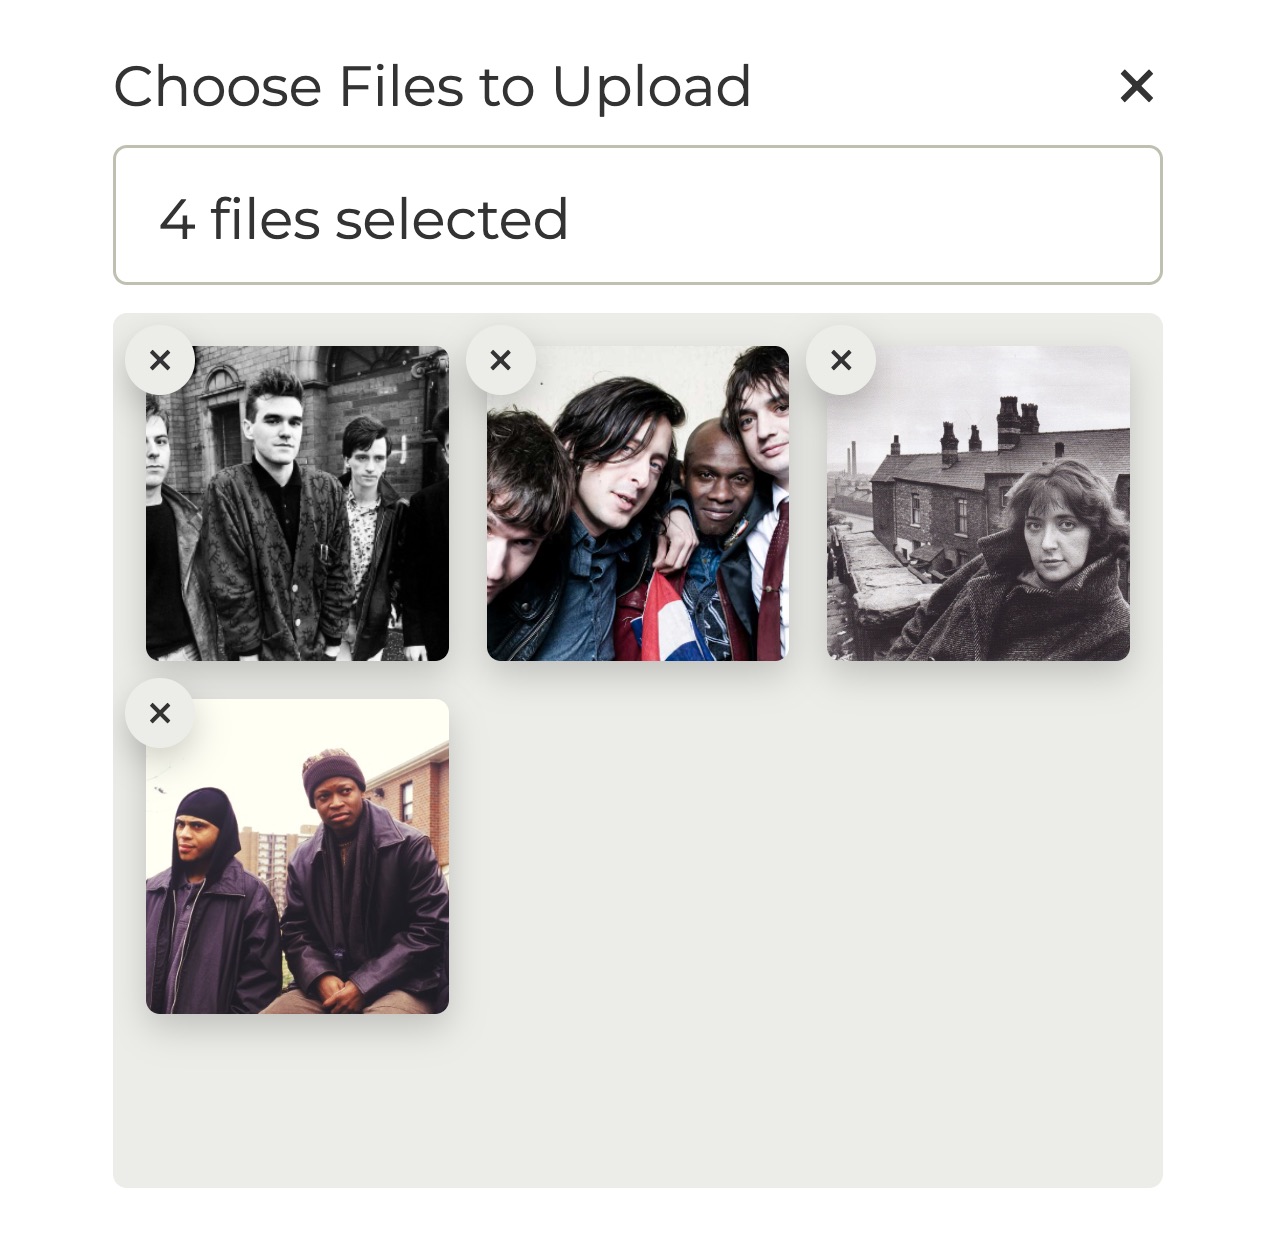
- Shows the actual image preview in the case of a single uploaded .jpg, .jpeg, .gif, or .png image. Shows a success-image in the case of an uploaded .pdf file, uploaded video, or other un-renderable file - so the user knows their image was collected successfully. In the case of multiple selected files, the user's selected images will be shown in a grid.
- Shows the image name in the input bar. Shows the count of selected images in the case of multiple selections within the same input.
- Allows the user to clear their upload and clear individual images in the
multiplegrid - Looks great
- Framework agnostic - to access the uploaded file/files just use the
cachedFileArray(always will be an array) property of yourFileUploadWithPreviewobject. - For every file-group you want just initialize another
FileUploadWithPreviewobject with its ownuniqueId- this way you can have multiple file-uploads on the same page. You also can just use a single input designated with amultipleproperty to allow multiple files on the same input.
This library looks for a specific HTML element to display the file-upload. Simply add the below div to your HTML. Make sure to populate your unique id in the data-upload-id attribute.
<div class="custom-file-container" data-upload-id="myFirstImage"></div>Then, initialize your file-upload in the JavaScript like below:
import { FileUploadWithPreview } from 'file-upload-with-preview';
import 'file-upload-with-preview/dist/file-upload-with-preview.min.css';

const upload = new FileUploadWithPreview('myFirstImage');
If you're importing directly in the browser, use the following instead:
<!DOCTYPE html>
<html>
  <head>
    <meta charset="UTF-8" />
    <link
      rel="stylesheet"
      type="text/css"
      href="https://unpkg.com/file-upload-with-preview/dist/file-upload-with-preview.min.css"
    />
  </head>
  <body>
    <div class="custom-file-container" data-upload-id="myFirstImage"></div>
    <script src="https://unpkg.com/file-upload-with-preview"></script>
  </body>
</html>
Then initialize like this:
const upload = new FileUploadWithPreview.FileUploadWithPreview('myFirstImage');Then when you're ready to use the user's file for an API call or whatever, just access the user's uploaded file/files in the cachedFileArray property of your initialized object like this:
upload.cachedFileArray;You can optionally trigger the image browser and clear selected images programmatically. There are additional methods on the class if you'd like to take a look at the source code.
upload.emulateInputSelection(); // to open image browser
upload.resetPreviewPanel(); // clear all selected images
You may also want to capture the event when an image is selected.
import { Events, ImageAddedEvent } from 'file-upload-with-preview';

window.addEventListener(Events.IMAGE_ADDED, (e: Event) => {
  const { detail } = e as unknown as ImageAddedEvent;

  console.log('detail', detail);
});The cachedFileArray property is always an array. So if you are only allowing the user to upload a single file, you can access that file at cachedFileArray[0] - otherwise just send the entire array to your backend to handle it normally.
Make sure to pass in multiple: true in your options if you want to allow the user to select multiple images.
View the full docs here.
See the full example in the ./example/index.ts folder. See the top of this README for some links to a few live CodeSandbox's.
If you are supporting a browser like IE11, one way to add a polyfill for fetch and promise is by adding the following in the bottom of your index.html:
<script src="https://cdn.jsdelivr.net/npm/es6-promise@4/dist/es6-promise.auto.js"></script>
<script src="https://cdnjs.cloudflare.com/ajax/libs/fetch/2.0.3/fetch.js"></script># Install dependencies
yarn
# Watch changes during local development
yarn dev
# Run tests
yarn test
# Build library
yarn buildGo ahead and fork the project! Submit an issue if needed. Have fun!


