LCDinit() - initializes the Display
LCDclear() - clears all lines on LCD
LCDgoto(char hexString[]) - goes to the character at the hexadecimal DDRAM address specified (no 0x)
LCDwriteMessage(char message[]) - writes the message to the LCD screen, takes a string max. 80 characters. Also tries to wrap the message automatically to the next line by detecting
the screen size.
LCDwriteRawMessage(char message[]) - writes the message to the display, but with no text wrapping/display detection.
LCDsendRawInstruction(int RS_PIN, int RW_PIN, char binary[]) - sends binary data directly to the screen. Takes the state of the Instruction/Data pin, Read/Write pin and the binary itself.
LCDwriteAscii(int characterCodeInDecimal) - Writes 1 character based off the character code.
LCDdisplayControl(int display, int cursor, int blink) - Controls the display.
Display: 0 - OFF, 1 - ON
Cursor: 0 - OFF, 1 - ON
(Cursor)Blink: 0 - OFF, 1 - ON
LCDcreateCharacter(int charnum, char line1[], char line2[], char line3[], char line4[], char line5[], char line6[], char line7[], char line8[])
LCDwcreateCharacter creates custom characters for you to use easily later on. The HD44780 supports up to 8 custom characters.
Please Note: After you have run this function, you must move the cursor using LCDgoto() before doing anything else (except if creating multiple custom characters in a row. you will only have to move the cursor after creating all characters).
There are two ways to accomplish this:
- Create all characters needed between
LCDinit()andLCDclear()asLCDclear()always resets the cursor to 0x00
- Move cursor manually between creating a custom character and displaying it.
int charnum = 1 - 8, defines which custom character is being written to
line1[] -> line8[] = The 8 lines of the custom character in binary.
Each custom character is 5x8, so each line*[] is the eight lines needed.
Example
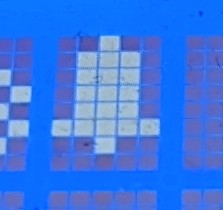
line1[] - (000)| 0 | 0 | 1 | 0 | 0 |
line2[] - (000)| 0 | 1 | 1 | 1 | 0 |
line3[] - (000)| 0 | 1 | 1 | 1 | 0 |
line4[] - (000)| 0 | 1 | 1 | 1 | 0 |
line5[] - (000)| 0 | 1 | 1 | 1 | 0 |
line6[] - (000)| 1 | 1 | 1 | 1 | 1 |
line7[] - (000)| 0 | 0 | 1 | 0 | 0 |
line8[] - (000)| 0 | 0 | 0 | 0 | 0 |
(0 - pixel is off, 1 - pixel is on)
Gives us this:
LCDcreateCharacter(2, "00000100", "00001110", "00001110", "00001110", "00001110", "00011111", "00000100", "00000000");
Which creates this:
LCDwriteCustomCharacter(int characterNum) - Writes the custom character specified. (1 - 8)
void LCDshiftDisplay(int rl) - Shift display based on rl (0 - left, 1 - right)
void LCDshiftCursor(int rl) - Shift cursor based on rl (0 - left, 1 - right)
If you would like to use the following, please also add #include presetChars.h to your main.c and presetChars.c to your add_executable() in CMakeLists.txt
LCDactivatePreChar(int characterNum, int preset) - Activates one of the pre-designed characters and writes it to a custom character slot.
Please Note: While these are displayed using LCDwriteCustomCharacter like all custom characters, these also require moving the cursor after activating them. See note in LCDwriteCustomCharacter for more details
characterNum = 1-8, the custom character slot
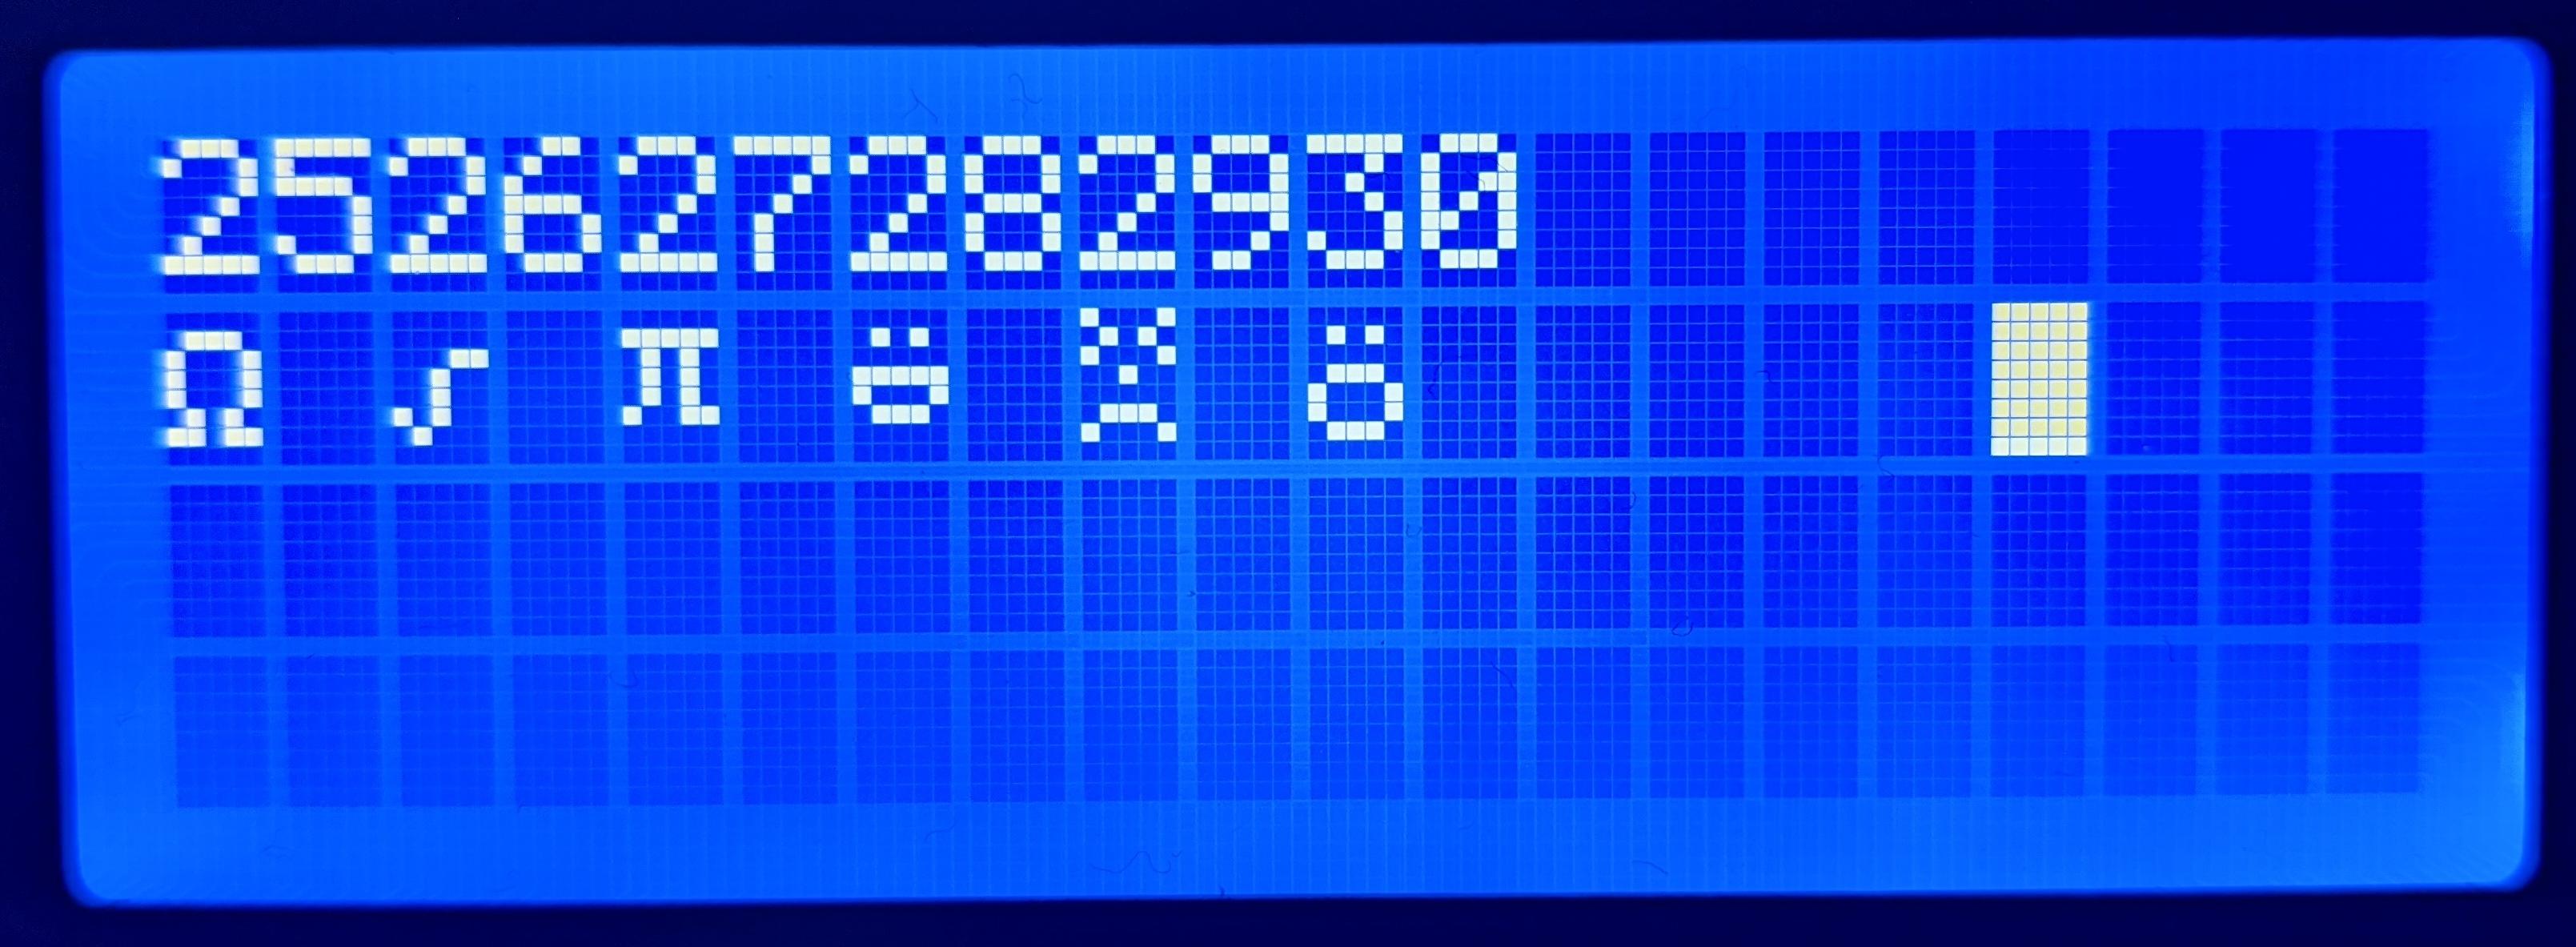
preset = The preset custom character you want to activate as shown below (1-30)
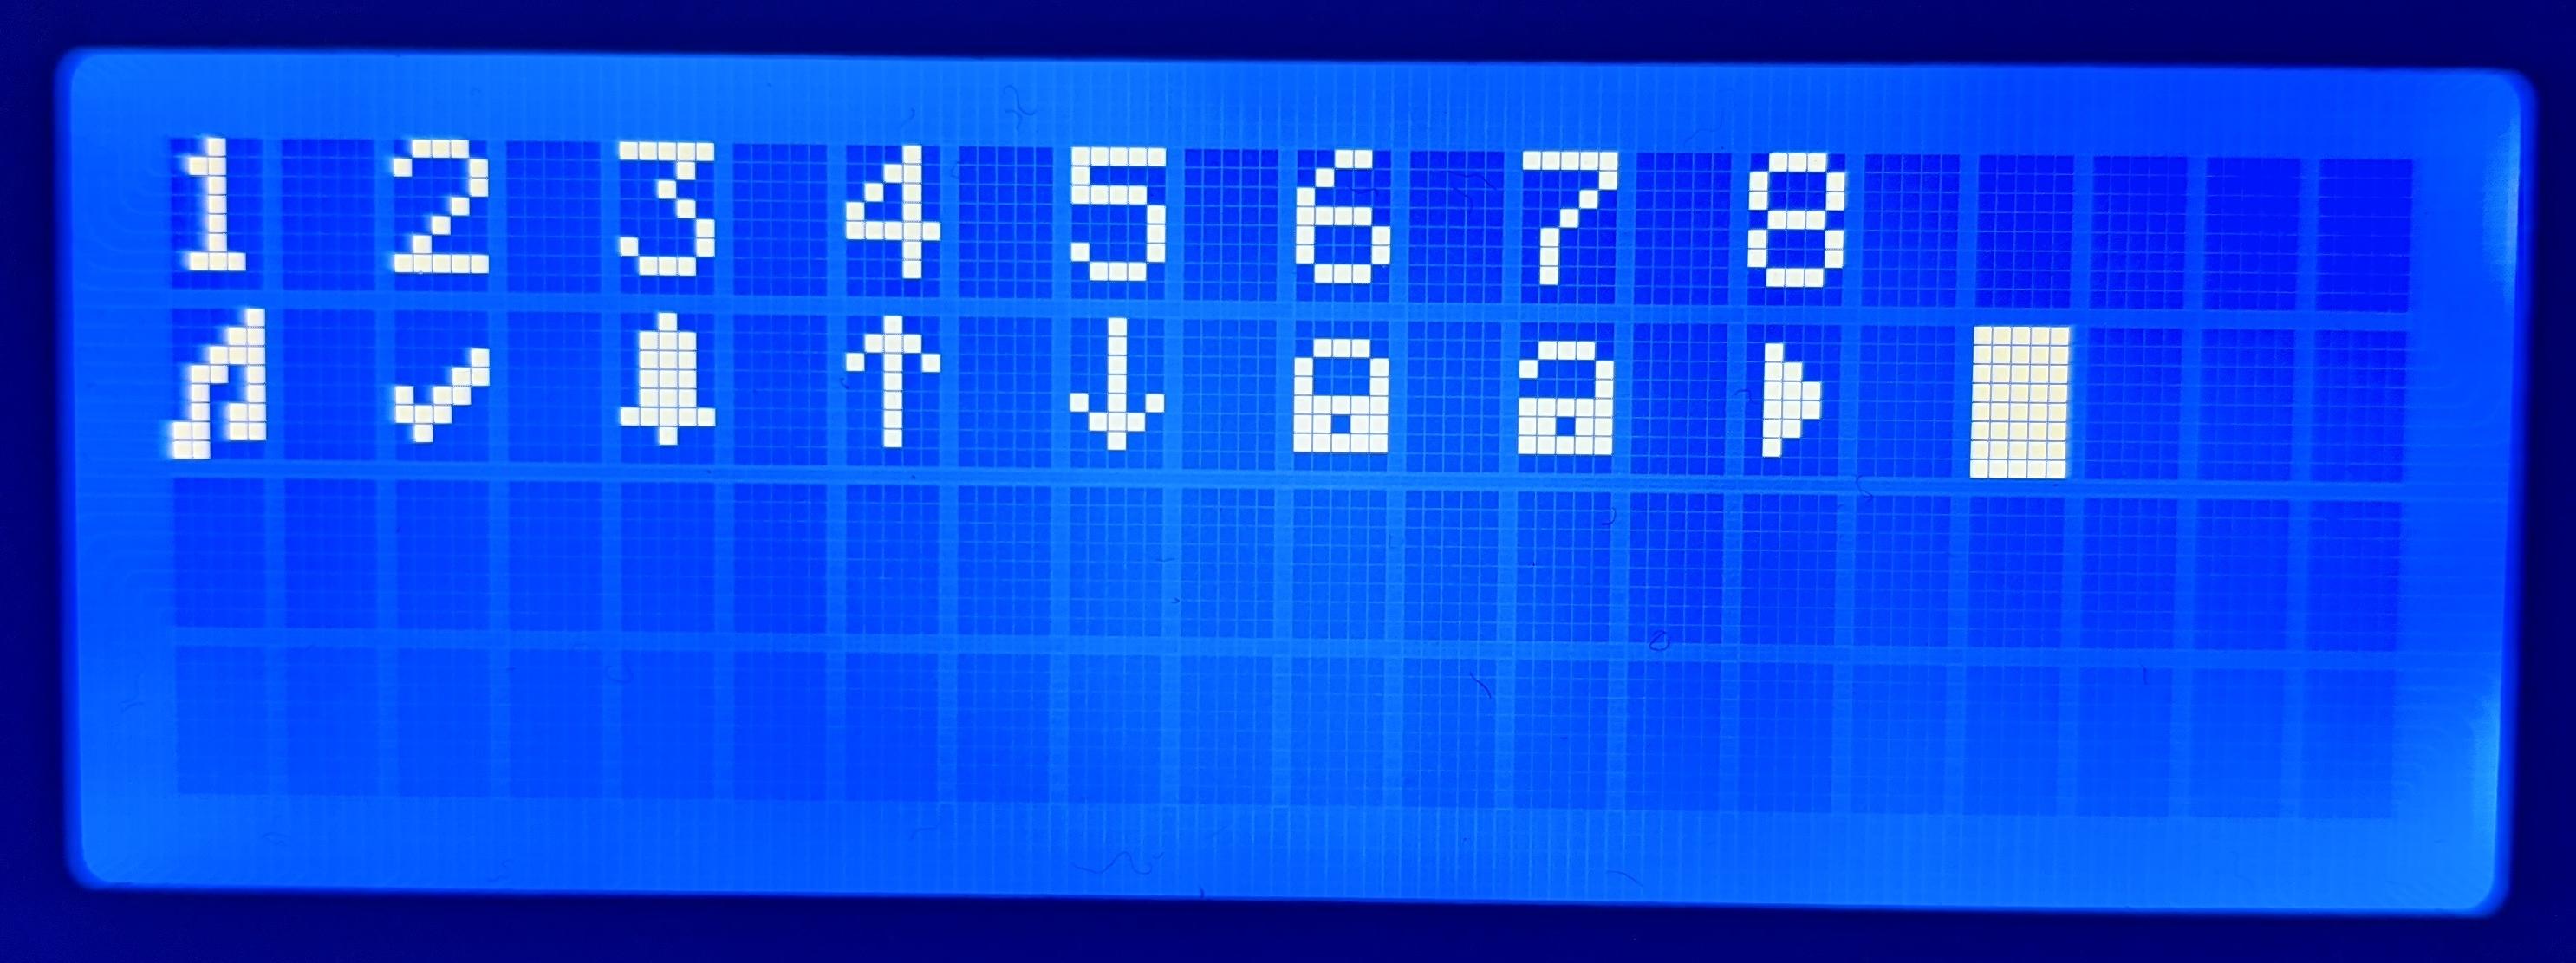
1 - Music
2 - Check
3 - Alarm bell
4 - Up
5 - Down
6 - Locked
7 - Unlocked
8 - Play
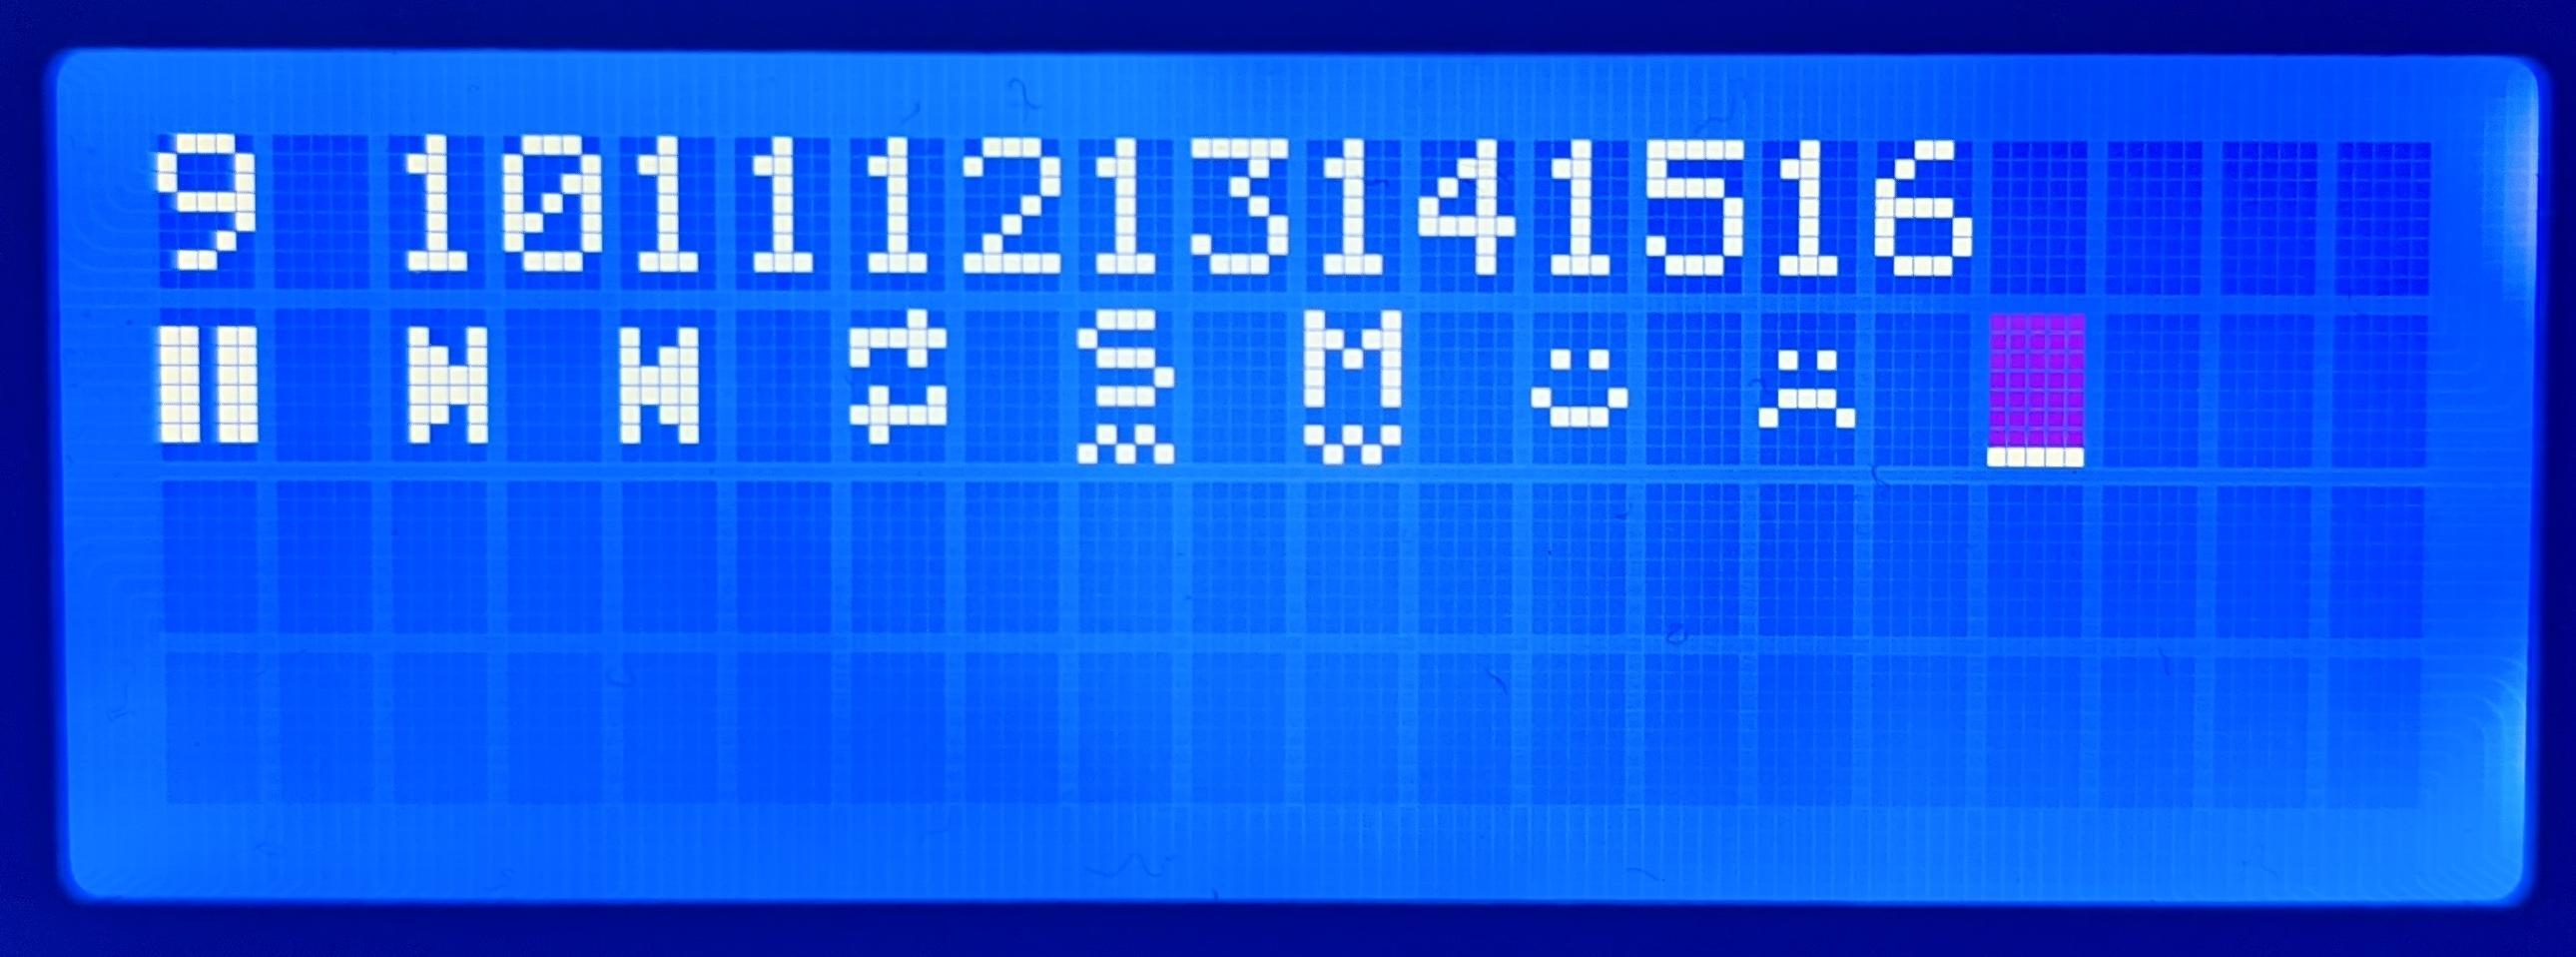
9 - Paused
10 - Next Song
11 - Previous Song
12 - Repeat On
13 - Shuffle On
14 - Mute On
15 - :)
16 - :(
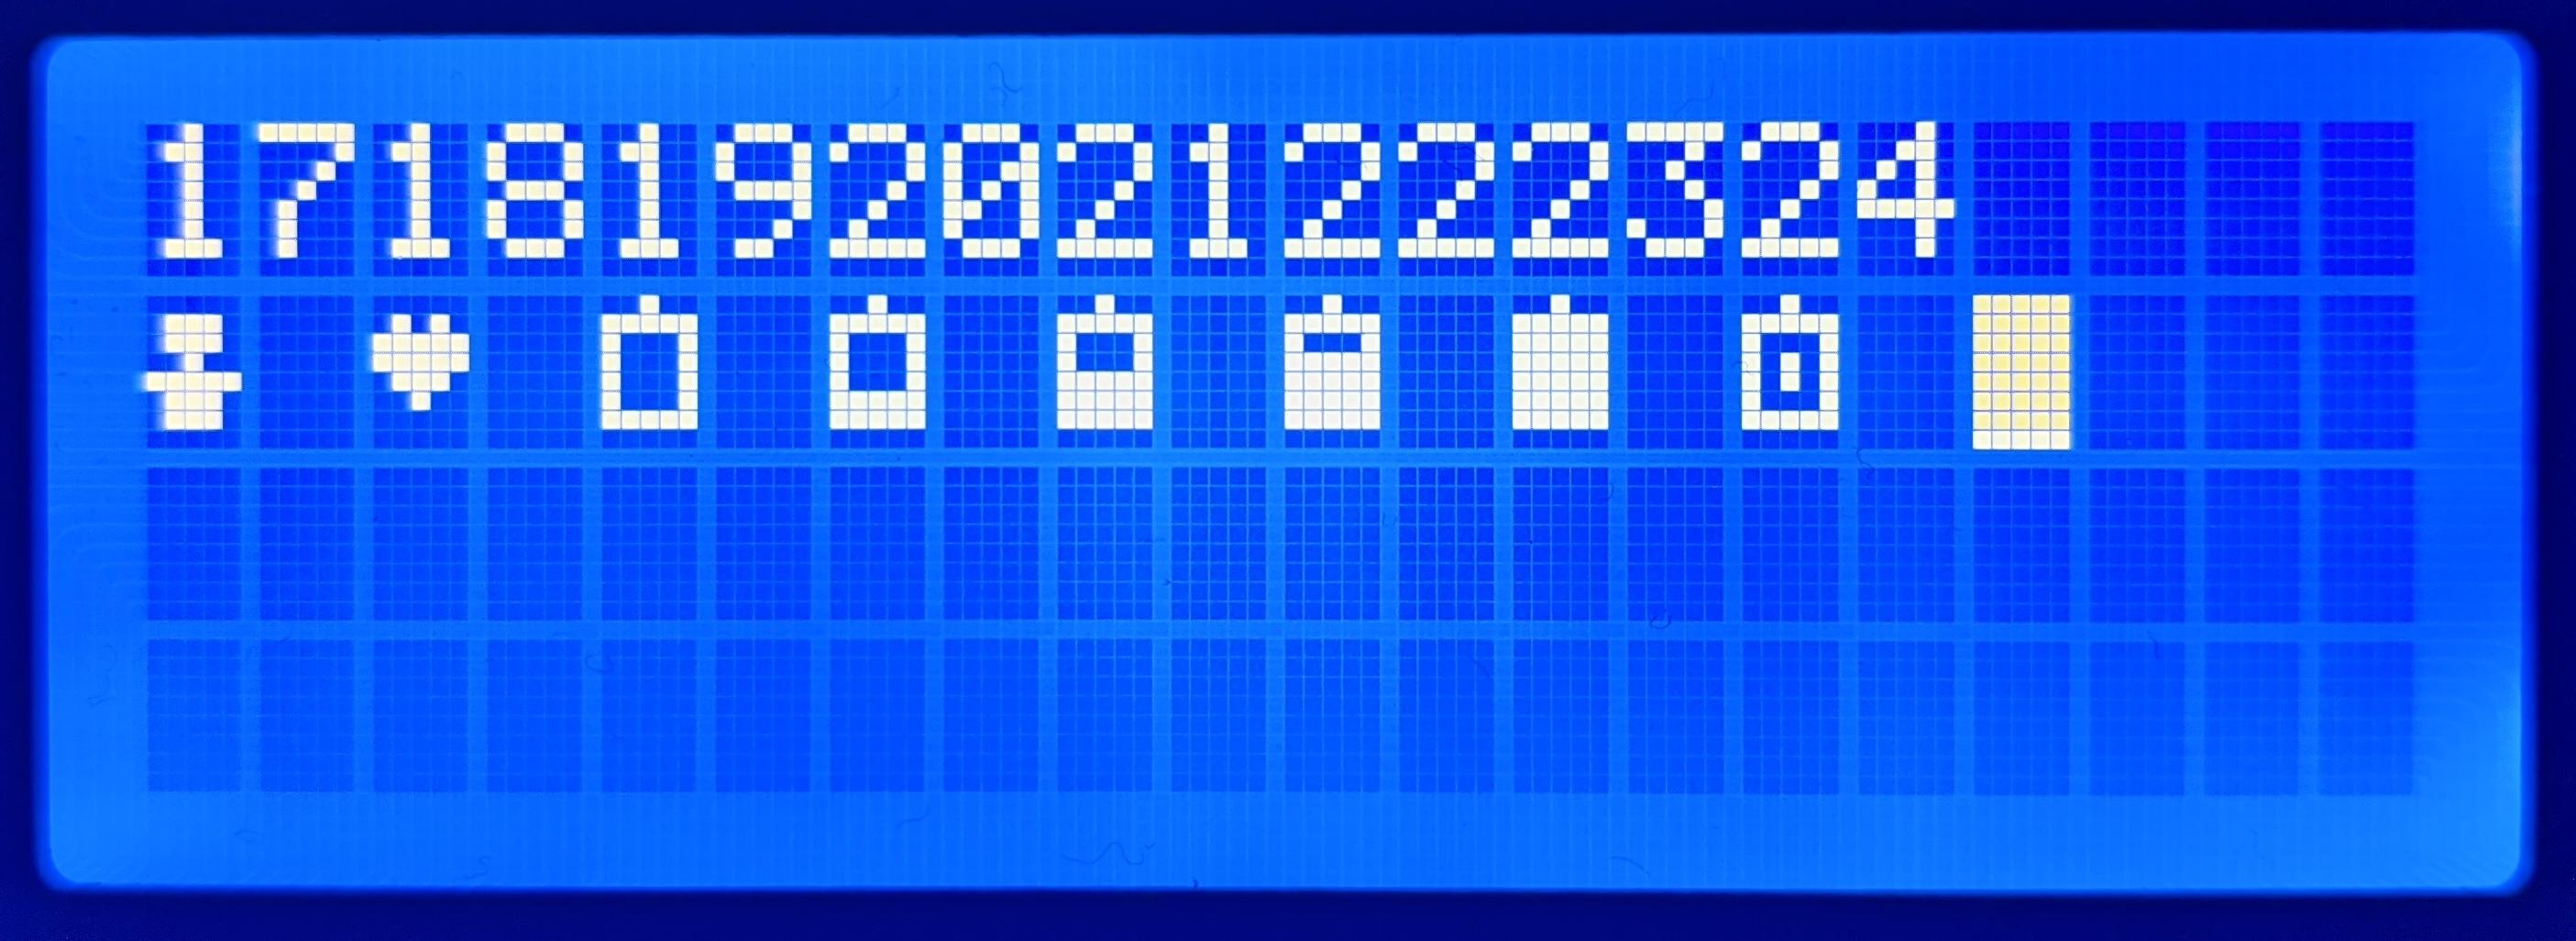
17 - Person
18 - Heart
19 - Battery_empty
20 - Battery_1
21 - Battery_2
22 - Battery_3
23 - Battery_full
24 - Battery_charging
25 - Ohm
26 - Square Root
27 - Pi
28 - :D
29 - >:(
30 - :O
If you would like to use the following, please also add #include presetMessages.h to your main.c and presetMessages.c to your add_executable() in CMakeLists.txt
LCDactivateImpMess() - Activates the "Important Message Recieved" preset. This automatically detects LCD screen size and outputs appropriate sized message. If an unsupported LCD is detected, defaults to 16x2.
LCDpreMessWrite(char mess[]) - Writes the actual message inside the last activated preset.
To calculate the amount of text you can write, you multiply the number of lines by line length (e.g for a 20x4 screen you can write up to 80 characters). If the message is long enough, the function auto wraps and auto switches to the second half of the message after 3 seconds of showing the first half.
The message should be one whole string passed to the function.


